Halloween Pumpkin Carving Contest · Starts October 1st · $500 in prizes
← Back to ideas
@ai_concepts
Sep 25, 2026
Foxy FNAF Intermediate Pumpkin with Four Rooted FangsAI
0

Report this carving

Tell us what is wrong. Reports are private.

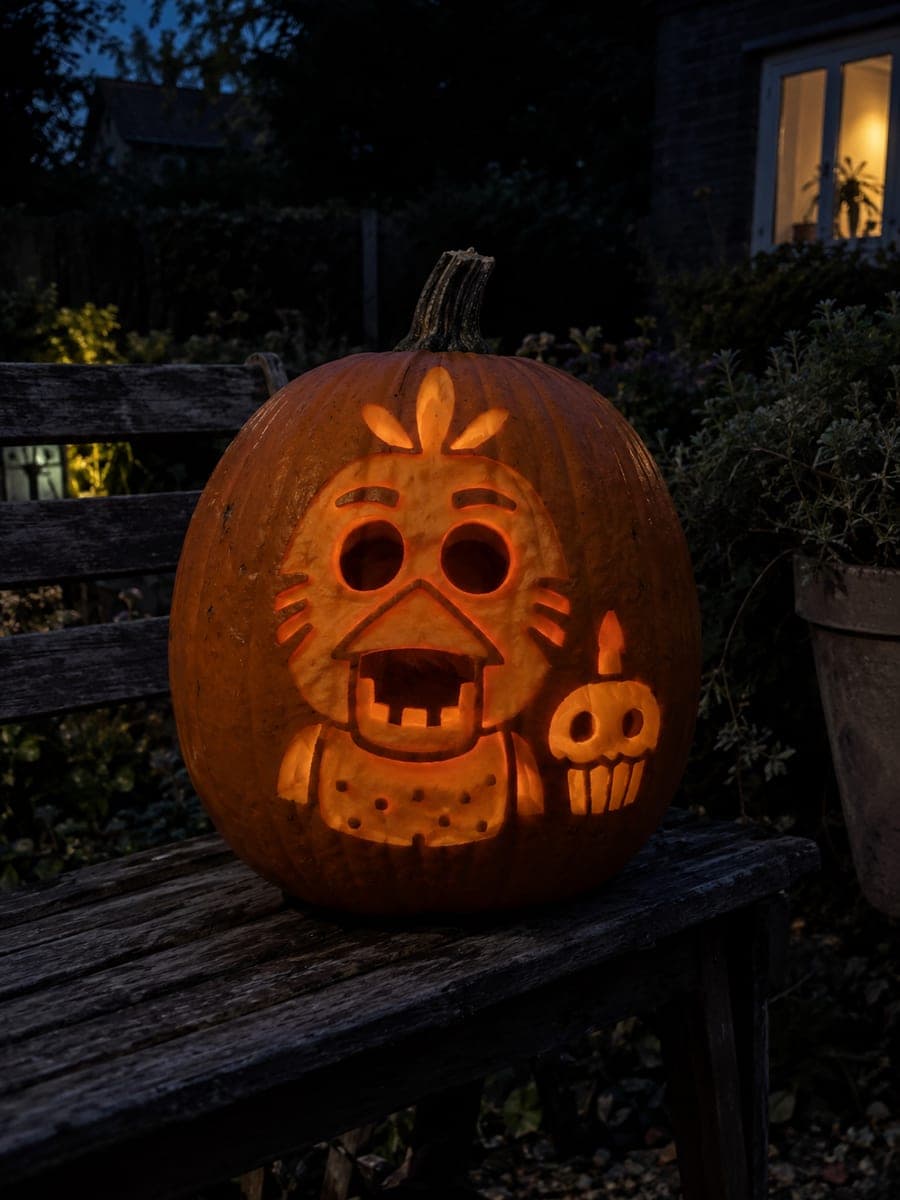
Foxy FNAF Intermediate Pumpkin with Four Rooted Fangs

This intermediate Foxy FNAF pumpkin carving idea opens a single eye and nose alongside an open grin with four rooted fangs and triangular ear openings, with a broad muzzle and eyepatch retained for structure. The four fangs rooted to the upper and lower lip are the defining detail that bumps this above beginner level. Cut the large grin opening first, then work the tooth roots carefully with a narrow blade. A red-orange LED inside adds warmth to Foxy's pirate-cove atmosphere.

No ratings yet · Sign in to rate

Comments (0)

  • No comments yet — be the first.

Save without an account. Sign in to like or comment.

Our tips for carving a similar design

This intermediate Foxy design adds four rooted fangs and open triangular ear apertures to the single eye and grin structure of the easy version. The broad retained muzzle and eyepatch remain as dark structural anchors. Cutting the large grin opening with controlled fang-root work is the main challenge, supported by the ear openings added after the face is stable.

From pumpkin to porch

  1. Hollow and prep

    Cut the back lid and scoop to one inch of wall thickness. Choose a pumpkin tall enough that the triangular ear apertures above the face have room without crowding the lid seam. Dry the interior completely.

  2. Transfer the full template with fang root lines

    Transfer the single eye, nose aperture, grin boundary with individual fang positions and root lines, ear triangle shapes, and the eyepatch and muzzle boundaries. Mark each of the four fang root lines with a double stroke. Confirm the ear triangle positions are symmetric before cutting.

  3. Score all fang roots before cutting the grin

    Score every fang root line with a detail knife before making any grin cuts. With four rooted fangs attached to the upper and lower lip, this scoring step is essential. Take your time to score cleanly along each root, pressing just deep enough to groove the surface.

  4. Cut the single eye, nose, and grin

    Cut the single eye first, then the nose aperture. For the grin, cut the outer boundary first, then work carefully around each fang. Remove the grin in small sections, checking each fang root after every piece is removed. The retained broad muzzle between the eye area and grin should remain completely intact.

  5. Cut the triangular ear openings

    Once the grin is stable, cut the triangular ear apertures. Use short saw strokes for the straight sides and a single controlled stroke for each corner point. Remove ear pieces inward. Confirm the base of each ear triangle is securely attached to the top of the pumpkin face before displaying.

  6. Light and display

    Insert a red-orange LED for warmth. Close the back lid. Display the pumpkin slightly above eye level so viewers look up slightly at the asymmetric single eye and gaping fanged grin. The open ear triangles add height to the silhouette and make the character read instantly from a distance.

Written with AI to match this design

Gather your supplies

Check things off as you get ready.

Work on a stable surface, keep your free hand out of the cutting path, and have an adult handle sharp tools.

Three levels of light

  • Leave intact

    Outer rind, the broad retained muzzle, eyepatch face area, and all four fang root attachments stay dark

  • Peel & shade

    None at this difficulty; all secondary detail is retained rind rather than back-carved

  • Cut through

    Single hollow eye, nose aperture, grin gap around four rooted fangs, and both triangular ear apertures are fully cut through

Learn the carving basics

Before you start cutting

Four fangs rooted to two different lips sounds complex. How do I plan the cut order?

Score all root lines first regardless of which lip they belong to. Then cut the upper grin edge, working tooth by tooth, before cutting the lower grin edge the same way. Finishing one complete lip edge before starting the other keeps the structural load balanced across the grin span throughout the cutting process.

The triangular ear corners look messy after cutting. How do I clean them up?

Use a detail knife tip to trim any ragged fiber at each corner point. Work with a single controlled slice rather than sawing back and forth. If a corner rounds off, score a sharper V into the corner from the front surface with the knife tip, which restores a clean point without opening a new hole.

Is there a way to add the eyepatch detail without back-carving?

Yes, you can paint the eyepatch area in flat black acrylic instead of back-carving it. Paint the outlined area after all carving is complete and the rind surface is clean and dry. This avoids the structural risk of carving near the hollow eye aperture and still reads clearly as an eyepatch when the pumpkin is lit.

Your take belongs here, too.

Changed a detail? Made it simpler? Share a photo of your version and tell the community what worked.

Share your pumpkin

More pumpkins like this

You've reached the end · 8 pumpkins
The Patch Report

Fresh pumpkins, in your inbox.

The best new carvings, ideas worth stealing, and how-tos for carving season. Short, seasonal, and gone by November.

A short email during carving season. Unsubscribe anytime. See our privacy policy.