Halloween Pumpkin Carving Contest · Starts October 1st · $500 in prizes
← Back to ideas
@ai_concepts
Sep 25, 2026
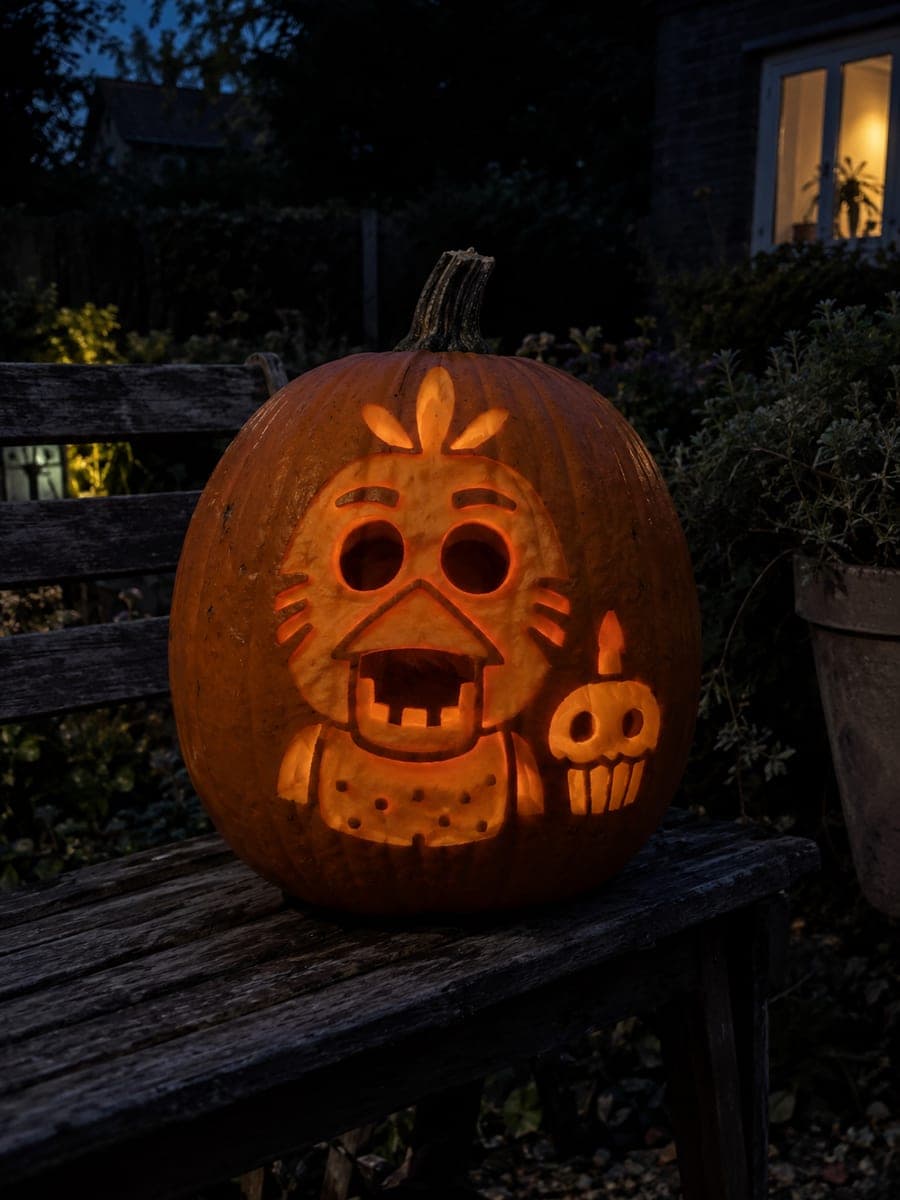
Hard Chica FNAF Pumpkin with Feather and Bib DetailAI
0

Report this carving

Tell us what is wrong. Reports are private.

Hard Chica FNAF Pumpkin with Feather and Bib Detail

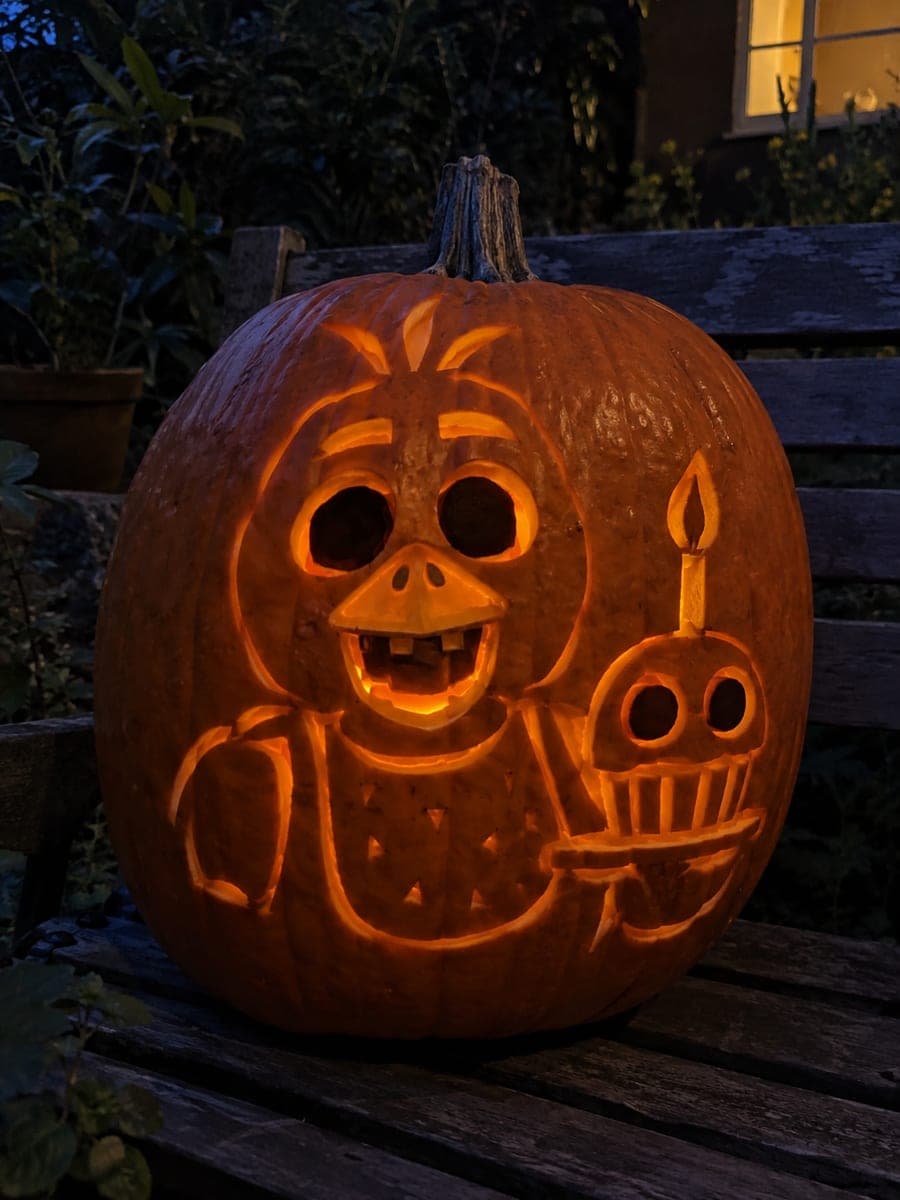
At the hard level, this Chica FNAF pumpkin carving retains the empty circular eyes and beak grin with rooted lower teeth, and adds shallow-backed feather, tuft, and bib details in isolated recesses. The isolated recesswork is the technical challenge here, requiring careful depth control to avoid cutting through. Work the main openings first, then score each feather channel separately. A warm flickering LED completes the Five Nights at Freddy's pumpkin carving idea with appropriately erratic stage-show lighting.

No ratings yet · Sign in to rate

Comments (0)

  • No comments yet — be the first.

Save without an account. Sign in to like or comment.

Our tips for carving a similar design

Circular hollow eyes and a beak grin with rooted lower teeth provide the structural core, while isolated recesswork for feather channels, tuft, and bib detail is the technical challenge that defines this hard design. Isolated recesses require careful depth control to avoid breaking through. Completing all main apertures first and adding recesswork last is the safest sequence.

From pumpkin to porch

  1. Hollow and inspect the wall thickness

    Cut the back lid and scoop to one inch of wall thickness throughout. Hold a flashlight against the outer rind in the feather areas before carving to confirm the wall is at least one inch deep there. Isolated recesses in thin spots will break through. Mark any areas thinner than three-quarters of an inch so you can adjust depth accordingly.

  2. Transfer the full template with feather channel positions

    Trace the circular eye outlines, beak boundary with rooted lower tooth lines, tuft outline, bib shape, and each individual feather channel position. Feather channels are typically short curved lines radiating outward from the neck area. Number them on the template if there are many so you can work them in order.

  3. Cut the main apertures

    Cut both circular eyes, then the beak opening with lower rooted teeth using the same scoring-first technique as earlier difficulty levels. Confirm all tooth roots are solid before moving to the secondary detail work. The main apertures should be fully stable before any recesswork begins.

  4. Carve the isolated feather channel recesses

    Use a narrow V-tool or a detail knife to carve each feather channel as an isolated recess, not a continuous groove. Carve in one deliberate stroke per channel from base to tip. Stop each channel before it meets adjacent rind areas so each feather reads as a separate element. Work from the center of the chest area outward.

  5. Back-carve the tuft and bib

    After the feather channels are done, back-carve the tuft at the crown and the bib area to about half wall depth with a flat gouge. The bib glow together with the individual feather channel points creates a layered texture effect that is the visual payoff of the extra recesswork.

  6. Light and display

    Use a warm flickering LED to make the isolated feather recesses shift with the light variation, which gives the texture a sense of movement. Display at eye level so viewers can see the individual feather channels clearly. The finished design rewards close inspection more than the earlier difficulty versions.

Written with AI to match this design

Gather your supplies

Check things off as you get ready.

Work on a stable surface, keep your free hand out of the cutting path, and have an adult handle sharp tools.

Three levels of light

  • Leave intact

    Outer rind, the broad upper beak edge, and tooth root attachments stay dark

  • Peel & shade

    Bib and tuft are back-carved to half depth for a soft mid glow; feather channels are isolated shallow recesses for subtle point lighting

  • Cut through

    Circular eye holes and the beak grin gap around rooted lower teeth are fully cut through

Learn the carving basics

Before you start cutting

How do I prevent the isolated feather recesses from linking up and becoming a continuous cut?

Leave at least a quarter inch of uncarved rind between every adjacent feather channel. Sketch the channel spacing on the template and confirm the gap distances before carving. If two channels accidentally meet, fill the joint with a small amount of toothpick pressed into the gap and sealed with craft glue.

The V-tool keeps catching and tearing the rind rather than cutting cleanly. What am I doing wrong?

A dull V-tool tears rather than cuts. Sharpen or replace the tool before continuing. Also try carving with the grain of the rind surface rather than against it, and use a single confident stroke rather than short sawing motions. Damp rind cuts more smoothly than very dry rind, so working within a day or two of buying the pumpkin helps.

The feather channels are not very visible when the pumpkin is lit. How do I make them more prominent?

Deepen each channel slightly by making a second careful pass with the V-tool. The deeper the channel relative to the surrounding rind, the more light it transmits relative to the adjacent uncarved surface. A flashlight check after each additional pass helps you judge when the contrast is strong enough.

Your take belongs here, too.

Changed a detail? Made it simpler? Share a photo of your version and tell the community what worked.

Share your pumpkin

More pumpkins like this

You've reached the end · 8 pumpkins
The Patch Report

Fresh pumpkins, in your inbox.

The best new carvings, ideas worth stealing, and how-tos for carving season. Short, seasonal, and gone by November.

A short email during carving season. Unsubscribe anytime. See our privacy policy.