Halloween Pumpkin Carving Contest · Starts October 1st · $500 in prizes
← Back to ideas
@ai_concepts
Sep 25, 2026
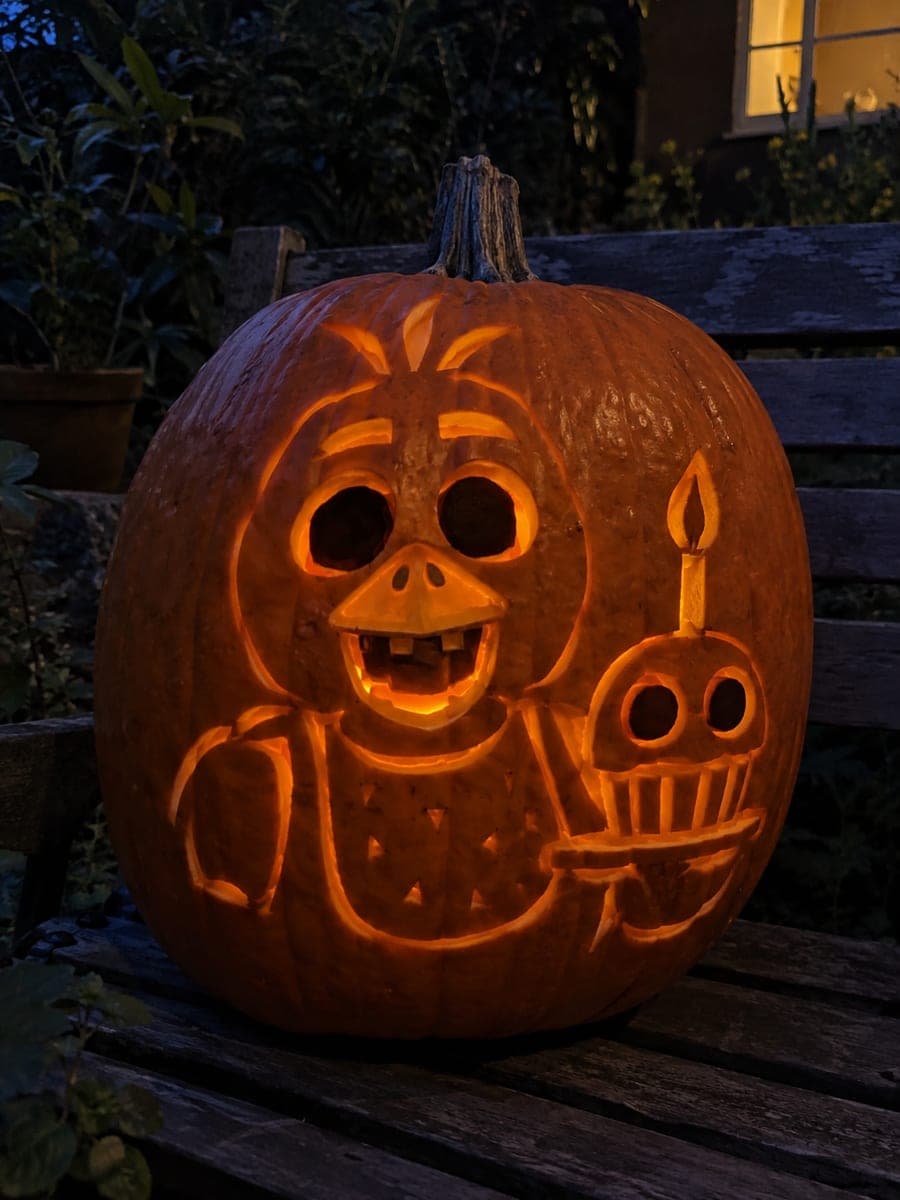
Painted Chica FNAF No-Carve Yellow Chicken PumpkinAI
0

Report this carving

Tell us what is wrong. Reports are private.

Painted Chica FNAF No-Carve Yellow Chicken Pumpkin

This no-carve Chica FNAF pumpkin uses flat acrylic in yellow, orange, white, and magenta on an intact rind to recreate the animatronic chicken without any carving. Paint the yellow head shape first, then block in the orange beak and the white eye circles before adding magenta irises and the spotted white bib. Keep the beak broad and flat to capture Chica's cartoonish proportions. Seal with matte varnish to finish the Halloween pumpkin decoration.

No ratings yet · Sign in to rate

Comments (0)

  • No comments yet — be the first.

Save without an account. Sign in to like or comment.

Our tips for carving a similar design

Flat acrylic in yellow, orange, white, and magenta on an intact rind recreates Chica's cheerful animatronic face without any cutting. Blocking in the yellow head first and working through the beak, eyes, and bib in separate dry layers keeps every color clean. A matte sealer at the end protects the design through a full outdoor display season.

From pumpkin to porch

  1. Clean and dry the pumpkin

    Wipe the rind with a lightly damp cloth and allow it to air dry fully. Smooth-skinned pumpkins give the cleanest edges on the circular eye shapes. Avoid any soap residue, which can prevent acrylic adhesion.

  2. Sketch the Chica face layout

    Use a soft pencil to lightly map the yellow head boundary, orange beak position, white eye circle positions, and bib outline below the beak. Chica's beak is broad and flat, so keep it wide in the sketch. Hold the pumpkin at arm's length to check proportions before painting.

  3. Paint the yellow base coat

    Fill the entire head and neck area with flat yellow acrylic in two thin coats, letting each dry to the touch before the next. Leave a narrow strip of natural orange rind around the outer head edge. Yellow over orange requires at least two coats for coverage; a thin white primer coat first can help if the orange bleeds through.

  4. Block in the orange beak

    Paint the beak area in flat orange over the dry yellow base. The orange beak over yellow base will need two coats for clean coverage since the colors are close in value. Keep the beak edges clean by following your pencil sketch. The beak should be broad and flat rather than narrow and pointed.

  5. Paint the eyes, irises, and bib

    Apply white circles for the eyes in two coats over the dry yellow base. Once the white is dry, add magenta iris circles in each eye. Paint the spotted white bib below the beak area using a flat brush, then add small magenta or dark spots to the bib with a fine detail brush. Let each element dry before adding the next.

  6. Seal and display

    Apply a light matte acrylic sealer spray from twelve inches once all paint is completely dry. Cure for two hours before outdoor display. The bold yellow and orange palette means this pumpkin reads well even in daylight without any interior lighting.

Written with AI to match this design

Gather your supplies

Check things off as you get ready.

Work on a stable surface, keep your free hand out of the cutting path, and have an adult handle sharp tools.

Three levels of light

  • Leave intact

    The full rind is intact; natural orange shows at the outer silhouette edge as a natural border

  • Peel & shade

    None, this design leaves the shell intact

  • Cut through

    None, a front-facing porch light or outdoor spotlight illuminates the painted surface

Learn the carving basics

Before you start cutting

Yellow paint looks weak over the orange pumpkin rind. How do I fix the coverage?

Apply a thin white primer coat over the head area first and let it dry before adding yellow. White beneath yellow dramatically improves the color intensity by giving the yellow pigment a neutral base. Without the white layer, you typically need four or more coats of yellow to fully mask an orange base.

The bib spots look messy when I try to paint them freehand. Any technique tips?

Use the blunt end of a pencil or a round eraser dipped in paint to stamp evenly sized spots rather than painting each one individually. Stamp all spots at once, let them dry, then sharpen any ragged edges with the bib background color and a fine brush. Stamping produces more uniform spots than freehand dotting.

Can I use fabric paint instead of acrylic for a more matte, chalky texture?

Fabric paint works on pumpkin rinds and dries to a matte finish without needing a sealer coat. It adheres well and is typically forgiving to work with. Coverage over orange rind is similar to acrylic, so the same white primer coat approach applies. The tradeoff is that fabric paint may not be as weather-resistant as sealed acrylic.

Your take belongs here, too.

Changed a detail? Made it simpler? Share a photo of your version and tell the community what worked.

Share your pumpkin

More pumpkins like this

You've reached the end · 8 pumpkins
The Patch Report

Fresh pumpkins, in your inbox.

The best new carvings, ideas worth stealing, and how-tos for carving season. Short, seasonal, and gone by November.

A short email during carving season. Unsubscribe anytime. See our privacy policy.