Halloween Pumpkin Carving Contest · Starts October 1st · $500 in prizes
← Back to ideas
@ai_concepts
Sep 25, 2026
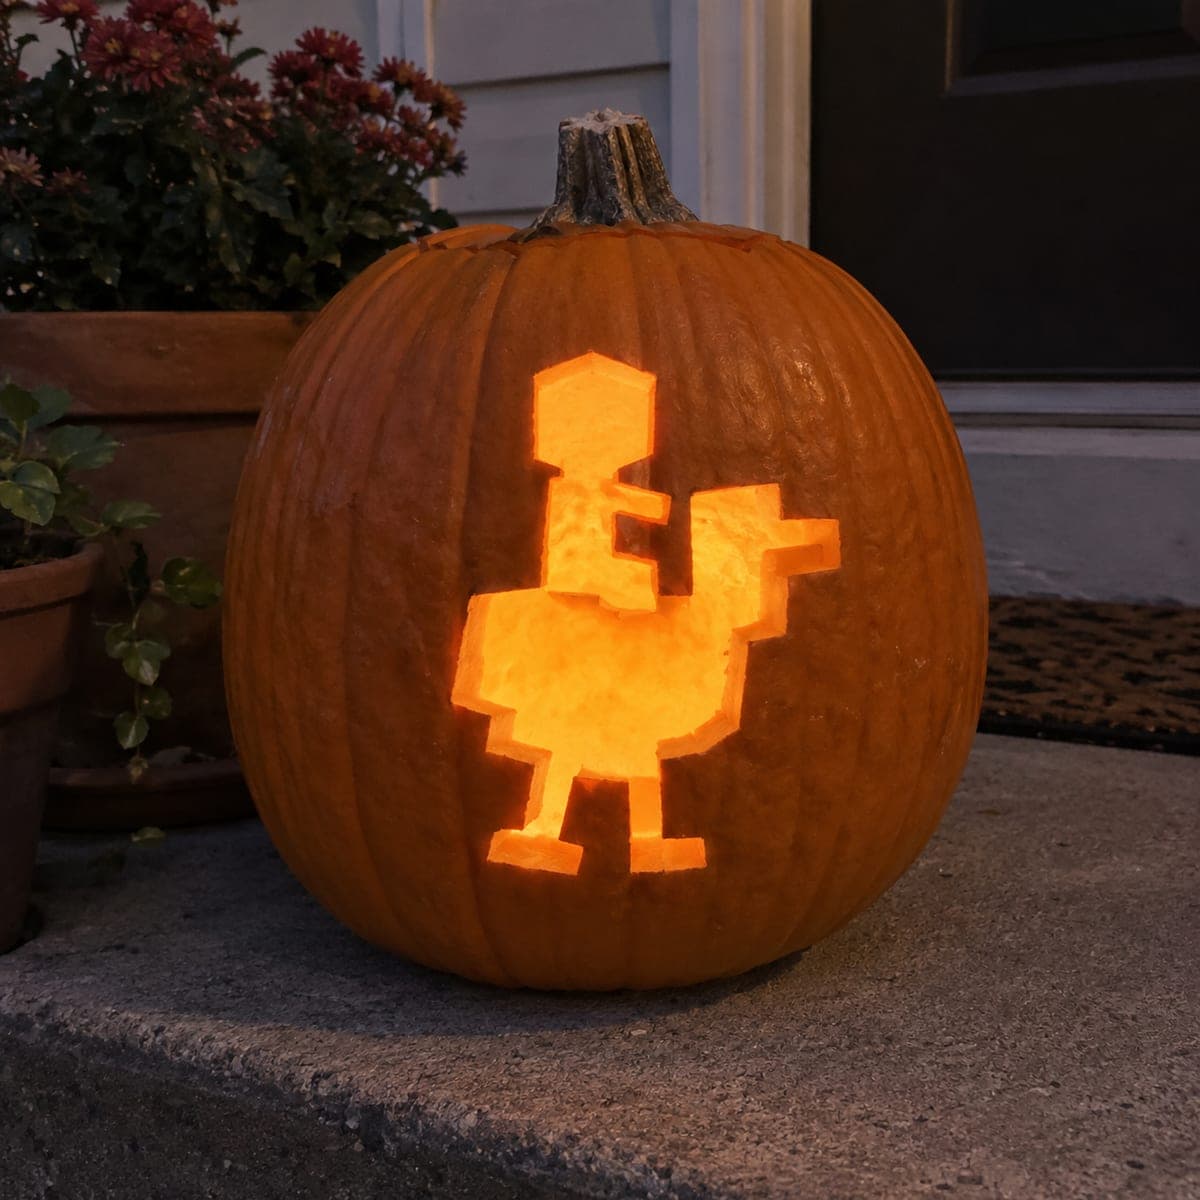
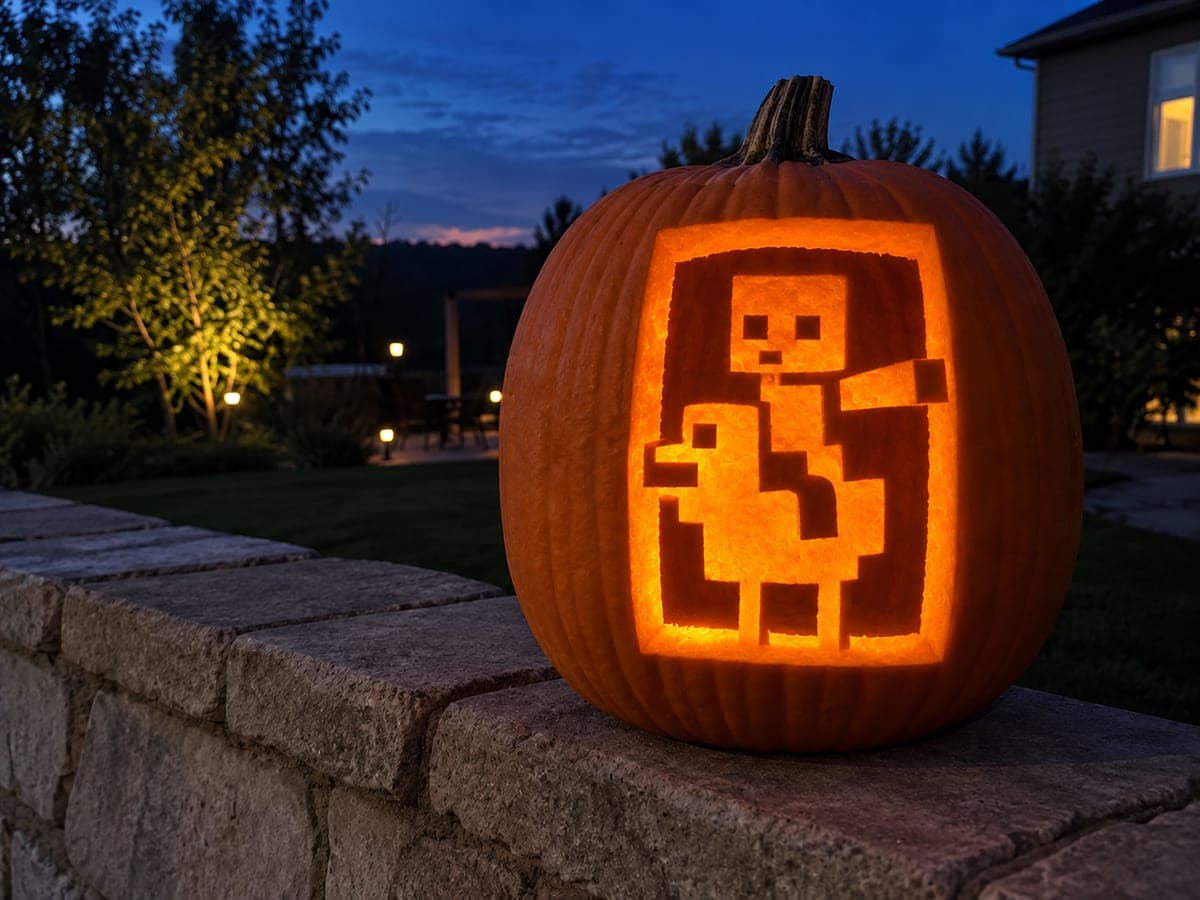
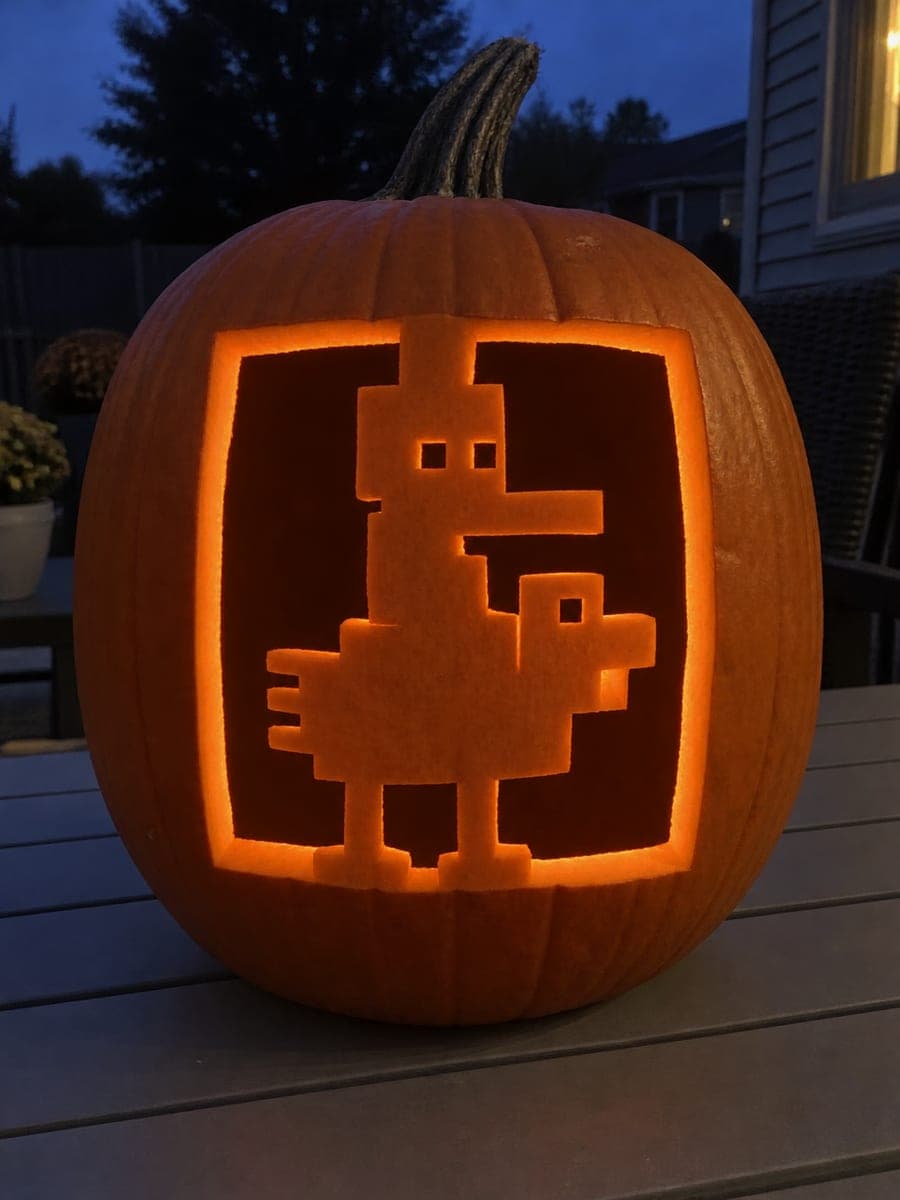
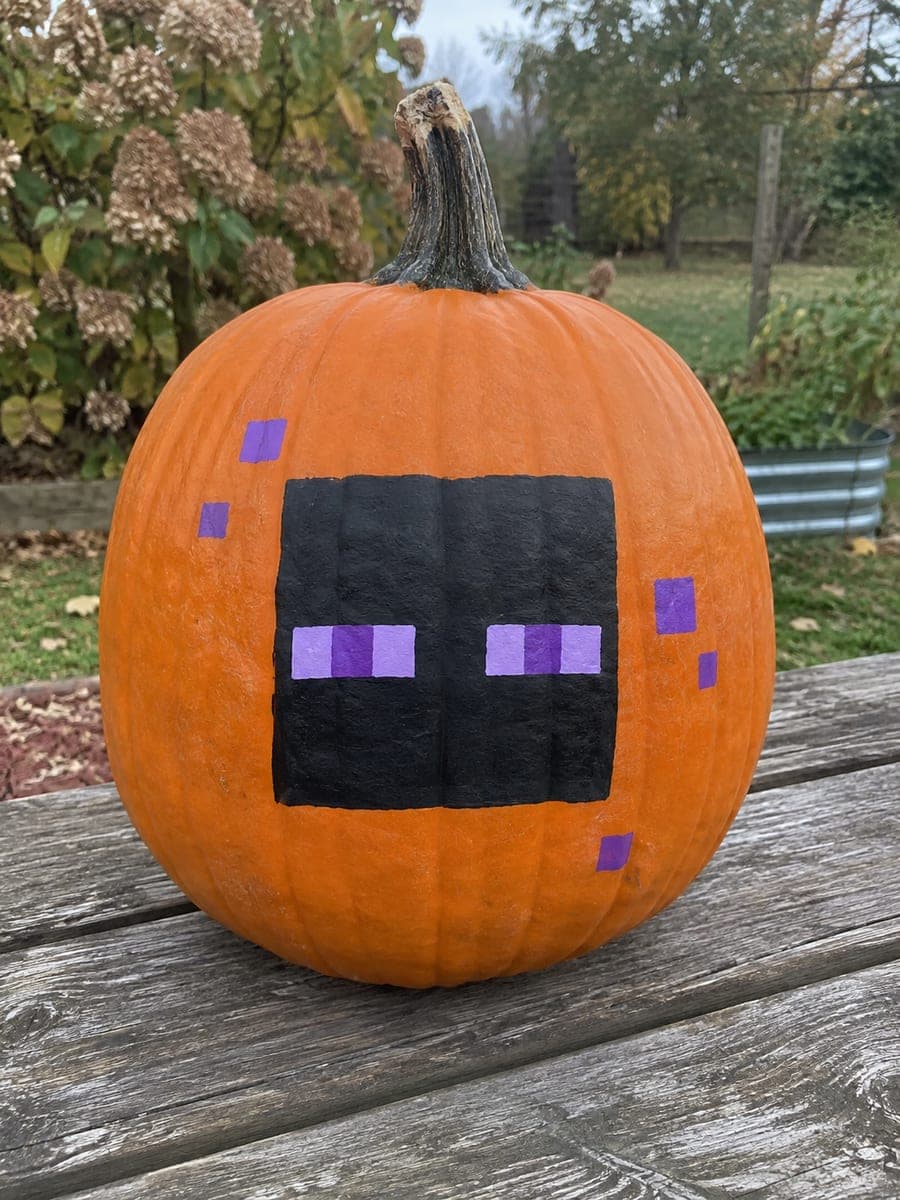
Painted Chicken Jockey No-Carve Minecraft PumpkinAI
0

Report this carving

Tell us what is wrong. Reports are private.

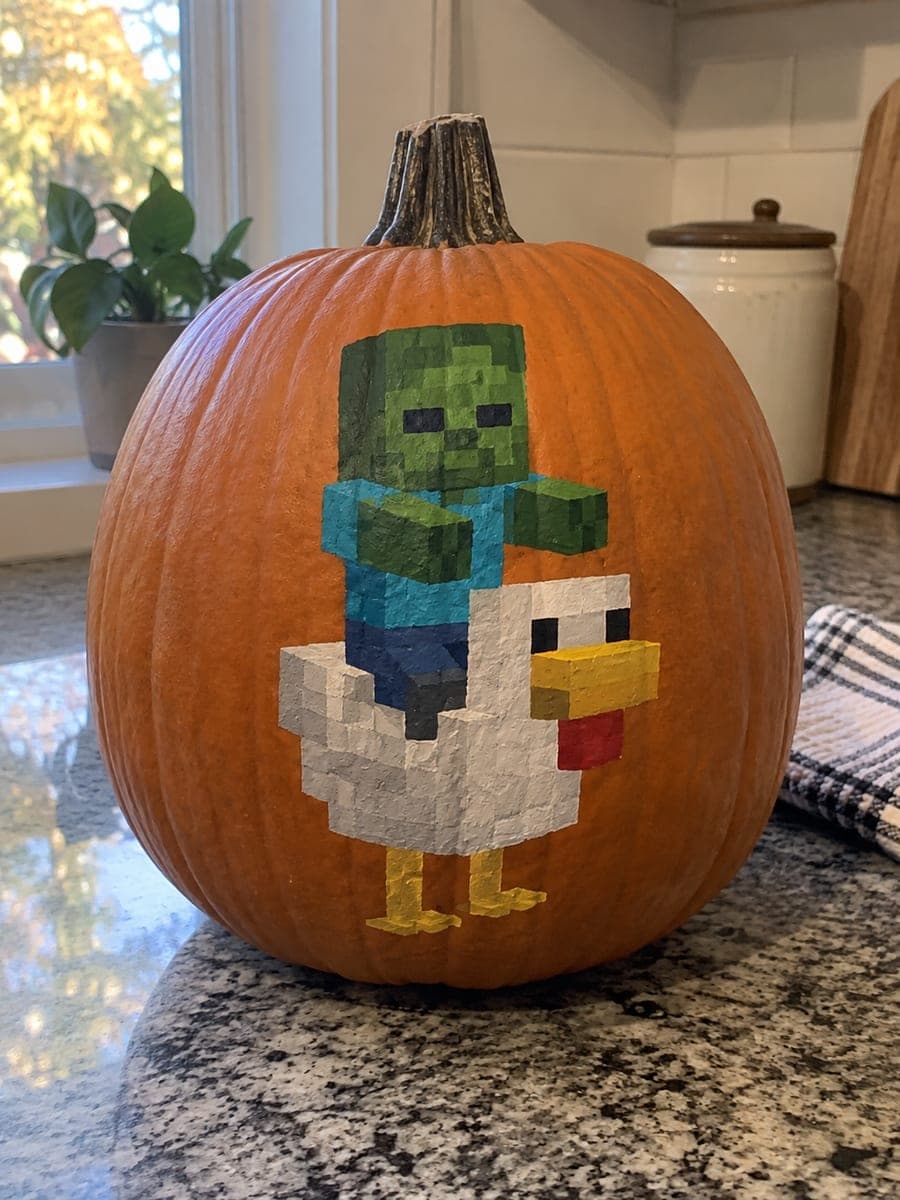
Painted Chicken Jockey No-Carve Minecraft Pumpkin

This no-carve Chicken Jockey pumpkin uses flat acrylic paint on an intact rind to show the beloved Minecraft mob combo. Paint the white chicken body first with blocky brush strokes, then add the small zombie rider in green on top. Keep the shapes geometric and chunky to honor the pixel art style. A matte finish spray coat keeps the paint from peeling through a full October on the porch.

No ratings yet · Sign in to rate
Comments (0)

  • No comments yet — be the first.

Save without an account. Sign in to like or comment.

Our tips for carving a similar design

Flat acrylic on an intact rind captures the absurd charm of a baby zombie rider mounted on a flustered chicken. Painting the white chicken body first and the green zombie rider on top keeps the layering logical and prevents color muddying. Chunky blocky brush strokes do more for the pixel art style than fine detail lines, so resist the urge to overwork the surface.

From pumpkin to porch

  1. Clean and prep the surface

    Wipe the pumpkin with rubbing alcohol and let it dry fully. A clean surface dramatically improves paint adhesion. Choose the flattest, most visible face of the pumpkin for your painting zone and mark it with a faint pencil cross to help center the composition.

  2. Sketch the chicken and rider outlines

    Lightly pencil in the blocky chicken body and the small square-headed zombie rider sitting on its back. Keep shapes geometric and chunky. The chicken should be the dominant element in size with the rider perched compactly at the top. These pencil lines will be covered by paint.

  3. Paint the white chicken body

    Fill the chicken body with flat white acrylic using broad square brush strokes. Two coats are needed for opacity over orange rind. Let the first coat dry completely before the second. Keep the edge between orange rind and white paint as a deliberate straight geometric line.

  4. Paint the zombie rider

    Build up the zombie in flat green acrylic over the upper chicken area. Add a darker green or brown for the head pixel details and a gray-brown for the decayed body. Use a small square-tipped brush to suggest the blocky facial features without overcomplicating the shapes.

  5. Add chicken beak, feet, and wing accents

    Finish the chicken with a yellow-orange beak, orange feet, and light gray wing-edge blocks. Use a fine liner brush for the feet detail. A black dot for the chicken eye and a black outline around the key color boundaries sharpens everything up.

  6. Seal and display

    Spray with matte acrylic sealer once all layers are fully dry. Keep the pumpkin out of direct rain for the best paint longevity. Display on a step or ledge where viewers can see the full figure easily.

Written with AI to match this design

Gather your supplies

Check things off as you get ready.

Work on a stable surface, keep your free hand out of the cutting path, and have an adult handle sharp tools.

Three levels of light

  • Leave intact

    Unpainted orange rind around the figure reads as the background.

  • Peel & shade

    None. The shell is never broken.

  • Cut through

    None. Use an outdoor lamp or spotlight for nighttime display.

Learn the carving basics

Before you start cutting

How do I get the white chicken to look opaque over orange rind?

Gesso primer applied first is the easiest fix. Paint one coat of white gesso, let it dry, and the acrylic white goes on fully opaque after just one coat. Without gesso, plan on three coats of white acrylic, letting each dry completely before the next.

What shade of green looks most like a Minecraft zombie?

A desaturated mid-tone green, sometimes labeled sage or olive in craft paint ranges, is closer to the game's palette than a bright lime green. Mix a touch of gray or brown into bright green if a neutral zombie tone is what you are after. Test on scrap cardboard before committing to the pumpkin.

Can I display this alongside a carved Minecraft pumpkin for a matched set?

Absolutely, and the contrast between painted and glowing carved pumpkins makes a great grouped display. Position the painted pumpkin where it catches a lamp or string light from the side so its colors pop at night as well as during the day.

Your take belongs here, too.

Changed a detail? Made it simpler? Share a photo of your version and tell the community what worked.

Share your pumpkin

More pumpkins like this

You've reached the end · 8 pumpkins
The Patch Report

Fresh pumpkins, in your inbox.

The best new carvings, ideas worth stealing, and how-tos for carving season. Short, seasonal, and gone by November.

A short email during carving season. Unsubscribe anytime. See our privacy policy.