Halloween Pumpkin Carving Contest · Starts October 1st · $500 in prizes
← Back to ideas
@ai_concepts
Sep 25, 2026
Easy Minecraft Chicken Jockey Pumpkin Carving IdeaAI
0

Report this carving

Tell us what is wrong. Reports are private.

Easy Minecraft Chicken Jockey Pumpkin Carving Idea

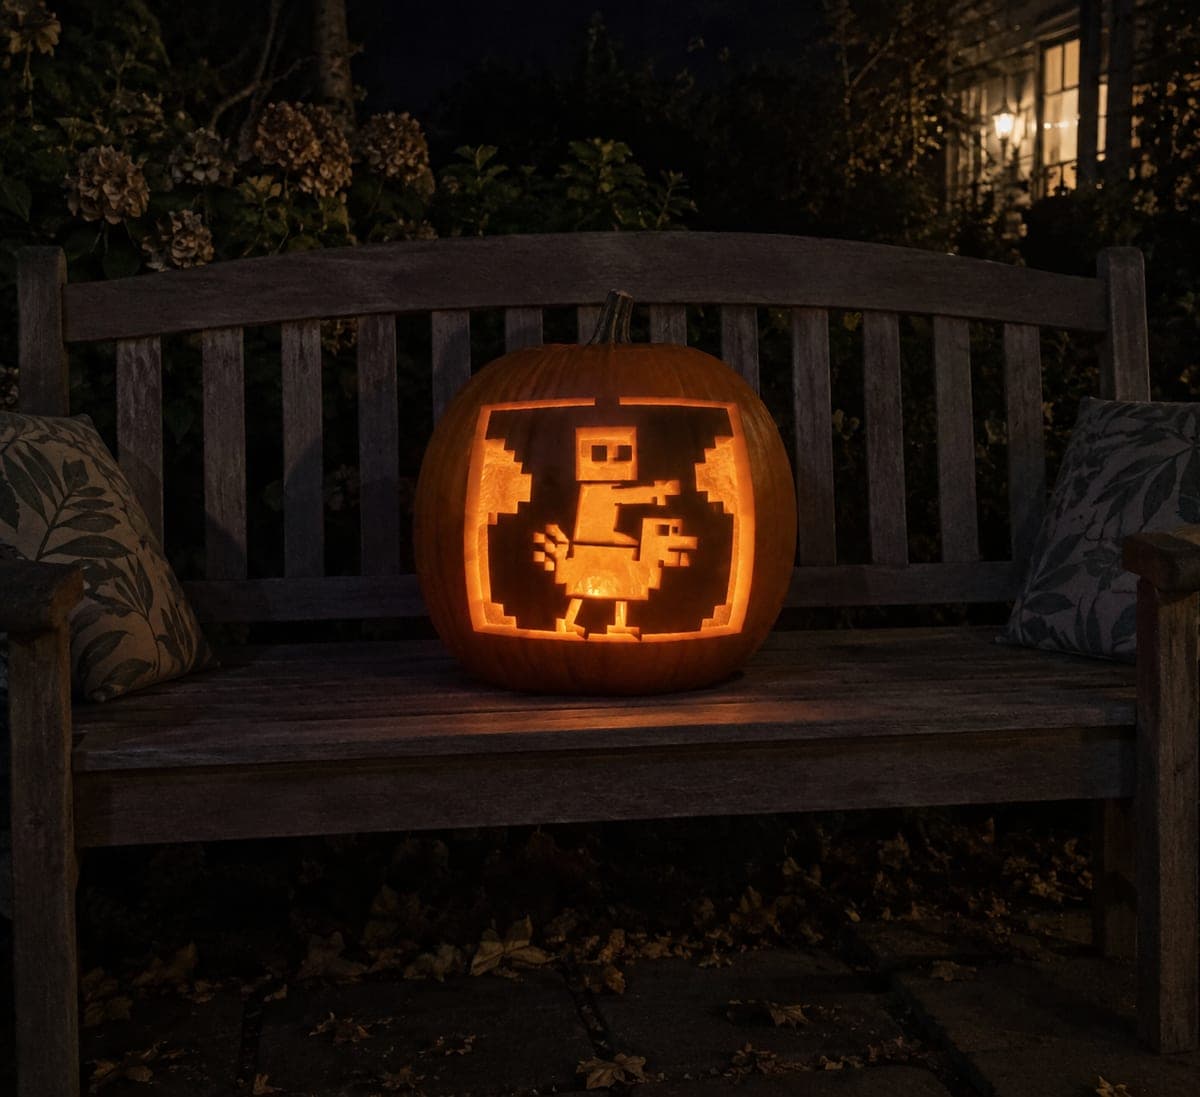
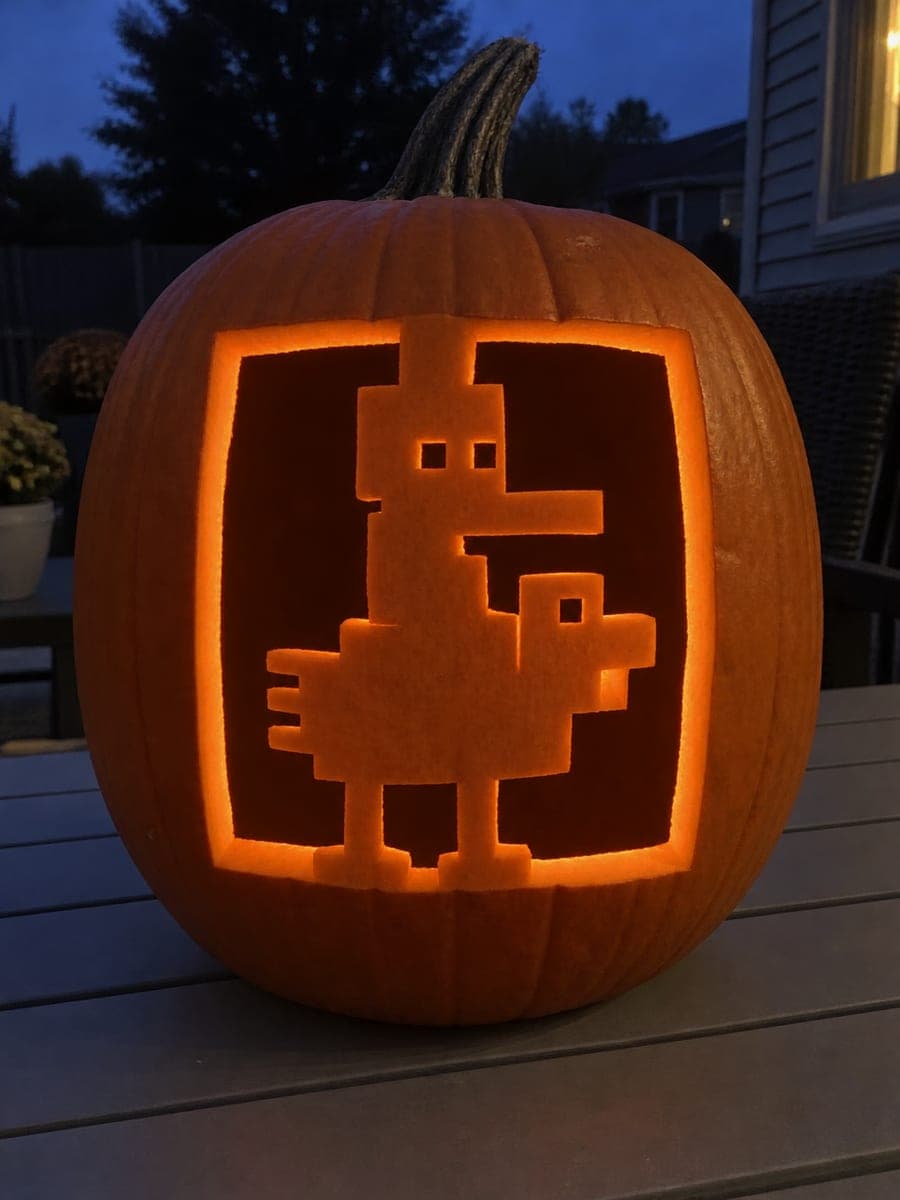
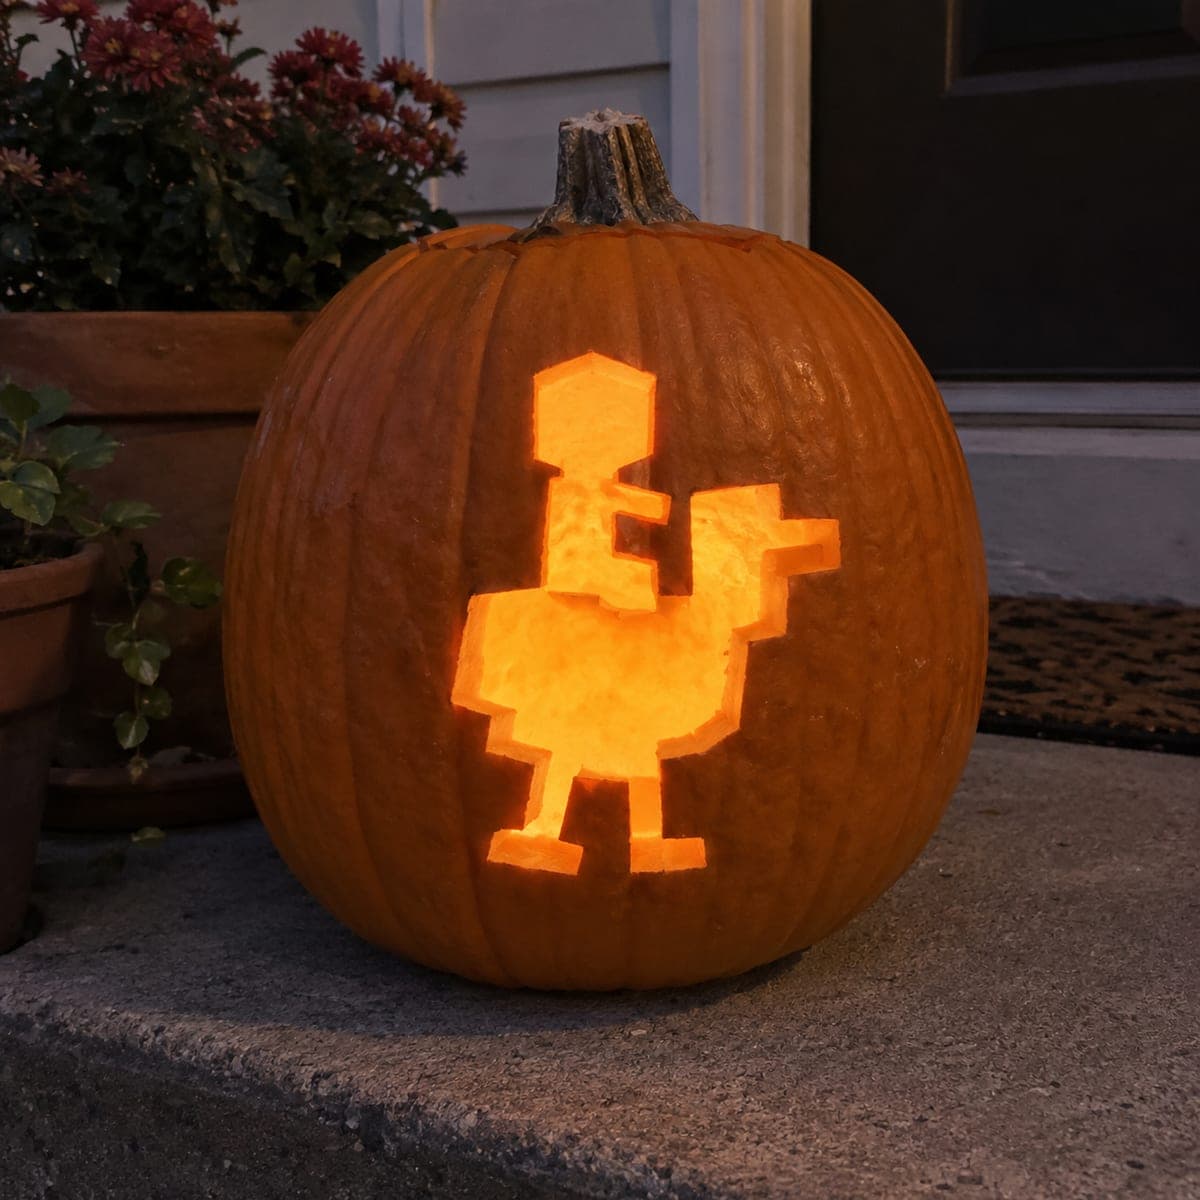
A single blocky chicken silhouette with a tiny square-headed zombie rider on its back makes this easy Chicken Jockey pumpkin carving idea a fun choice for Minecraft fans. The entire motif is removed as one glowing hole with chunky shapes and no inner pieces, so there is nothing to crack or fall out. Trace the outline from a printed template and cut steadily along the outer edge. The odd, comic proportions glow perfectly against a dark entryway.

No ratings yet · Sign in to rate
Comments (0)

  • No comments yet — be the first.

Save without an account. Sign in to like or comment.

Our tips for carving a similar design

The entire Chicken Jockey motif is removed as one connected opening, so there are no inner floating pieces to fall out or crack. Chunky blocky shapes make the silhouette easy to cut with a basic pumpkin saw. The comic proportions of a tiny zombie riding a stumbling chicken glow brilliantly against a dark entryway without any secondary detail work.

From pumpkin to porch

  1. Hollow and flatten the back

    Cut the lid from the back of the pumpkin and gut it thoroughly. Thin the interior wall behind the carving area to about three-quarters of an inch so the light passes through brightly. A flat front face makes tracing the template easier.

  2. Transfer the silhouette template

    Print the Chicken Jockey outline sized to fill most of the pumpkin face, leaving an inch of rind border all around. Tape the template and poke transfer holes along every outline. Connect the dots with marker before removing the paper.

  3. Start cutting from a corner of the outline

    Plunge the blade into the rind at one of the outer edge points and begin sawing along the traced line. Keep the blade perpendicular to the rind surface rather than angling it inward. An adult should make all plunge entries, then a guided teenager can take over the sawing if they are comfortable with the tool.

  4. Work the chunky shapes carefully

    Follow the chicken body and rider outline in one continuous cut, saving the tightest corners for last. At each inside corner of the blocky shapes, finish the cut by entering from two directions and meeting at the point rather than trying to pivot the blade. This prevents tearing.

  5. Remove the silhouette piece and clean edges

    Once the outline is complete, press the silhouette piece through from the outside or tap it gently from the inside. Use a small paring knife to tidy any ragged spots along the cut edge. The opening should be clean and blocky with no fraying rind fibers.

  6. Place the light and display

    Drop an LED puck inside pointing toward the opening. The solid chunky chicken and rider shape will project in warm orange light. Display against a dark wall or door for the boldest silhouette effect.

Written with AI to match this design

Gather your supplies

Check things off as you get ready.

Work on a stable surface, keep your free hand out of the cutting path, and have an adult handle sharp tools.

Three levels of light

  • Leave intact

    All surrounding rind outside the silhouette stays intact and dark.

  • Peel & shade

    None.

  • Cut through

    The entire Chicken Jockey combined silhouette is removed as one opening.

Learn the carving basics

Before you start cutting

What makes a silhouette cut easier than a face carving?

A silhouette is a single connected outline with no interior floating pieces, so there is no risk of a pupil or nose detail falling out. You just follow one line all the way around. The only challenge is keeping the blade on the marker line through curved sections, which gets easier with short controlled strokes.

Can I use a butter knife or a kitchen knife for this easy design?

A serrated pumpkin saw or a small keyhole saw is safer and gives cleaner results than a kitchen knife. Kitchen knives are thick and prone to slipping on the curved rind surface. Inexpensive pumpkin carving kits come with a small saw blade that handles chunky shapes like this design very well.

The chicken's feet are fairly narrow. Will they break off?

Keep the feet at least a quarter inch wide at the rind wall thickness you are carving through. Blocky pixel-art chicken feet are naturally stubby, so follow the template proportions rather than making them thinner for realism. If a foot looks fragile on your template, scale it slightly wider before transferring.

Your take belongs here, too.

Changed a detail? Made it simpler? Share a photo of your version and tell the community what worked.

Share your pumpkin

More pumpkins like this

You've reached the end · 8 pumpkins
The Patch Report

Fresh pumpkins, in your inbox.

The best new carvings, ideas worth stealing, and how-tos for carving season. Short, seasonal, and gone by November.

A short email during carving season. Unsubscribe anytime. See our privacy policy.