Halloween Pumpkin Carving Contest · Starts October 1st · $500 in prizes
← Back to ideas
@ai_concepts
Sep 25, 2026
Easy Bowser Pumpkin Carving with Cut-Through FaceAI
0

Report this carving

Tell us what is wrong. Reports are private.

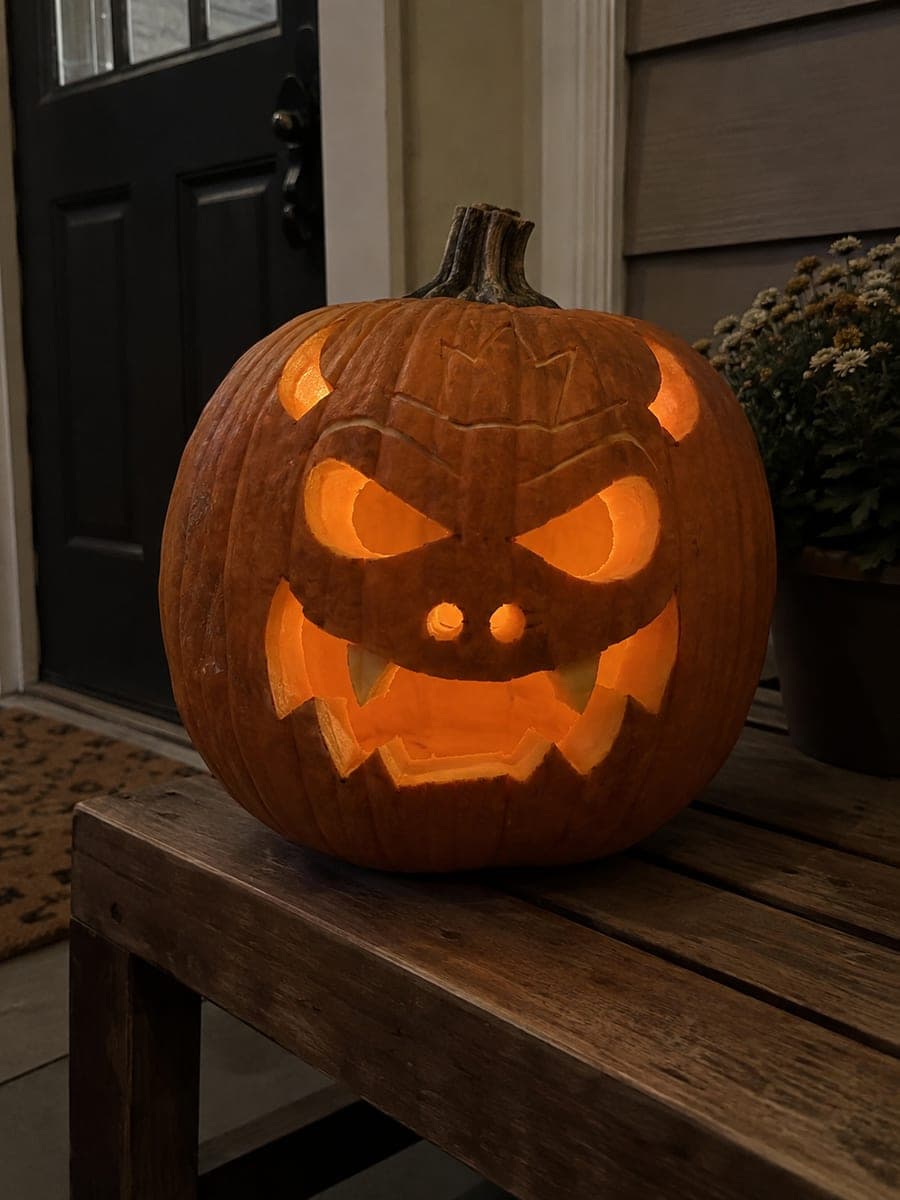
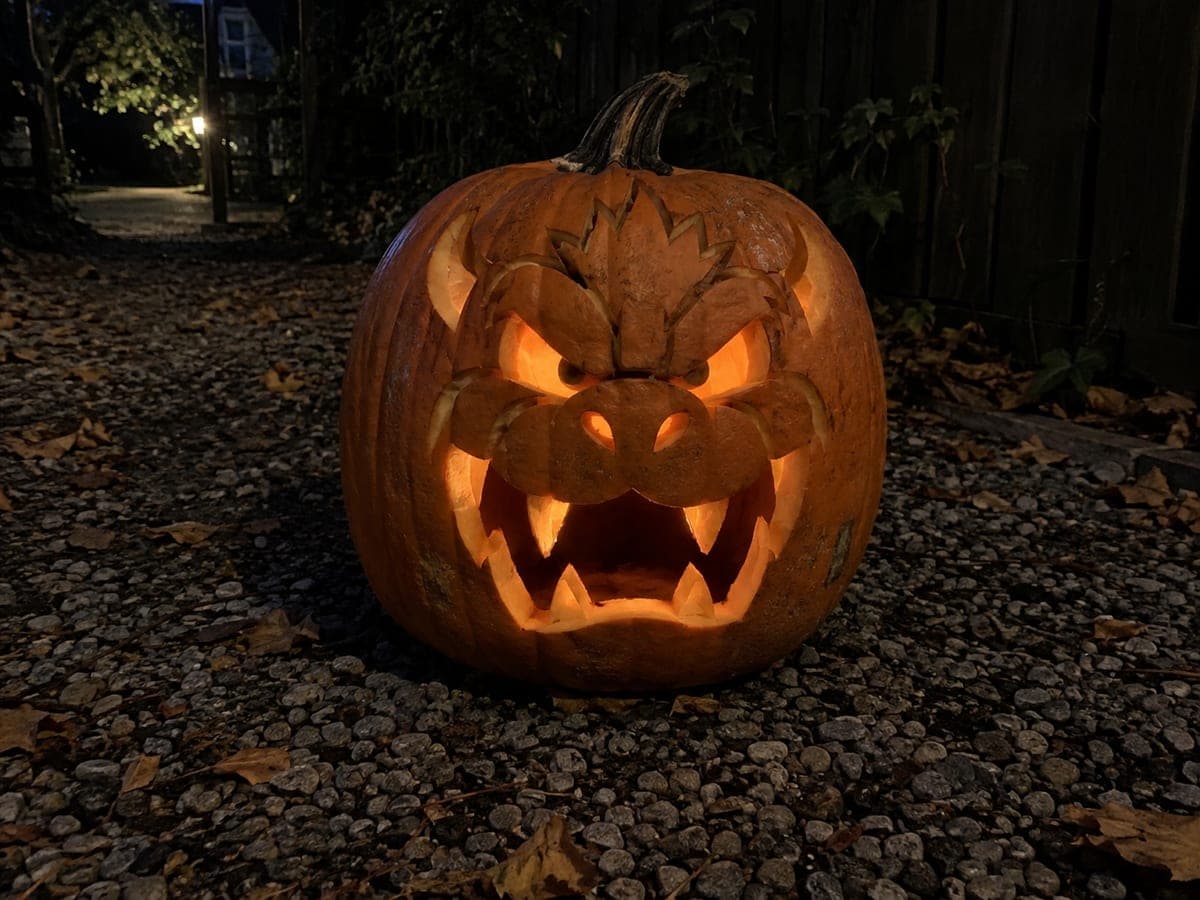
Easy Bowser Pumpkin Carving with Cut-Through Face

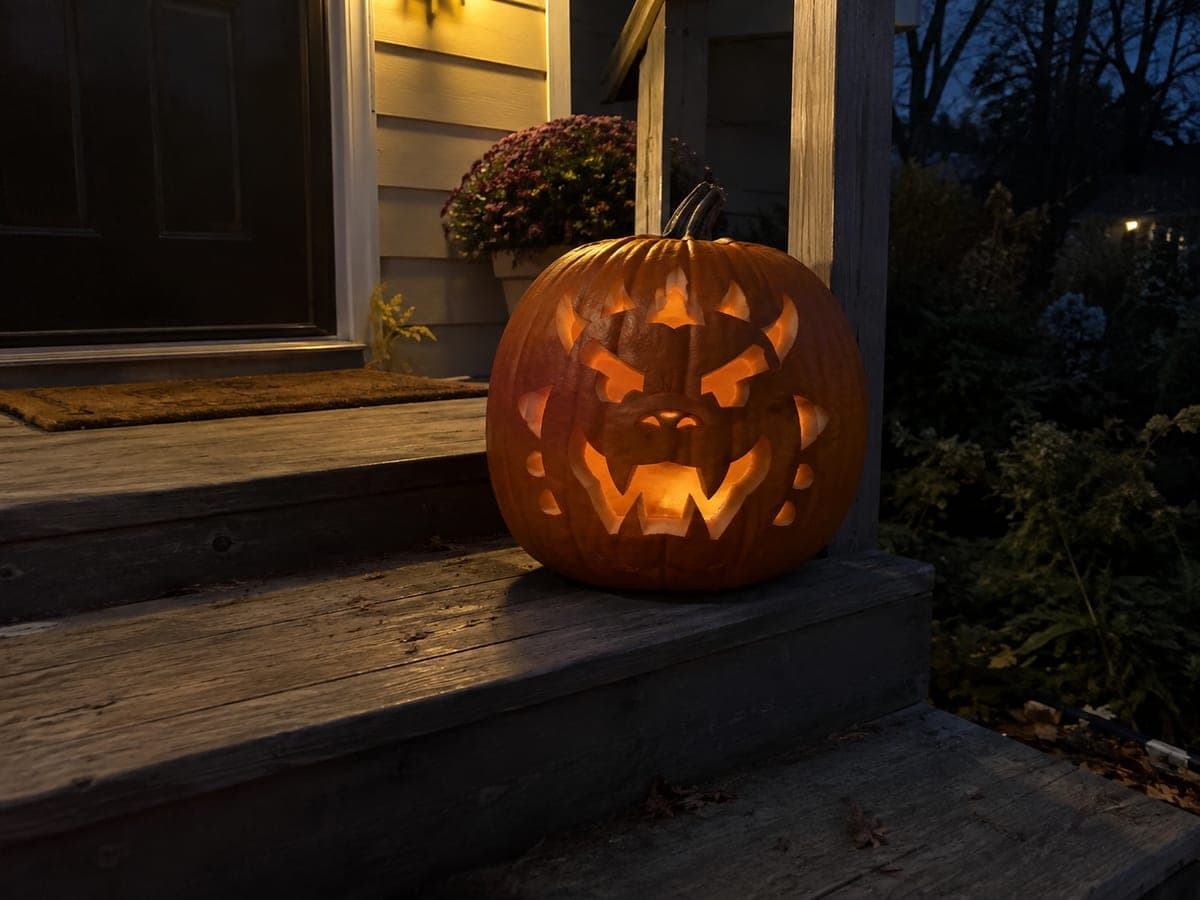
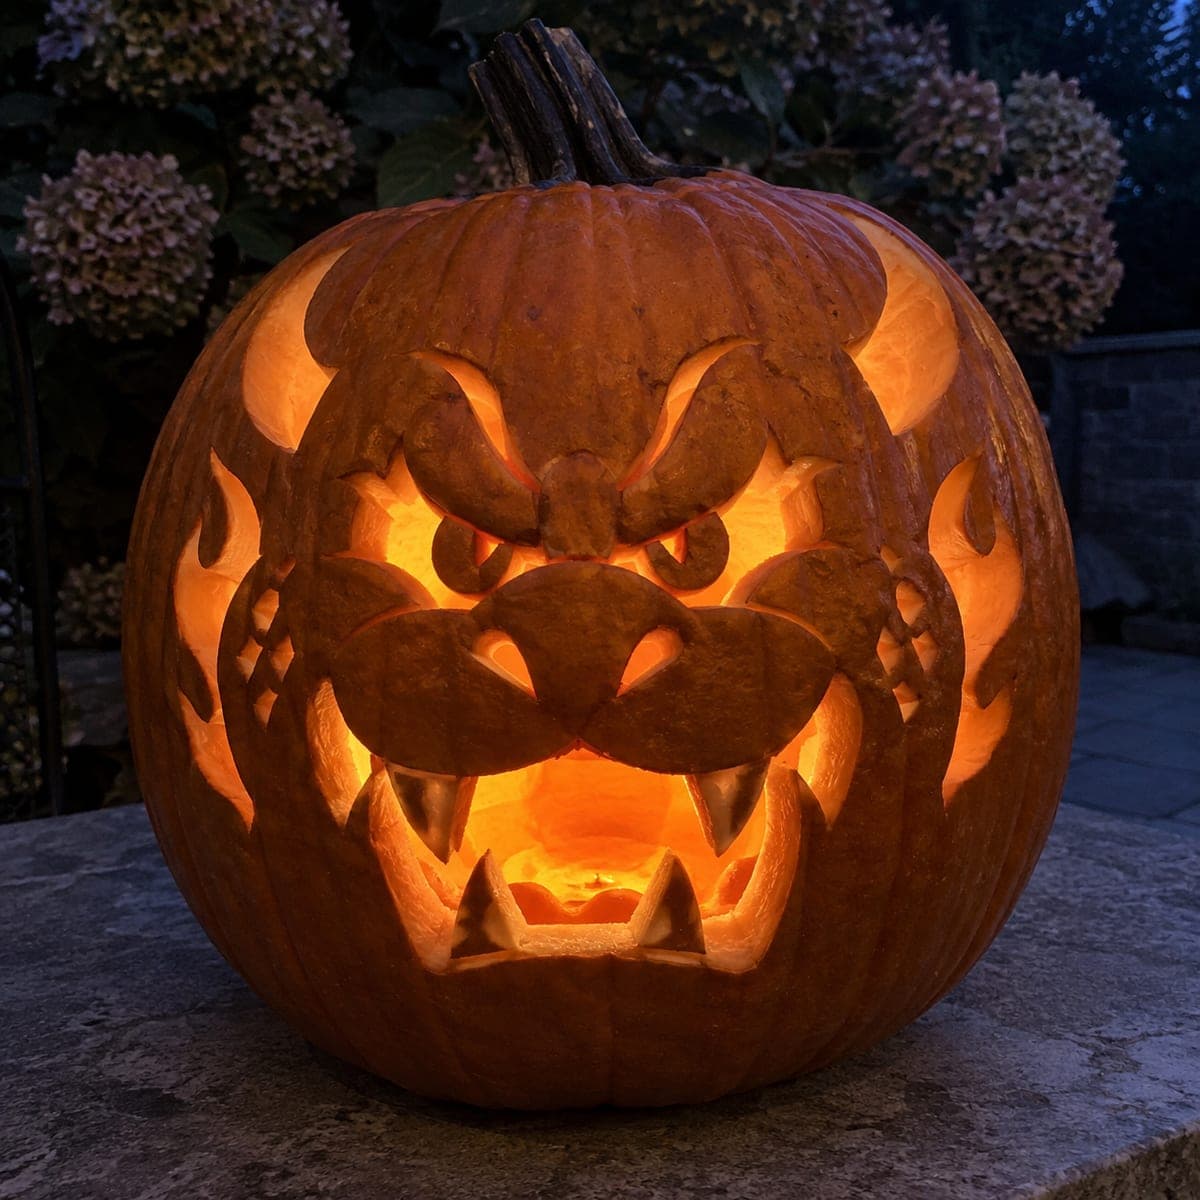
This easy Bowser pumpkin carving captures King Koopa's menacing face with cut-through main apertures and broadly rooted retained pupils, teeth, and silhouette details that keep the design structurally sound. Smaller accent marks use shallow back-carved relief to add depth without cutting all the way through. A tea light inside throws warm light through the main openings while the shallow-backed details add a subtle texture ring around them.

No ratings yet · Sign in to rate
Comments (0)

  • No comments yet — be the first.

Save without an account. Sign in to like or comment.

Our tips for carving a similar design

The design uses broad retained pupils and teeth anchored firmly to their surrounding rind so the iconic Bowser expression holds together without bridgework. Main apertures provide the bright light while small shallow-backed accents around the face add depth without punching through. Cutting the eyes first to confirm placement before the wide mouth is the key discipline of this design.

From pumpkin to porch

  1. Prep and transfer

    Scoop from the back and thin interior walls to about an inch. Transfer the stencil with a pounce wheel, marking both the main aperture outlines and the shallow accent positions. Keep the pounce marks light over the rind areas that will remain as retained pupils and teeth.

  2. Cut the eye apertures

    Use a medium carving saw to cut the eye openings first, confirming they sit at the correct height on the face before moving to the mouth. Bowser's eyes are typically wide and expressive, so follow the stencil outline closely. Remove each eye slug cleanly.

  3. Cut the mouth with retained teeth

    Cut along the outer mouth boundary first to define the opening, then work inward to separate the space between each tooth while keeping every tooth broadly rooted at its base. Use a fine detail saw for the narrow gaps. Check each tooth connection by pressing gently before releasing the saw.

  4. Cut remaining main apertures

    Open any other main face apertures defined on the stencil, such as nostril or forehead areas, using the medium carving saw. Work from the largest openings to the smallest to remove rind mass in a controlled sequence.

  5. Add shallow accent marks

    Switch to a linoleum cutter or V-gouge for the small secondary accent marks. Keep the depth to about a third of the rind thickness. A narrow round gouge is useful for any circular accent shapes around the pupils.

  6. Light and display

    Place an LED tea light inside and view from a couple of feet in a dark room. Bowser's eyes and jagged grin should glow immediately. Apply petroleum jelly to all cut edges and keep the pumpkin in a cool spot when not on display.

Written with AI to match this design

Gather your supplies

Check things off as you get ready.

Work on a stable surface, keep your free hand out of the cutting path, and have an adult handle sharp tools.

Three levels of light

  • Leave intact

    Retained pupils, tooth bases, and rind between features remain fully dark

  • Peel & shade

    Small secondary accent marks are shallow-backed to cream flesh for subtle mid-glow texture

  • Cut through

    Main eye apertures, mouth opening including gaps between teeth, and any nostril or forehead holes are fully cut through

Learn the carving basics

Before you start cutting

Bowser's pupils look unusual as retained dark shapes. Is that correct?

Yes. Retaining the pupils as dark rind against a glowing eye opening is a standard technique for keeping the character's focused expression. The pupil sits inside the open eye aperture as a dark island connected at top and bottom, so the iris around it glows while the center reads dark.

How many teeth does the design typically have, and how wide should their roots be?

The stencil determines the tooth count, usually six to eight for Bowser. Each tooth root should be at least a half-inch wide at the lip connection. Wider roots are always safer, and any excess can be shaved back slightly after you confirm all teeth are secure.

Can I add Bowser's shell spikes with shallow backing around the top?

Absolutely. Score the spike outlines along the top of the pumpkin with a gouge, removing just the orange skin to reveal the cream flesh. Keep the backing shallow so the spikes read as surface texture rather than fragile through-cuts. This adds character without any structural risk.

Your take belongs here, too.

Changed a detail? Made it simpler? Share a photo of your version and tell the community what worked.

Share your pumpkin

More pumpkins like this

You've reached the end · 8 pumpkins
The Patch Report

Fresh pumpkins, in your inbox.

The best new carvings, ideas worth stealing, and how-tos for carving season. Short, seasonal, and gone by November.

A short email during carving season. Unsubscribe anytime. See our privacy policy.