Halloween Pumpkin Carving Contest · Starts October 1st · $500 in prizes
← Back to ideas
@ai_concepts
Sep 25, 2026
Bowser Pumpkin Carving with Retained Teeth and SilhouetteAI
0

Report this carving

Tell us what is wrong. Reports are private.

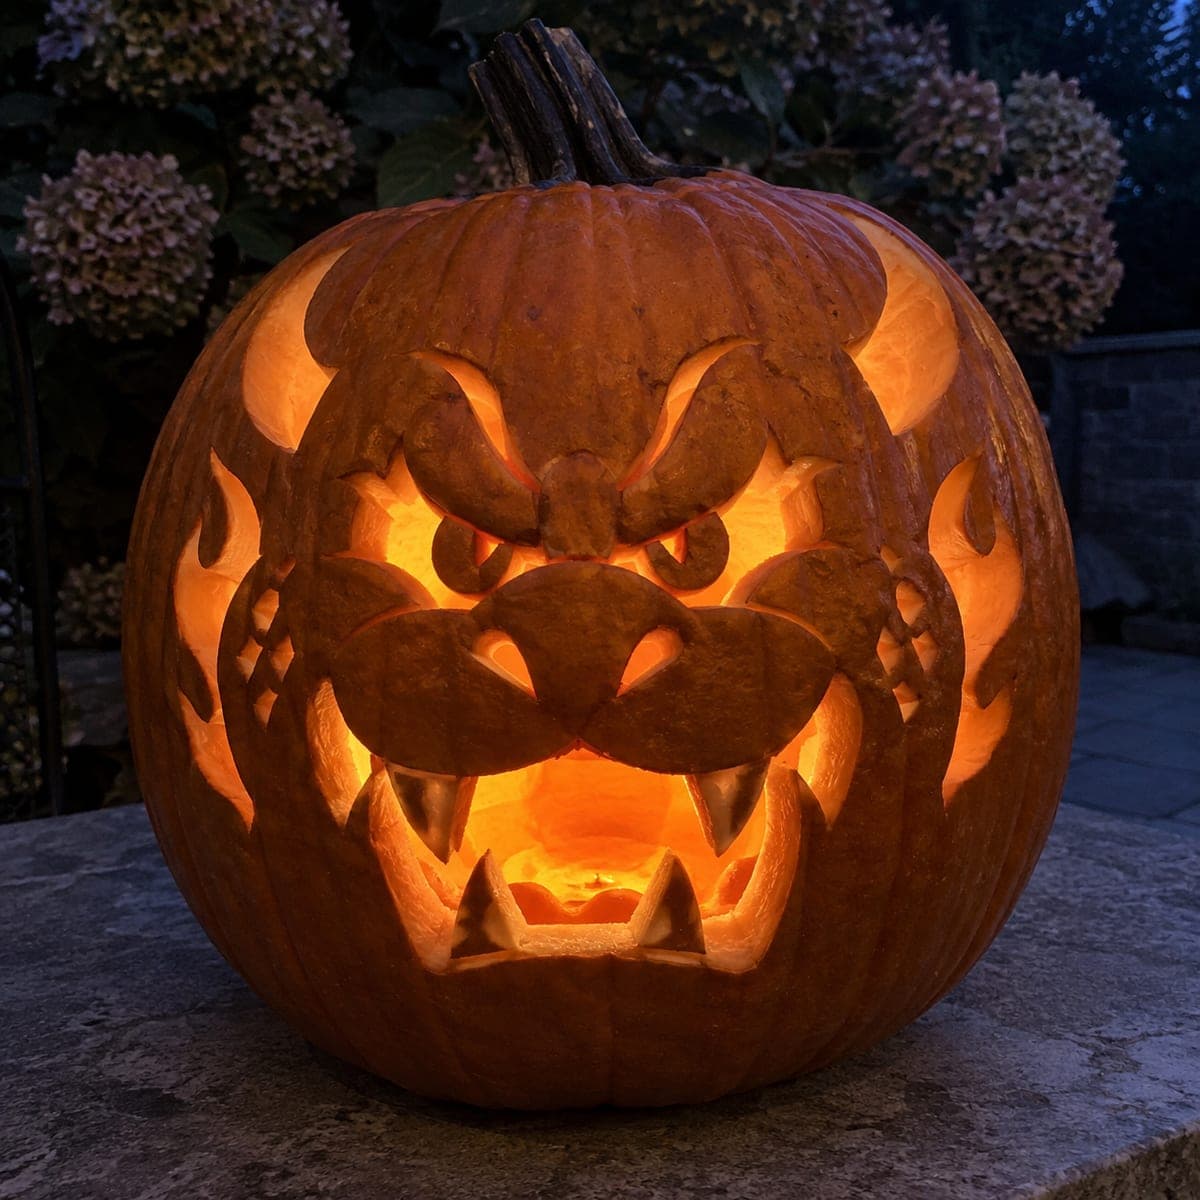
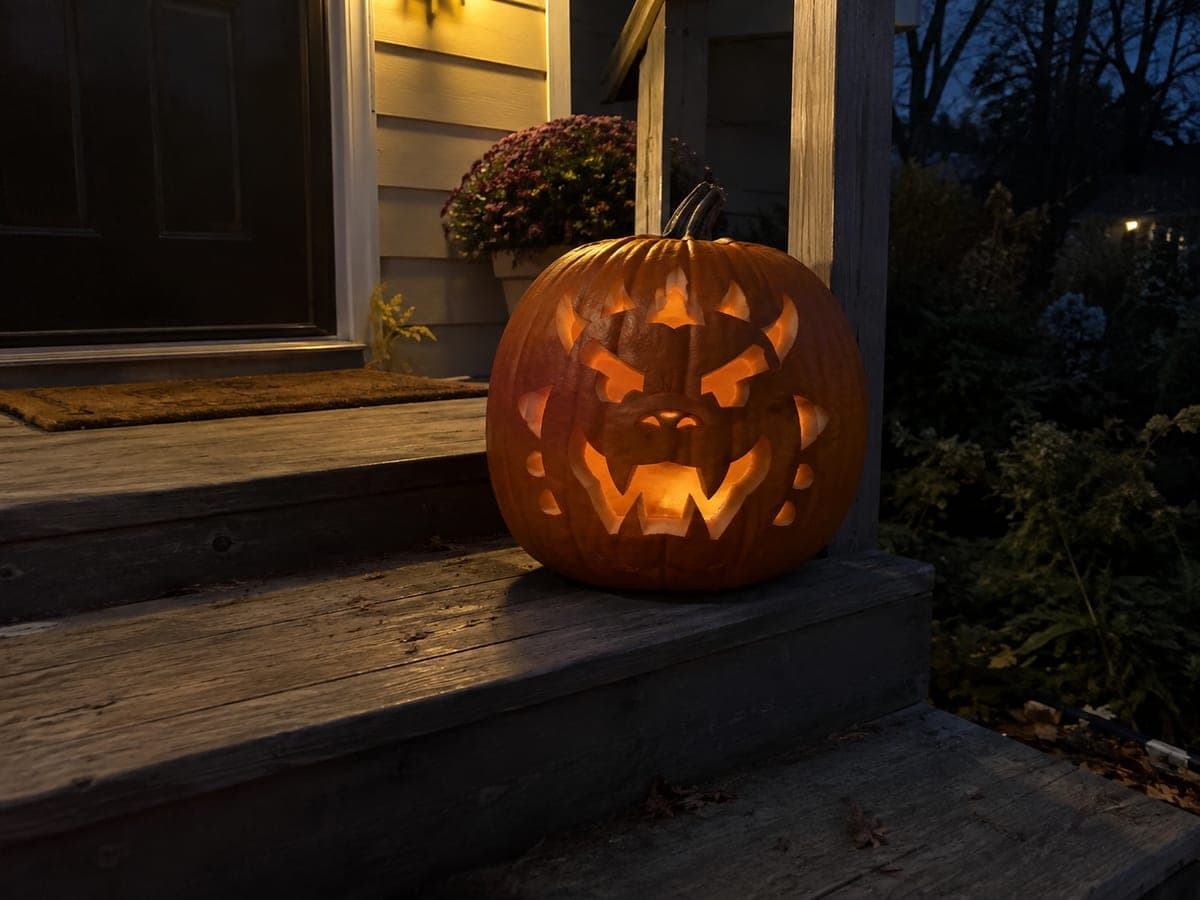
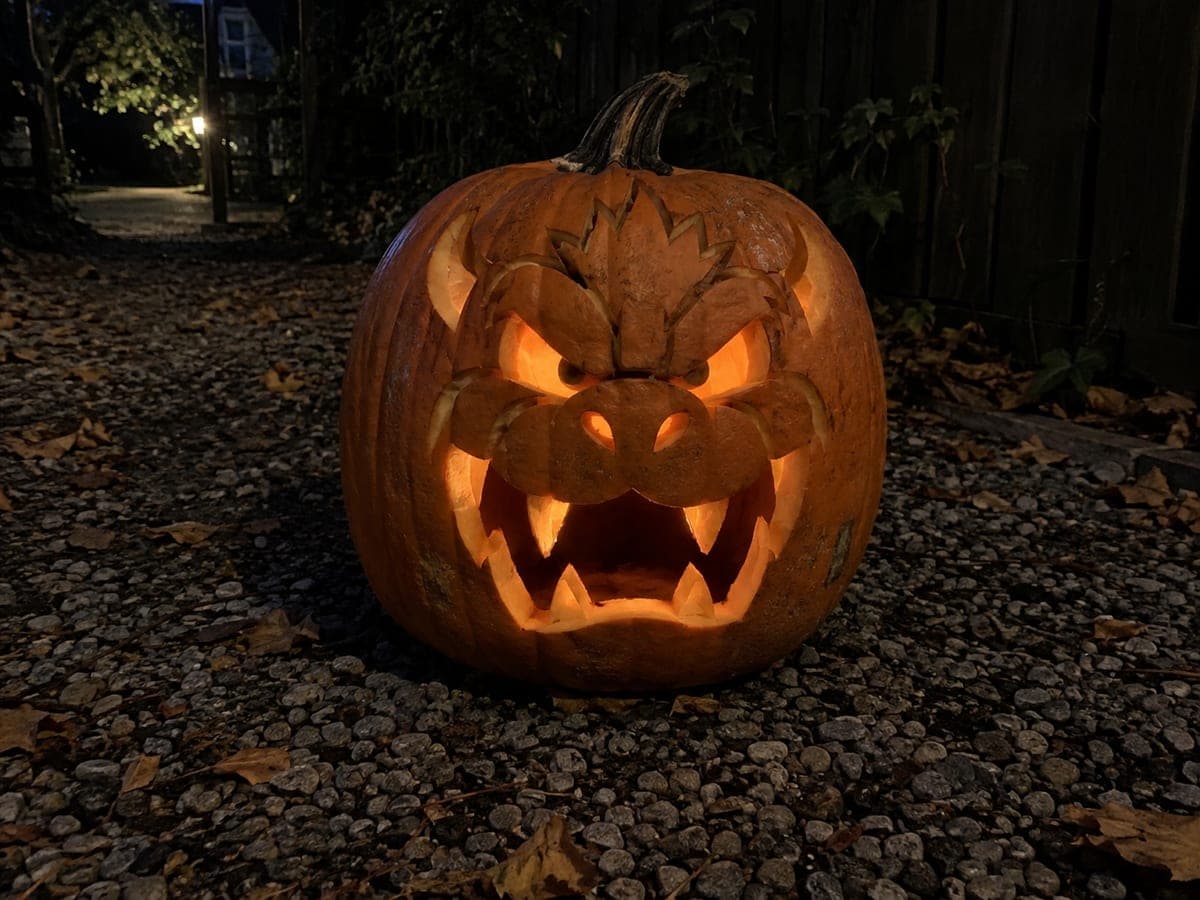
Bowser Pumpkin Carving with Retained Teeth and Silhouette

Bowser's hard pumpkin carving idea uses cut-through main openings alongside broadly rooted retained pupils, teeth, and silhouette sections so the full face holds together as a single connected piece. Secondary detail marks are kept shallow to preserve rind between the larger cuts. Carve the background openings around the retained silhouette before tackling the teeth so the surrounding shell stabilizes the smaller retained pieces.

No ratings yet · Sign in to rate
Comments (0)

  • No comments yet — be the first.

Save without an account. Sign in to like or comment.

Our tips for carving a similar design

The hard version treats Bowser's face as one continuous retained shape rather than isolated retained details, so the pupils, teeth, and surface silhouettes are all part of a single connected piece anchored to the surrounding shell through broad root connections. Background openings around the retained face provide the light source, and secondary detail marks use shallow backing to add surface texture. Cutting the background first, while the retained face is fully solid, gives you the most controlled conditions for every subsequent cut.

From pumpkin to porch

  1. Prep and mark the anchor points

    Scoop from the back and thin walls to a consistent inch. Transfer the full stencil and clearly mark every anchor point where the retained face silhouette connects to the surrounding shell. These anchor marks are your absolute cut boundaries. Confirm there are at least three anchor points before starting.

  2. Cut the outer background apertures

    Open the background areas flanking and surrounding the retained face first using a medium carving saw. Work from the widest background opening to the narrowest, always stopping precisely at the anchor boundary lines. This sequence keeps the retained face supported from behind as the surrounding rind is removed.

  3. Open the mouth and eye spaces

    With the background open, work the eye apertures inside the retained face region and the mouth opening with its tooth gaps. Use a fine detail saw for the tooth separation cuts, keeping every tooth broadly rooted to the lips. Check each cut against the stencil before removing any slug.

  4. Work remaining retained silhouette boundaries

    Cut any remaining aperture areas adjacent to the retained silhouette sections using the fine detail saw. Move slowly near every root connection. After each cut, press the retained silhouette gently to confirm it has no flex or movement.

  5. Shallow-back the secondary accents

    Use a gouge to add the secondary detail marks across the retained face surface. Brow ridges, scale texture, and forehead lines are all good candidates for shallow backing. Vary the groove width slightly to suggest different kinds of surface texture within Bowser's complex face.

  6. Light and display

    Place an LED tea light inside. The retained face silhouette should appear as a detailed dark portrait against glowing background panels. Step back to evaluate from several feet away, adjusting the LED position so the light fills the background evenly. Coat all surfaces with petroleum jelly and store cold when not on display.

Written with AI to match this design

Gather your supplies

Check things off as you get ready.

Work on a stable surface, keep your free hand out of the cutting path, and have an adult handle sharp tools.

Three levels of light

  • Leave intact

    The full retained face silhouette including pupils and tooth shapes remains entirely dark

  • Peel & shade

    Secondary accent marks on the retained face surface are shallow-backed to cream flesh for mid-glow texture detail

  • Cut through

    Background apertures surrounding the face and tooth-gap openings inside the mouth are fully cut through

Learn the carving basics

Before you start cutting

This is the first time I will be carving a connected retained silhouette. What is the biggest mistake to avoid?

The biggest mistake is cutting across an anchor point boundary, which detaches the retained shape from the surrounding shell. Mark every boundary with a double pounce line before starting and stop well before each boundary, then approach it slowly from the other side. It is much easier to remove a little extra rind than to reattach a detached piece.

How do background apertures produce more even light than face apertures?

When the light openings surround the retained face rather than being cut through it, the LED inside illuminates the background evenly and the retained silhouette reads as a shadowed portrait against that glow. Face apertures illuminate only the specific holes, leaving the rest dark. Background apertures give a cleaner, more theatrical silhouette effect.

Can I make this design at hard difficulty without a stencil?

It is possible but challenging without a stencil, because the placement and size of the background apertures relative to the retained face must be carefully proportioned for the silhouette to read as Bowser. If you want to freehand it, sketch the retained face first in chalk on the pumpkin, then plan the background openings around that sketch before making any cuts.

Your take belongs here, too.

Changed a detail? Made it simpler? Share a photo of your version and tell the community what worked.

Share your pumpkin

More pumpkins like this

You've reached the end · 8 pumpkins
The Patch Report

Fresh pumpkins, in your inbox.

The best new carvings, ideas worth stealing, and how-tos for carving season. Short, seasonal, and gone by November.

A short email during carving season. Unsubscribe anytime. See our privacy policy.