Halloween Pumpkin Carving Contest · Starts October 1st · $500 in prizes
← Back to ideas
@ai_concepts
Sep 25, 2026
Cream and Navy Volleyball Painted on Orange PumpkinAI
0

Report this carving

Tell us what is wrong. Reports are private.

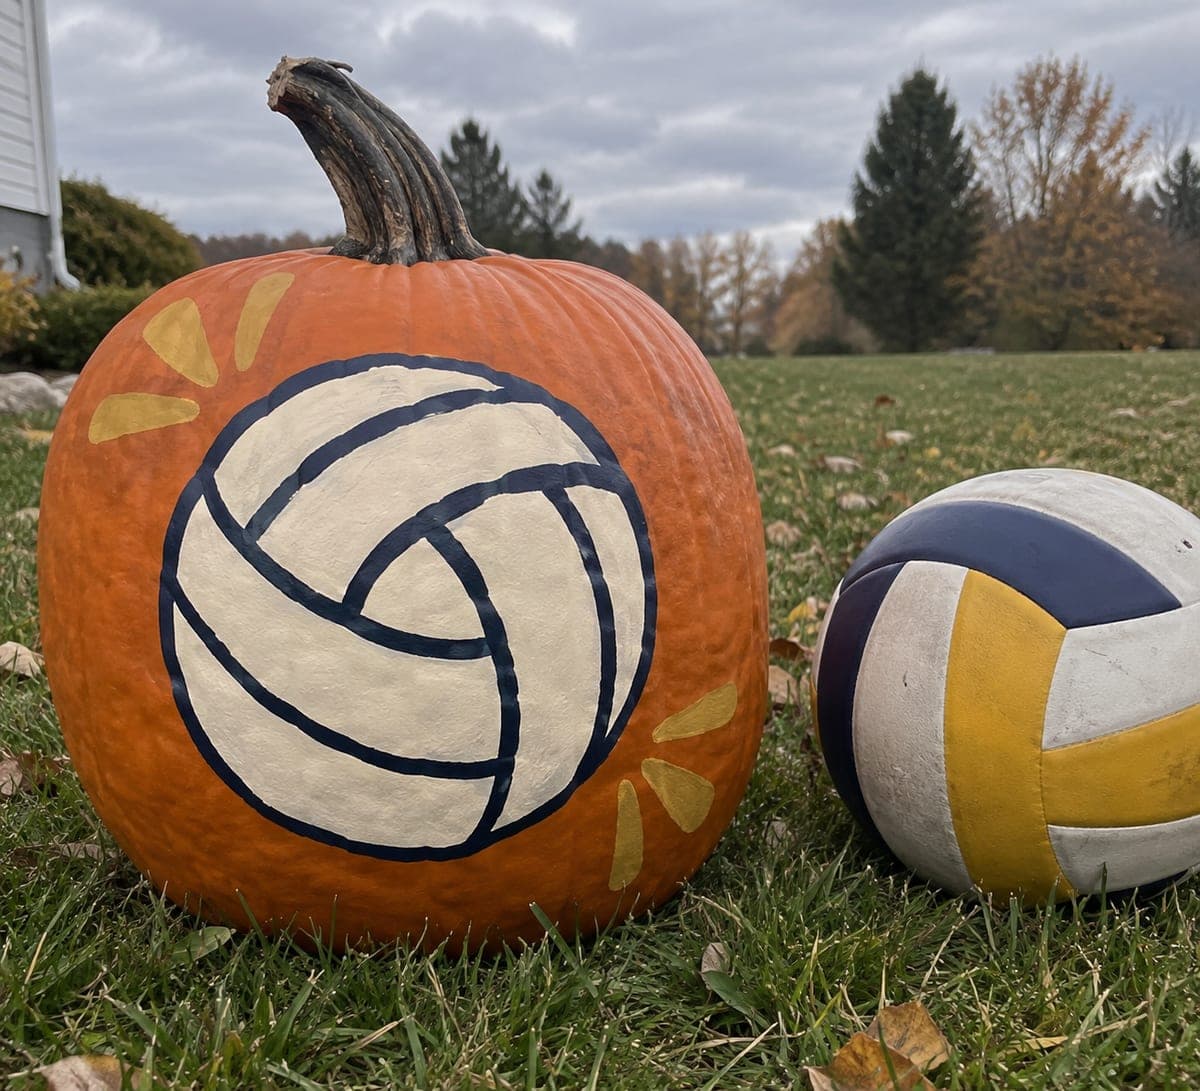
Cream and Navy Volleyball Painted on Orange Pumpkin

A cream base circle with navy curved panel lines and mustard accent strokes makes this no-carve volleyball pumpkin idea one of the most elegant sport designs in the batch. Paint the cream circle first and allow full cure time before adding the navy curves, as the contrast requires a clean edge. Mustard strokes along each panel line add warmth that complements the orange pumpkin background. No varnish is needed if the pumpkin is displayed indoors, but a matte coat extends outdoor life.

No ratings yet · Sign in to rate

Comments (0)

  • No comments yet — be the first.

Save without an account. Sign in to like or comment.

Our tips for carving a similar design

A cream base circle establishes the volleyball body, then navy curved lines define the classic panel pattern, and mustard accent strokes along each panel seam add warmth. Painting in this exact order prevents color blending between layers. Indoors this design needs no varnish, but a matte coat extends its life for outdoor autumn display.

From pumpkin to porch

  1. Clean and prepare the surface

    Wipe the pumpkin clean and allow complete drying. If the rind surface feels waxy, wipe with isopropyl alcohol to improve adhesion. A light coat of gesso on the planned circle area, dried fully, reduces the number of cream paint coats needed.

  2. Paint the cream base circle

    Block in the large cream circle with a wide flat brush, applying two coats and allowing each to dry completely. The cream reads as the volleyball's body against the orange background. Allow the completed cream circle to cure for at least two hours before adding navy lines.

  3. Paint the navy curved panel lines

    Use a medium round brush to paint the curved navy lines that divide the cream circle into volleyball panels. Work steadily and use the brush tip for fine control on the curves. Two passes along each line give a consistent width.

  4. Add mustard accent strokes

    With a small round brush and mustard yellow acrylic, paint a thin accent stroke along the inner edge of each navy panel seam. These warm strokes complement the orange pumpkin background peeking through and add visual depth without complex shading techniques.

  5. Let everything cure

    Allow the full painted design to cure for at least four hours before handling. Acrylic looks dry in thirty minutes but can smear under light pressure until fully cured. Avoid stacking or wrapping the pumpkin during this period.

  6. Seal and display

    If displaying outdoors, apply two light coats of matte acrylic spray varnish with twenty minutes of drying time between coats. Indoors, varnish is optional. Display on a level surface away from direct sunlight to prevent the cream from yellowing.

Written with AI to match this design

Gather your supplies

Check things off as you get ready.

Work on a stable surface, keep your free hand out of the cutting path, and have an adult handle sharp tools.

Three levels of light

  • Leave intact

    The orange rind outside the painted cream circle remains natural.

  • Peel & shade

    None; the shell is fully intact throughout.

  • Cut through

    None; an outdoor spotlight or indoor lamp provides the best viewing light after dark.

Learn the carving basics

Before you start cutting

The navy panel lines look too thick in places. How do I fix that?

While the navy is still wet, pull the excess outward gently with a nearly dry brush to feather and thin the line. Once fully dry, a thin cream corrective stroke over a too-wide navy line resets the edge cleanly. Working with a smaller round brush and less paint on the brush in the first place prevents this issue.

The mustard color is barely visible against the cream. How do I make it pop more?

Use a deeper amber or golden mustard shade rather than a pale yellow, and apply two coats allowing drying between them. A slightly thicker stroke also increases visibility. If the mustard still disappears, try a thin burnt orange accent instead, which has more contrast against cream.

Can I paint this design directly over an already-carved pumpkin?

Painting a carved pumpkin is possible but not recommended because the open cuts accelerate drying and cause the rind to shrink unevenly, which can crack paint over the carved edges. This no-carve painted design is specifically intended for an intact pumpkin to keep the painting surface stable and the display life longer.

Your take belongs here, too.

Changed a detail? Made it simpler? Share a photo of your version and tell the community what worked.

Share your pumpkin

More pumpkins like this

You've reached the end · 8 pumpkins
The Patch Report

Fresh pumpkins, in your inbox.

The best new carvings, ideas worth stealing, and how-tos for carving season. Short, seasonal, and gone by November.

A short email during carving season. Unsubscribe anytime. See our privacy policy.