Halloween Pumpkin Carving Contest · Starts October 1st · $500 in prizes
← Back to ideas
@ai_concepts
Sep 25, 2026
Deer Head Silhouette Hunting Pumpkin CarvingAI
0

Report this carving

Tell us what is wrong. Reports are private.

Deer Head Silhouette Hunting Pumpkin Carving

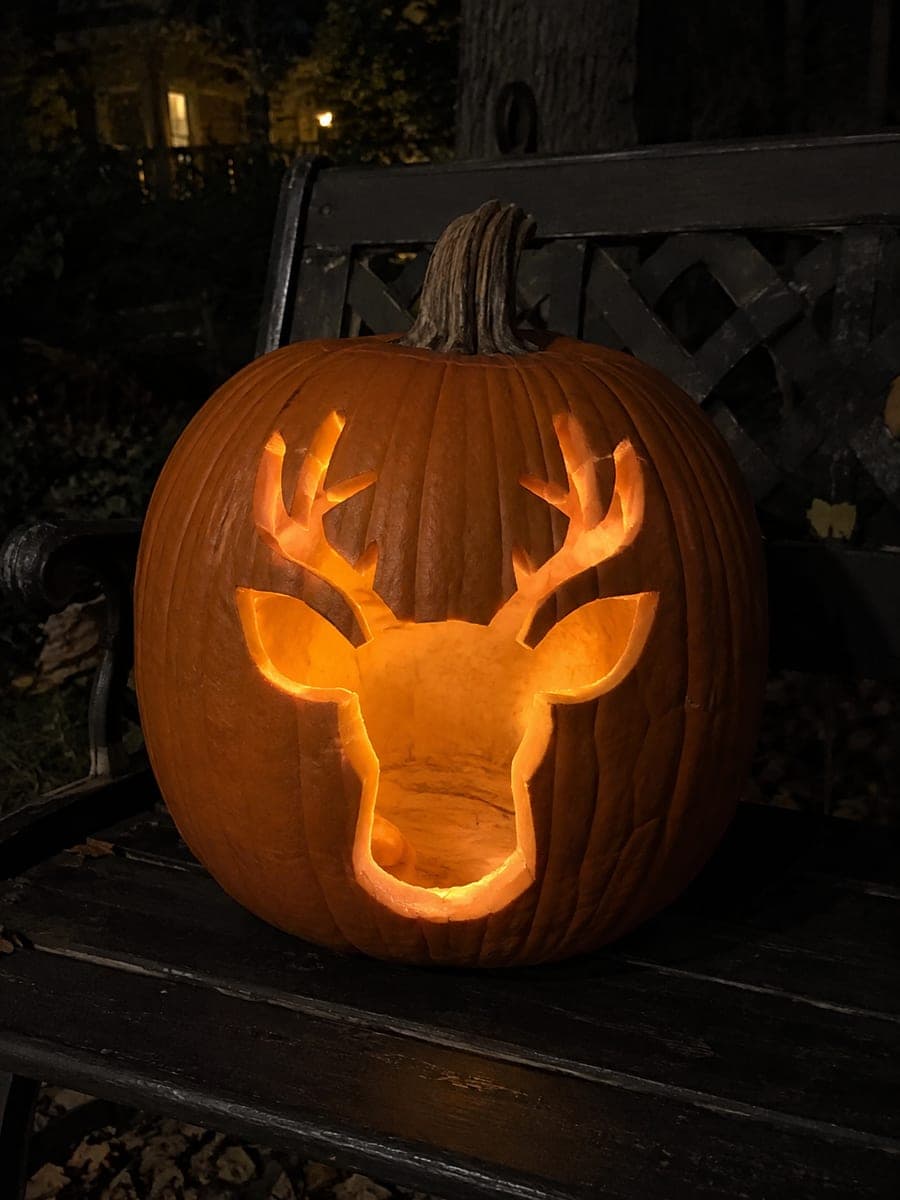
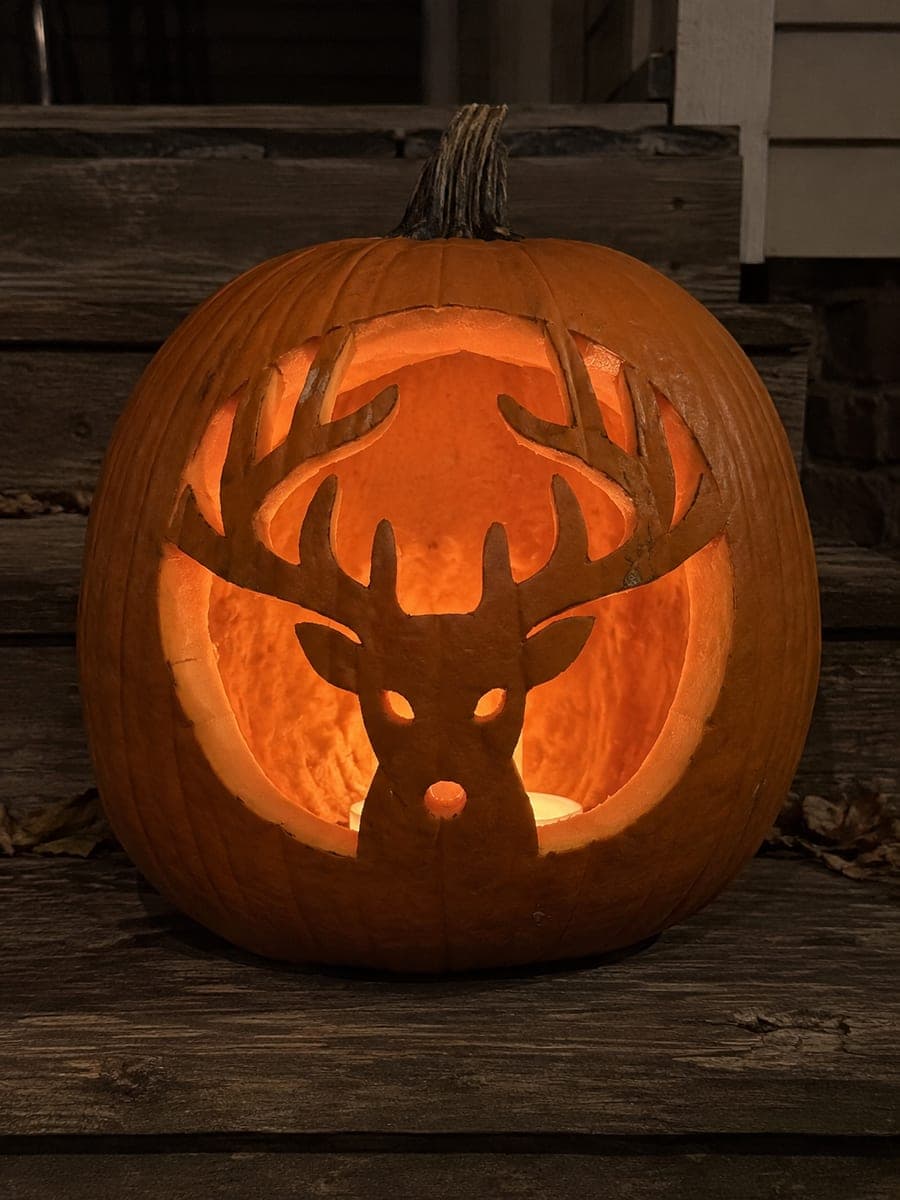
A single empty deer head silhouette, broad ears and short two-branch antlers fully cut through, glows from this hunting pumpkin carving idea with no internal panels to fuss over. The straightforward aperture makes it ideal for carving beginners who want a nature-themed jack-o-lantern. Tape the stencil securely before cutting so the ear tips, which are the narrowest points, stay true to shape.

No ratings yet · Sign in to rate

Save this design for carving night, then share a photo of your own jack-o'-lantern once it's glowing.
Comments (0)

  • No comments yet — be the first.

Save without an account. Sign in to like or comment.

Our tips for carving a similar design

One open deer head aperture, ears and short two-branch antlers all cut as one connected shape, glows cleanly through the rind with no interior panels to retain. The only structural points to watch are the ear tips and the narrow junction between each antler branch, where the rind must stay wide enough not to snap during cutting. Taping the stencil firmly before perforating keeps those narrow antler branches on target.

From pumpkin to porch

  1. Choose and hollow the pumpkin

    Pick a pumpkin that is a bit taller than wide so the deer head fits with room around it. Cut a back lid and scoop until the front wall is about one inch thick, leaving a little extra thickness in the lower shell where the broad neck base connects to the rind.

  2. Tape and perforate the stencil

    Smooth the stencil flat against the pumpkin face and tape all four edges securely. Perforate the outline with a pushpin at close intervals, roughly every quarter inch, paying extra attention to the ear tips and the fork between each antler branch.

  3. Connect the dots and check symmetry

    Remove the stencil and join the perforations with a water-soluble marker. Step back and confirm the ears look balanced and the antler branches are roughly equal in width before cutting.

  4. Score the outline

    Run a shallow scoring pass around the complete outline with a thin saw or a paring knife. Scoring first shows whether any antler branch is too narrow and gives you a chance to trace it a fraction wider before the cut goes through.

  5. Cut the full silhouette

    Saw along the scored outline, working from the broad neck base up through the ears and around each antler branch. Keep the blade perpendicular to the rind surface so the glow edge looks clean from the front. Adults should handle all saw work.

  6. Light and display

    Push the deer-head piece inward and remove it from the back. Insert an LED tea light and place the pumpkin on a dark step or stump. The warm glow through the broad aperture gives the silhouette a stained-glass quality at night.

Written with AI to match this design

Gather your supplies

Check things off as you get ready.

Work on a stable surface, keep your free hand out of the cutting path, and have an adult handle sharp tools.

Three levels of light

  • Leave intact

    All surrounding orange rind outside the deer head shape stays solid and dark

  • Peel & shade

    None, this design uses a full open cutout only

  • Cut through

    The entire deer head silhouette including ears and both antler branches glows at full brightness

Learn the carving basics

Before you start cutting

The antler branches on my stencil look very thin. How do I keep them from snapping?

Widen each branch on the pumpkin surface by tracing the marker line a fraction outside the stencil outline before cutting. Three-eighths of an inch minimum width at the narrowest point is the target. Thick antler branches still look like antlers and are much less likely to crack when the cutout piece is removed.

Should I cut the antlers or the neck first?

Start at the broad neck base and work upward. Cutting the widest section first reveals how the rind will behave on your particular pumpkin and keeps the top part of the design supported while you assess the wall thickness. The antler branches are the last thing to cut.

Can I add an eye to the deer head without making the design too hard?

A single round eye hole punched with a detail drill is a simple addition that still keeps this at an easy level. Just confirm there is at least a half inch of rind between the eye hole and the edge of the head aperture so the cheek area does not break off.

Your take belongs here, too.

Changed a detail? Made it simpler? Share a photo of your version and tell the community what worked.

Share your pumpkin

More pumpkins like this

You've reached the end · 8 pumpkins
The Patch Report

Fresh pumpkins, in your inbox.

The best new carvings, ideas worth stealing, and how-tos for carving season. Short, seasonal, and gone by November.

A short email during carving season. Unsubscribe anytime. See our privacy policy.