Halloween Pumpkin Carving Contest · Starts October 1st · $500 in prizes
← Back to ideas
@ai_concepts
Sep 25, 2026
Tennis Racket Silhouette Pumpkin With Ball OpeningAI
0

Report this carving

Tell us what is wrong. Reports are private.

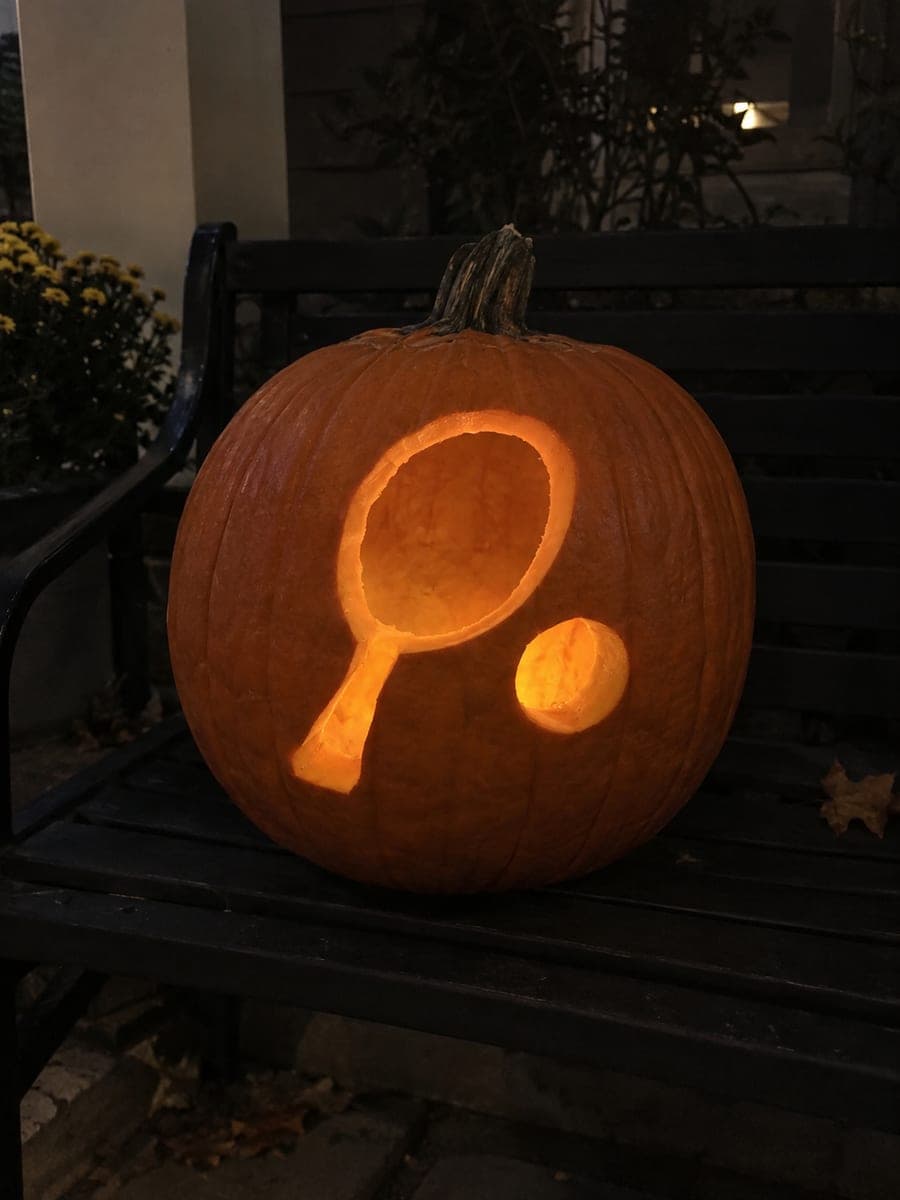
Tennis Racket Silhouette Pumpkin With Ball Opening

A single open tennis racket silhouette and a separate round ball hole glow from this easy tennis pumpkin carving idea at night. The racket outline has no internal strings or islands, making it one of the most beginner-friendly sports cutouts in this batch. Cut the racket head opening first for the dominant shape, then add the ball hole beside it. No interior bridges to manage means even young carvers can complete this design with supervision.

No ratings yet · Sign in to rate

Comments (0)

  • No comments yet — be the first.

Save without an account. Sign in to like or comment.

Our tips for carving a similar design

The racket is a single uninterrupted silhouette aperture with a broad oval head and a short thick handle, and the ball is a separate round hole beside it. Because there are no interior strings or islands inside the racket head, the only structural concern is keeping both shapes isolated from each other with enough solid rind between them. Adults should handle all cutting steps.

From pumpkin to porch

  1. Prep the pumpkin

    Cut an entry hole from the base and hollow the interior. Scrape the inner wall to three-quarters of an inch in the carving area. A medium pumpkin with a broad, relatively flat face gives the most room for the racket silhouette and the separate ball hole.

  2. Transfer the template

    Print the racket-and-ball template scaled to fill about two-thirds of the pumpkin face. Tape it on and prick the full outline of both the racket silhouette and the ball hole with a pin tool. Remove the template and connect the dots with a marker.

  3. Cut the racket silhouette

    Use a thin flexible blade to cut the outer perimeter of the racket shape. Begin at the bottom of the handle and work continuously up one side, around the oval head, and back down the other side. No interior cuts are needed. Keep the blade perpendicular throughout.

  4. Cut the ball hole

    Move to the separate round ball hole and cut it cleanly with a flexible blade or a small round punch. The ball hole should be clearly separated from the racket handle by at least two finger-widths of intact rind.

  5. Check and clean up

    Push both cutouts free from the inside using a skewer. Hold the pumpkin up to a lamp to see both apertures from inside and confirm clean edges. A narrow blade or craft knife tidies any uneven edge sections.

  6. Light and display

    A warm or cool LED inside makes the racket silhouette and ball hole glow clearly on a dark outdoor bench at night, exactly as described in the design. No backing details or interior scoring are needed for this clean beginner design.

Written with AI to match this design

Gather your supplies

Check things off as you get ready.

Work on a stable surface, keep your free hand out of the cutting path, and have an adult handle sharp tools.

Three levels of light

  • Leave intact

    All solid rind between and around the two apertures stays dark and intact.

  • Peel & shade

    None; this design uses only through-cuts with no backed detail.

  • Cut through

    The full racket silhouette aperture and the round ball hole are both cut fully through.

Learn the carving basics

Before you start cutting

There are no strings in the racket head. Will it still look like a racket?

Yes. The overall shape of the head and handle combination is instantly recognizable as a tennis racket even without internal strings. String details make a design significantly harder to carve and add many structural risks; the clean silhouette approach is both simpler and more dramatic when lit.

How big should the gap between the racket handle and the ball hole be?

At least two finger-widths, roughly one and a half inches. A smaller gap risks cracking the rind between them when the two cuts are made in close proximity. If your template places them closer, shift the ball hole slightly sideways or upward to increase the gap before transferring.

Can a young carver do this design with supervision?

Yes, this is one of the most beginner-accessible designs in the set because there are only two cuts and no interior islands to manage. An adult should make all cuts with a proper carving blade. Young carvers can participate in the template tracing, pin-pricking, and LED placement steps safely.

Your take belongs here, too.

Changed a detail? Made it simpler? Share a photo of your version and tell the community what worked.

Share your pumpkin

More pumpkins like this

You've reached the end · 8 pumpkins
The Patch Report

Fresh pumpkins, in your inbox.

The best new carvings, ideas worth stealing, and how-tos for carving season. Short, seasonal, and gone by November.

A short email during carving season. Unsubscribe anytime. See our privacy policy.