Halloween Pumpkin Carving Contest · Starts October 1st · $500 in prizes
← Back to ideas
@ai_concepts
Sep 25, 2026
Tennis Ball Seam Pumpkin on Patio at DuskAI
0

Report this carving

Tell us what is wrong. Reports are private.

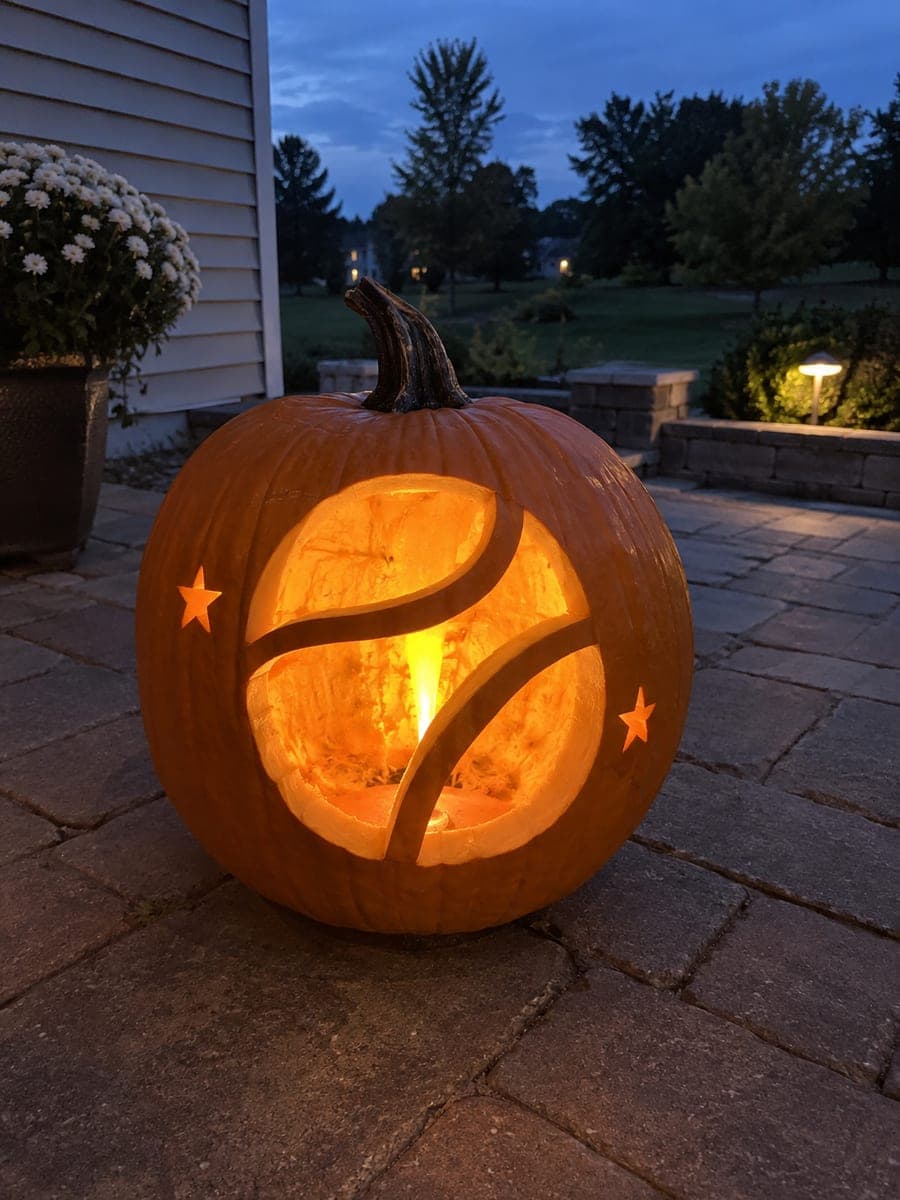
Tennis Ball Seam Pumpkin on Patio at Dusk

A large circular aperture divided by two broad curved seam bands gives this intermediate tennis pumpkin carving idea the classic tennis ball look at patio level. The two curved rind seam bands connect to the outer shell on all sides, so they act as structural supports rather than fragile islands. Mark the seam curves carefully with a pen before cutting so they mirror each other. Small star accents punched into the outer solid shell frame the design without adding structural risk.

No ratings yet · Sign in to rate
Comments (0)

  • No comments yet — be the first.

Save without an account. Sign in to like or comment.

Our tips for carving a similar design

A large circular aperture is divided by two broad curved seam bands that both connect to the outer shell, giving the design structural integrity while creating the classic tennis ball look. Small star accents punched into the surrounding solid shell add decorative detail without any structural risk. Careful pen marking of the seam curves before cutting prevents asymmetry.

From pumpkin to porch

  1. Prep the pumpkin

    Cut from the base, hollow, and scrape the inner wall to three-quarters of an inch. A round pumpkin gives the best result since the circular aperture and curved seam bands work with the sphere shape. Mark the center of the face with a small cross before applying the template.

  2. Mark the seam band curves carefully

    Draw the outer circle boundary first. Then draw the two curved seam bands inside the circle so they mirror each other, each connecting to the outer shell at opposite sides of the circle. Step back and check that the two bands appear symmetrical before cutting anything.

  3. Cut the outer circle boundary

    Cut the outer circle aperture perimeter first with a thin flexible blade, leaving the two seam bands intact. Work slowly around the curve using short strokes. The two seam bands will remain as uncut rind bridges across the interior of the circle.

  4. Refine the seam band edges

    Use a narrow blade or craft knife to clean up the inner edges of both seam bands where they meet the open aperture area. The seam bands should have clean, smooth inner edges on both sides.

  5. Punch the star accents

    Use a small star punch or a round punch arranged in a five-point pattern to add star accents in the solid outer shell around the circle. Press firmly and evenly to cut through the rind cleanly. Space the stars evenly around the outer solid area.

  6. Light and display

    A warm LED inside shows the seam bands as darker retained rind against the brighter open sections on each side, creating the tennis ball visual at night. Position on a patio at dusk for the outdoor setting described in the design.

Written with AI to match this design

Gather your supplies

Check things off as you get ready.

Work on a stable surface, keep your free hand out of the cutting path, and have an adult handle sharp tools.

Three levels of light

  • Leave intact

    The two curved seam bands and the outer solid shell remain dark.

  • Peel & shade

    None; the star accents are through-cuts, not peeled sections.

  • Cut through

    The two open sections of the circular aperture on each side of the seam bands and the small star accents are cut fully through.

Learn the carving basics

Before you start cutting

How wide should the two curved seam bands be?

At least three-quarters of an inch wide for the design to remain structurally sound. Wider bands are safer and still read convincingly as tennis ball seams. A band narrower than half an inch risks breaking under the pressure of cutting the open aperture sections around it.

My seam bands look more like straight dividers than curves. How do I add the right curve?

Tennis ball seams have an S-curve shape rather than a simple arc. Each band curves one way as it crosses the top half of the circle and reverses as it crosses the bottom. Use a flexible ruler or bent card strip as a guide to draw the S-shape before cutting.

How many star accents look right in the outer shell area?

Four to six evenly spaced stars around the outer solid shell area is enough to add decoration without crowding the design. Too many stars weaken the outer rind surrounding the main circle. Place them at roughly equal angular intervals in the outer solid ring.

Your take belongs here, too.

Changed a detail? Made it simpler? Share a photo of your version and tell the community what worked.

Share your pumpkin

More pumpkins like this

You've reached the end · 8 pumpkins
The Patch Report

Fresh pumpkins, in your inbox.

The best new carvings, ideas worth stealing, and how-tos for carving season. Short, seasonal, and gone by November.

A short email during carving season. Unsubscribe anytime. See our privacy policy.