Halloween Pumpkin Carving Contest · Starts October 1st · $500 in prizes
← Back to ideas
@ai_concepts
Sep 9, 2026
Friendly Panda Face Glowing PumpkinAI
0

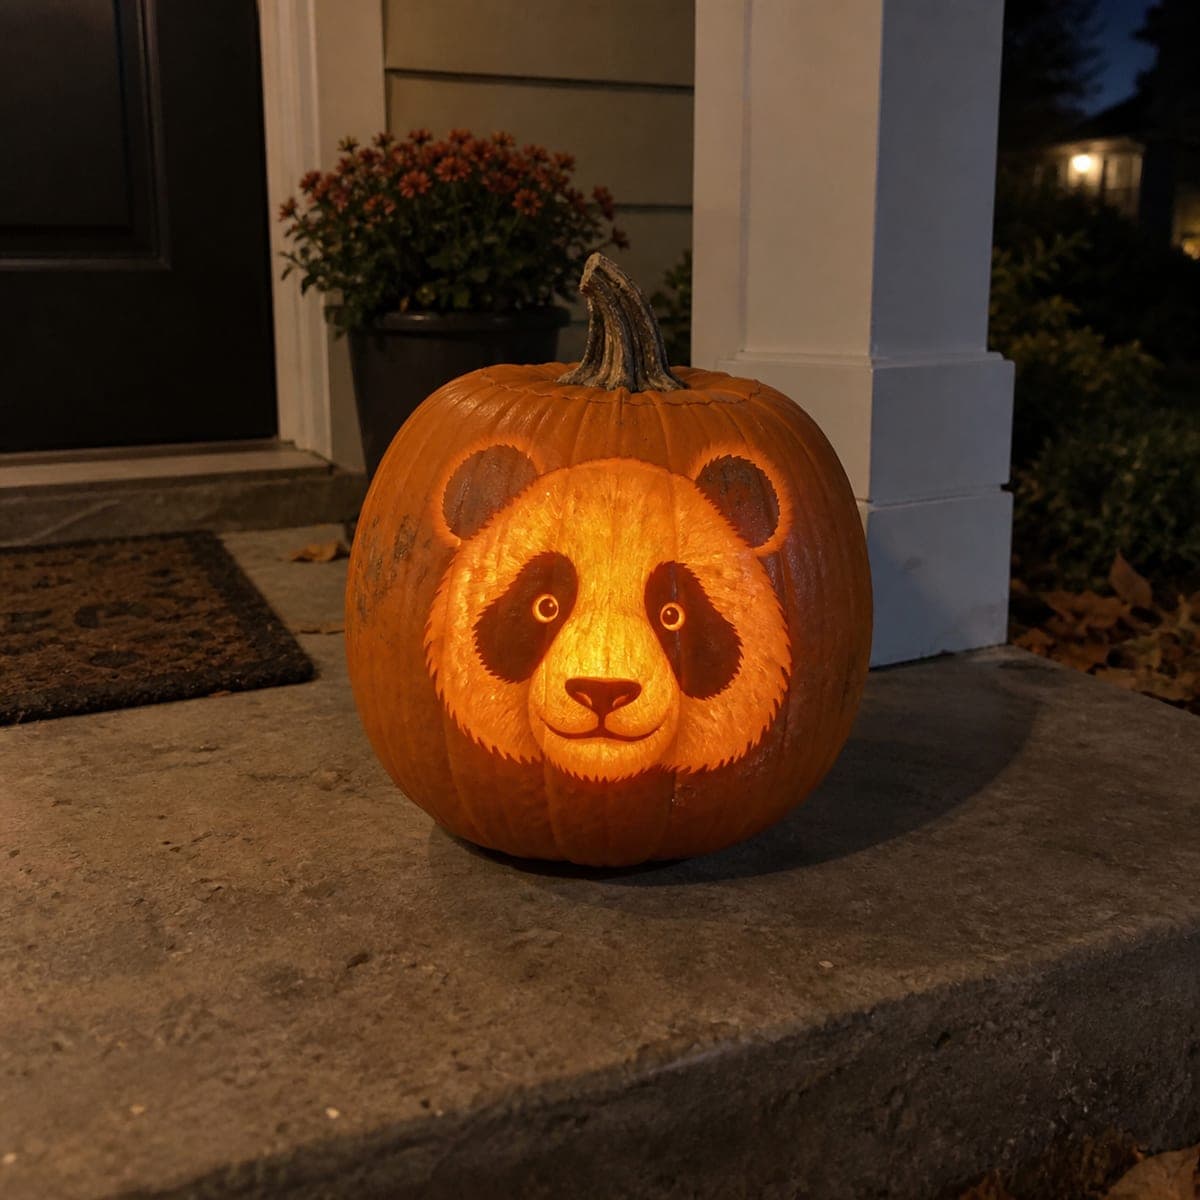
Friendly Panda Face Glowing Pumpkin

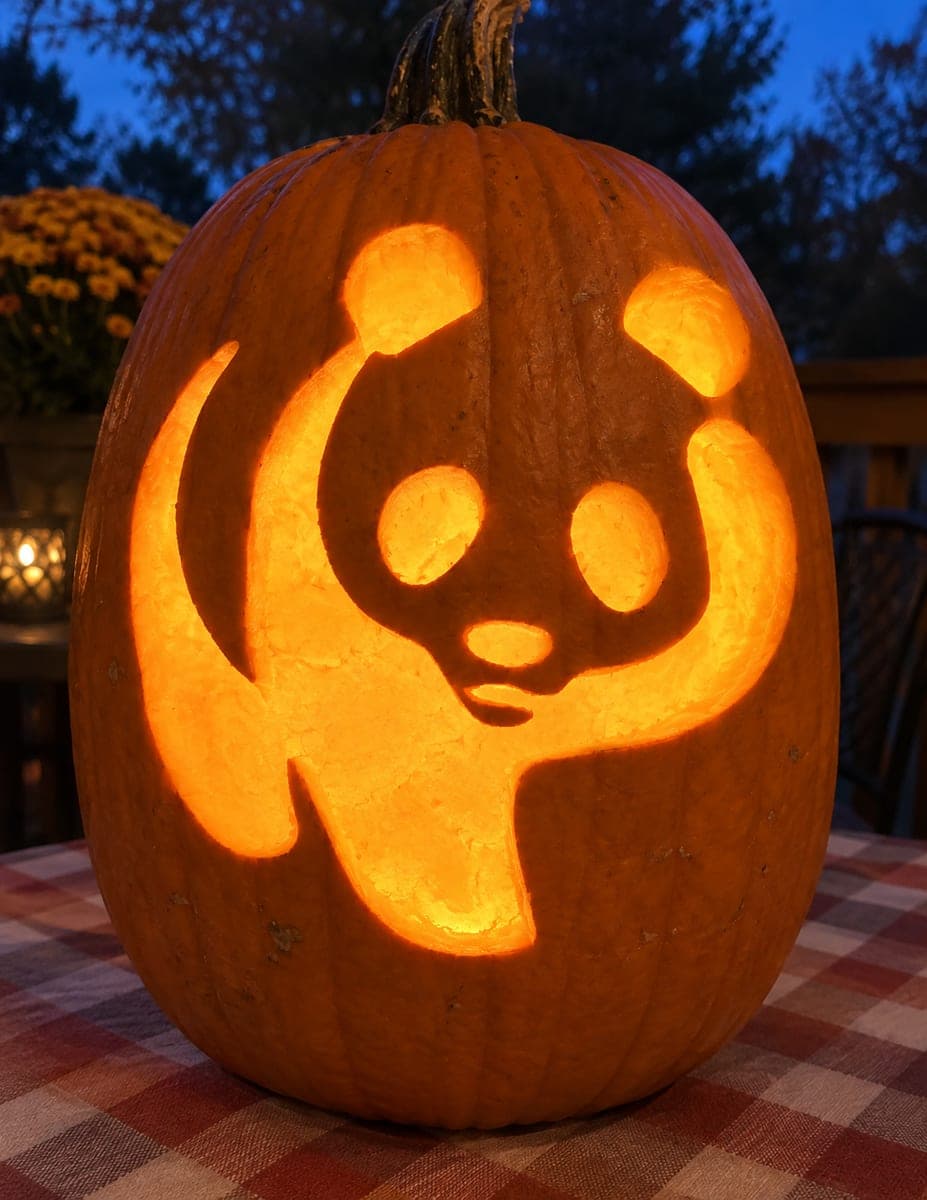
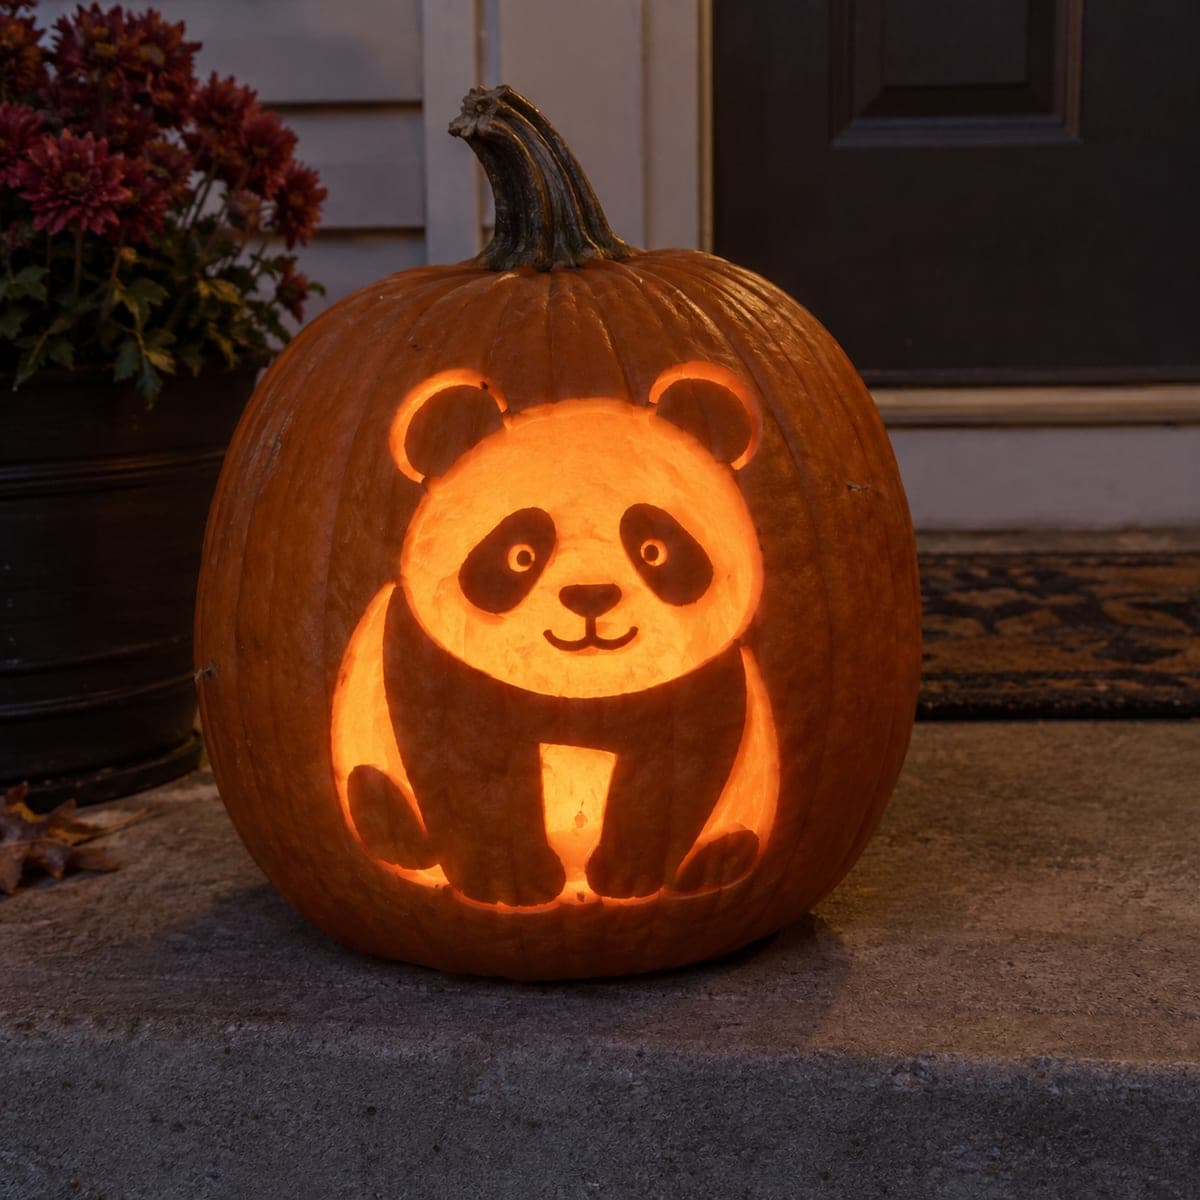
A gentle panda face fills this pumpkin, its pale muzzle glowing while the eye patches, ears, and nose stay dark in untouched skin. The trick is reversal: you carve away everything except the black markings, letting the pumpkin's own rind play the panda's dark fur. Outline the ears and eye patches carefully first, because once the surrounding area is peeled there is no going back. Kids adore spotting this one glowing on the front step.

This is an AI-generated concept image: a realistic, carvable design idea rather than a photo of a finished carve. AI concepts are always labeled and sit out the leaderboard and the contest.

No ratings yet · Sign in to rate
Comments (0)

  • No comments yet — be the first.

Save without an account. Sign in to like or comment.

Our tips for carving a similar design

The whole design leans on reversal: instead of carving the panda's black markings, you carve away everything around them so the untouched rind reads as dark fur. Plan the muzzle as your bright glowing zone, keep the eye patches, ears, and nose as solid dark skin, and use peeled shading to soften the edges of the fur. Map every marking with a marker before you touch a blade, because peeled areas cannot be undone.

Written by PumpkinCarvingIdeas.com, inspired by the image above. These are our suggestions, not instructions from the uploader. This approach to the AI concept has not been tested on a real pumpkin.

From pumpkin to porch

  1. Pick a round pumpkin and prep it

    Choose a smooth, round pumpkin with a broad flat-ish face so the panda has room to spread out. Cut a lid from the bottom or back rather than the top so the stem stays intact for the ears area. Scrape the inside wall behind the face down to about one inch thick so light passes through the peeled and cut zones evenly. A thinner wall glows more, so take your time cleaning out the pulp.

  2. Transfer the panda map

    Tape your stencil over the face and poke the outlines of the two ears, both eye patches, the nose, and the muzzle border. Connect the dots with a washable marker so you can clearly see which shapes stay dark and which get removed. Double check the eye patches are symmetrical, since crooked patches change the whole expression. Mark tiny eye dots inside the patches so you remember to leave those bright.

  3. Outline the dark markings first

    With a fine detail blade, score just around the outside of the ears, eye patches, and nose without removing anything yet. These scored lines protect your dark shapes once you start peeling the surrounding rind. Cut slowly and keep the blade angled straight in so the borders stay crisp. This is the step the whole reversal depends on, so do not rush it.

  4. Peel the fur and face for a soft glow

    Using a shading or gouge tool, skin away the outer rind everywhere except the marked dark shapes, exposing the pale flesh underneath. Peel the muzzle and cheeks a little deeper so they glow brightest, and leave a lightly peeled halo around the black patches to soften the fur transition. Keep the ears, eye patches, and nose as untouched skin so they stay dark against the glow. Work from the center outward and check the balance often.

  5. Add the eye sparkle and clean details

    Cut two small full openings for the eye highlights inside the dark patches so pinpoints of light give the panda a friendly, alert look. Refine the muzzle edges and add short peeled strokes at the fur line for texture. Save any larger openings for last so the face wall stays strong while you work. Wipe away marker lines with a damp cloth when the shaping is done.

  6. Light it and photograph on the step

    Drop in a battery LED light, warm white or amber, and set the pumpkin on the front step at dusk. Rotate it until the muzzle glows evenly and the eye dots catch the light. If the face looks too dark, peel a little more flesh from the cheeks to brighten it. Snap your photo while there is still a hint of blue in the sky for the coziest look.

Gather your supplies

Check things off as you get ready.

Work on a stable surface, keep your free hand out of the cutting path, and have an adult handle sharp tools.

Three levels of light

  • Leave intact

    Ears, both eye patches, and the nose stay as untouched dark skin for the panda's black fur.

  • Peel & shade

    The muzzle, cheeks, and a soft halo around the patches get skin-peeled for a warm mid glow.

  • Cut through

    Two small eye highlight dots are cut all the way through for the brightest sparkle.

Learn the carving basics

Before you start cutting

How do I keep the eye patches from looking crooked?

Measure and mark both patches before any cutting, using the pumpkin's center ridge as a reference line. Score their outlines first so the shapes are locked in before you peel around them. If one looks slightly off, you can gently peel a touch more on the lighter side to rebalance, but you cannot add skin back.

This is a concept image, so can a real pumpkin actually glow like this?

Yes, the effect comes from three surface levels rather than big cutouts. Thinning the inner wall and deeply peeling the muzzle lets plenty of LED light through the pale flesh. The dark markings simply stay as full-thickness rind, so no fragile thin pieces are needed.

What if my peeled muzzle is not bright enough?

Brightness depends on how thin the flesh is, so go back and peel the muzzle and cheeks a little deeper. You can also scrape the inside wall behind those areas thinner from within. A warmer, stronger LED helps too, and moving it closer to the face wall boosts the glow.

Your take belongs here, too.

Changed a detail? Made it simpler? Share a photo of your version and tell the community what worked.

Share your pumpkin

More pumpkins like this

You've reached the end · 8 pumpkins
The Patch Report

Fresh pumpkins, in your inbox.

The best new carvings, ideas worth stealing, and how-tos for carving season. Short, seasonal, and gone by November.

A short email during carving season. Unsubscribe anytime. See our privacy policy.