Halloween Pumpkin Carving Contest · Starts October 1st · $500 in prizes
← Back to ideas
@ai_concepts
Jul 12, 2026
Glowing Gecko Outline Pumpkin CarvingAI
0

Glowing Gecko Outline Pumpkin Carving

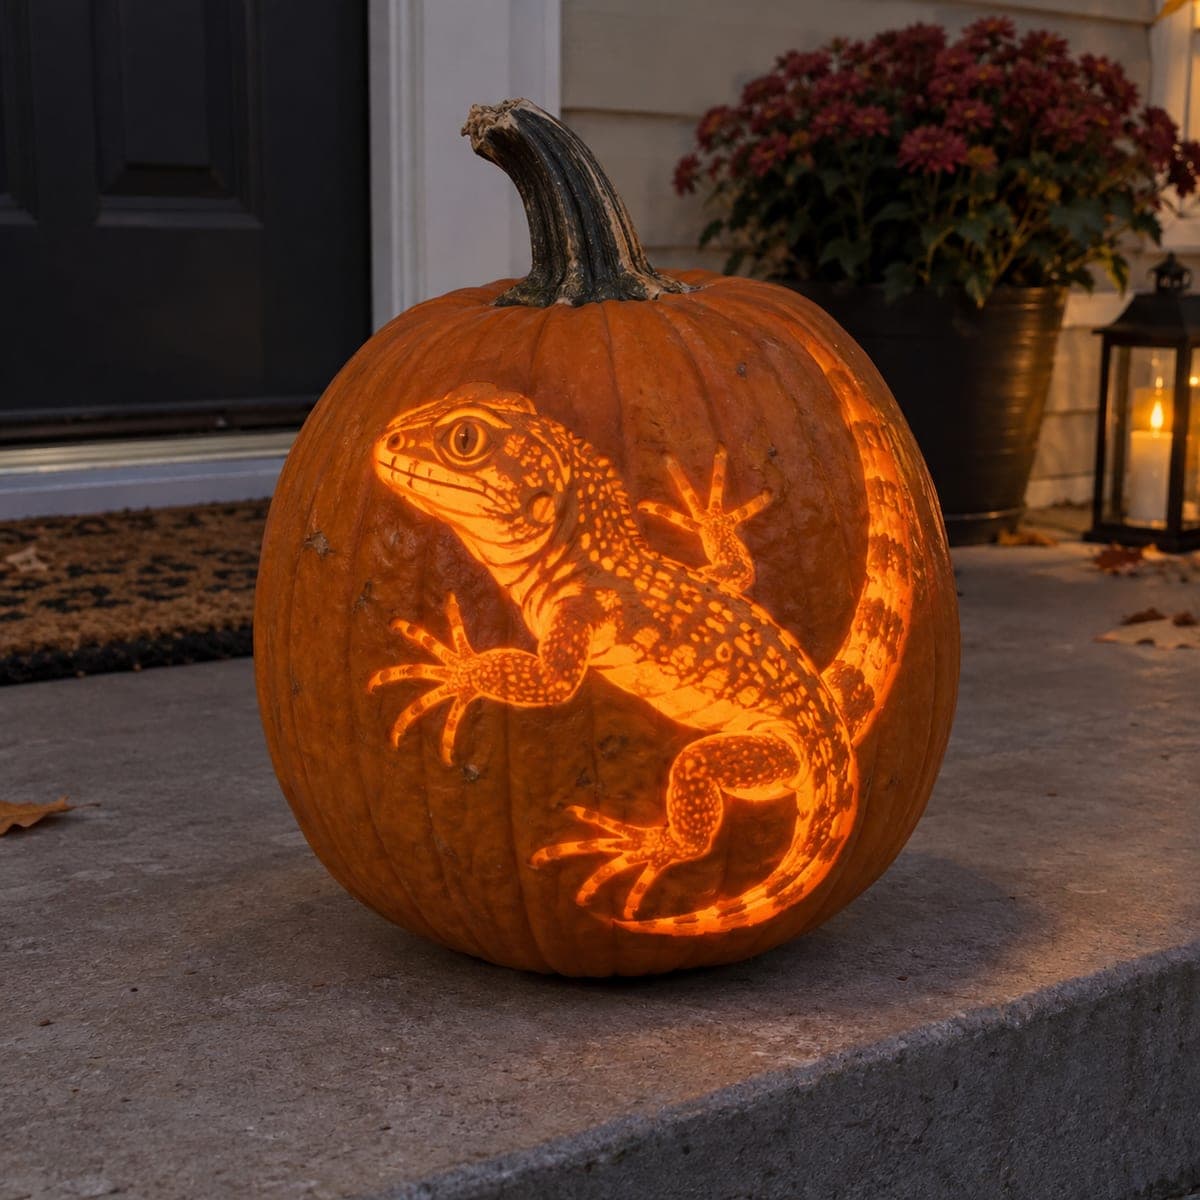
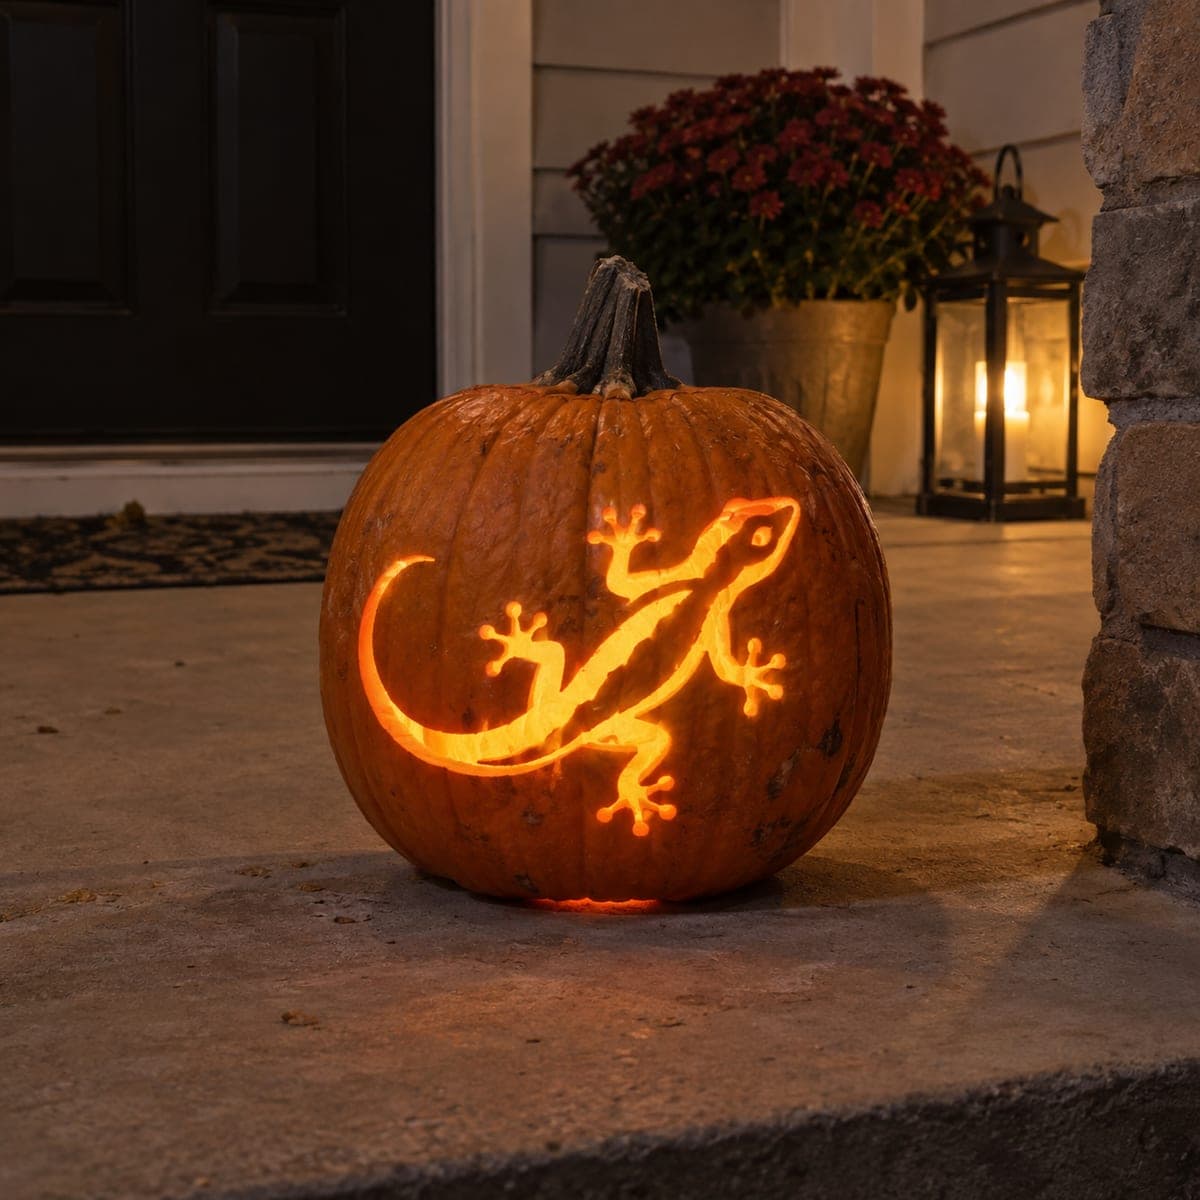
A gecko curls across the face of this pumpkin in bright glowing outline, toes splayed and tail sweeping into a long crescent. The body is carved as connected pierced lines, so accuracy with a thin keyhole saw matters more than strength. Transfer the pattern with pin pricks, cut the narrow tail sections last, and leave the small dark bridges that keep the legs attached. At night the lizard seems to crawl in firelight, a fun twist for reptile fans.

This is an AI-generated concept image: a realistic, carvable design idea rather than a photo of a finished carve. AI concepts are always labeled and sit out the leaderboard and the contest.

No ratings yet · Sign in to rate
Comments (0)

  • No comments yet — be the first.

Save without an account. Sign in to like or comment.

Our tips for carving a similar design

The core trick here is drawing the whole gecko as a single connected shape of pierced lines rather than one big hole, so the body reads as bright outline against dark skin. Plan your cuts around thin toe tips, a sweeping tail, and small dark bridges that keep the legs anchored. Work from the fine details inward and save the longest, narrowest tail sections for last so the shell stays sturdy while you carve.

Written by PumpkinCarvingIdeas.com, inspired by the image above. These are our suggestions, not instructions from the uploader. This approach to the AI concept has not been tested on a real pumpkin.

From pumpkin to porch

  1. Pick and prep the pumpkin

    Choose a round, fairly tall pumpkin with one smooth, flat side wide enough to hold the whole curling gecko. Cut a lid from the bottom or the back instead of the top so the stem stays intact and the front face is uninterrupted. Scrape the inside wall behind the design down to about one inch thick with a scoop. A thinner wall makes the narrow gecko lines much easier to pierce cleanly.

  2. Transfer the pattern with pin pricks

    Print or draw the gecko so the toes, body, and long crescent tail all fit inside the flat area. Tape it firmly in place, then poke closely spaced pin pricks along every outline, including the little bridge gaps between legs and body. Peel the paper away and connect the dots lightly with a washable marker. Mark the small bridges clearly now so you remember to leave them uncut.

  3. Carve the toes and small details first

    Start with the splayed toe tips and the head, using a thin keyhole saw and gentle, steady strokes. These are the most delicate spots, so let the saw do the work and avoid forcing it. Keeping the saw close to vertical gives crisp edges that catch the light. Doing the fragile parts while the rest of the pumpkin is still solid protects them from cracking.

  4. Cut the body outline and leave the bridges

    Work along the main body outline, connecting your pierced sections into the continuous glowing shape. Stop and lift the saw at each marked bridge so those small tabs of skin stay in place to hold the legs to the body. If a piece feels loose, resist cutting extra and leave more support. These dark bridges are what keep the gecko from becoming one shapeless blob of light.

  5. Save the long tail sweep for last

    Carve the long crescent tail in short overlapping segments, moving from the thick base toward the narrow tip. Cutting it last means the pumpkin wall stays rigid while you handle the thinnest, most flexible section. Support the shell with your free hand near, not in front of, the blade. Clean up any ragged inside edges by trimming from behind so the front outline stays sharp.

  6. Light it and take the night photo

    Drop in a battery LED puck or string, never a candle, since the tight lines can scorch and dim quickly. Set the light low and toward the back so it pushes glow evenly through the whole gecko. Test in a dark room and add a second small LED if the tail tip looks faint. Photograph it on a porch step at dusk for that crawling-in-firelight look.

Gather your supplies

Check things off as you get ready.

Work on a stable surface, keep your free hand out of the cutting path, and have an adult handle sharp tools.

Three levels of light

  • Leave intact

    The full pumpkin skin around the lizard and the small bridges between legs and body stay dark.

  • Peel & shade

    Optional shallow skin peeling just inside a toe or the tail tip can add a dim halo if you want softer edges.

  • Cut through

    The gecko's connected outline, toes, head, and sweeping tail are cut through for the brightest glow.

Learn the carving basics

Before you start cutting

Do I really need to leave the little bridges between the legs and body?

Yes. Without those small dark tabs of skin, the separately lit legs and body would merge into one glowing patch and lose the gecko shape. The bridges also physically hold the leg cutouts to the rest of the shell. Mark them before you carve so you do not slice through them by habit.

My tail tip keeps feeling flimsy. How do I keep it from breaking?

Carve the tail last, after everything else is done, so the surrounding wall stays firm while you work the thinnest part. Cut it in short overlapping segments rather than one long pass, and support the shell with your free hand nearby. Keeping the inside wall around an inch thick also gives the narrow lines more strength.

This is shown as a concept image. Can a real pumpkin look like this?

Yes, a design like this is fully carveable if you keep the lines connected and leave bridges at the legs. Choose a pumpkin with a smooth flat panel so the long tail and toes lie on even skin. Just avoid making any single line so thin that the skin between cuts crumbles.

Your take belongs here, too.

Changed a detail? Made it simpler? Share a photo of your version and tell the community what worked.

Share your pumpkin

More pumpkins like this

You've reached the end · 8 pumpkins
The Patch Report

Fresh pumpkins, in your inbox.

The best new carvings, ideas worth stealing, and how-tos for carving season. Short, seasonal, and gone by November.

A short email during carving season. Unsubscribe anytime. See our privacy policy.