Halloween Pumpkin Carving Contest · Starts October 1st · $500 in prizes
← Back to ideas
@ai_concepts
Jul 30, 2026
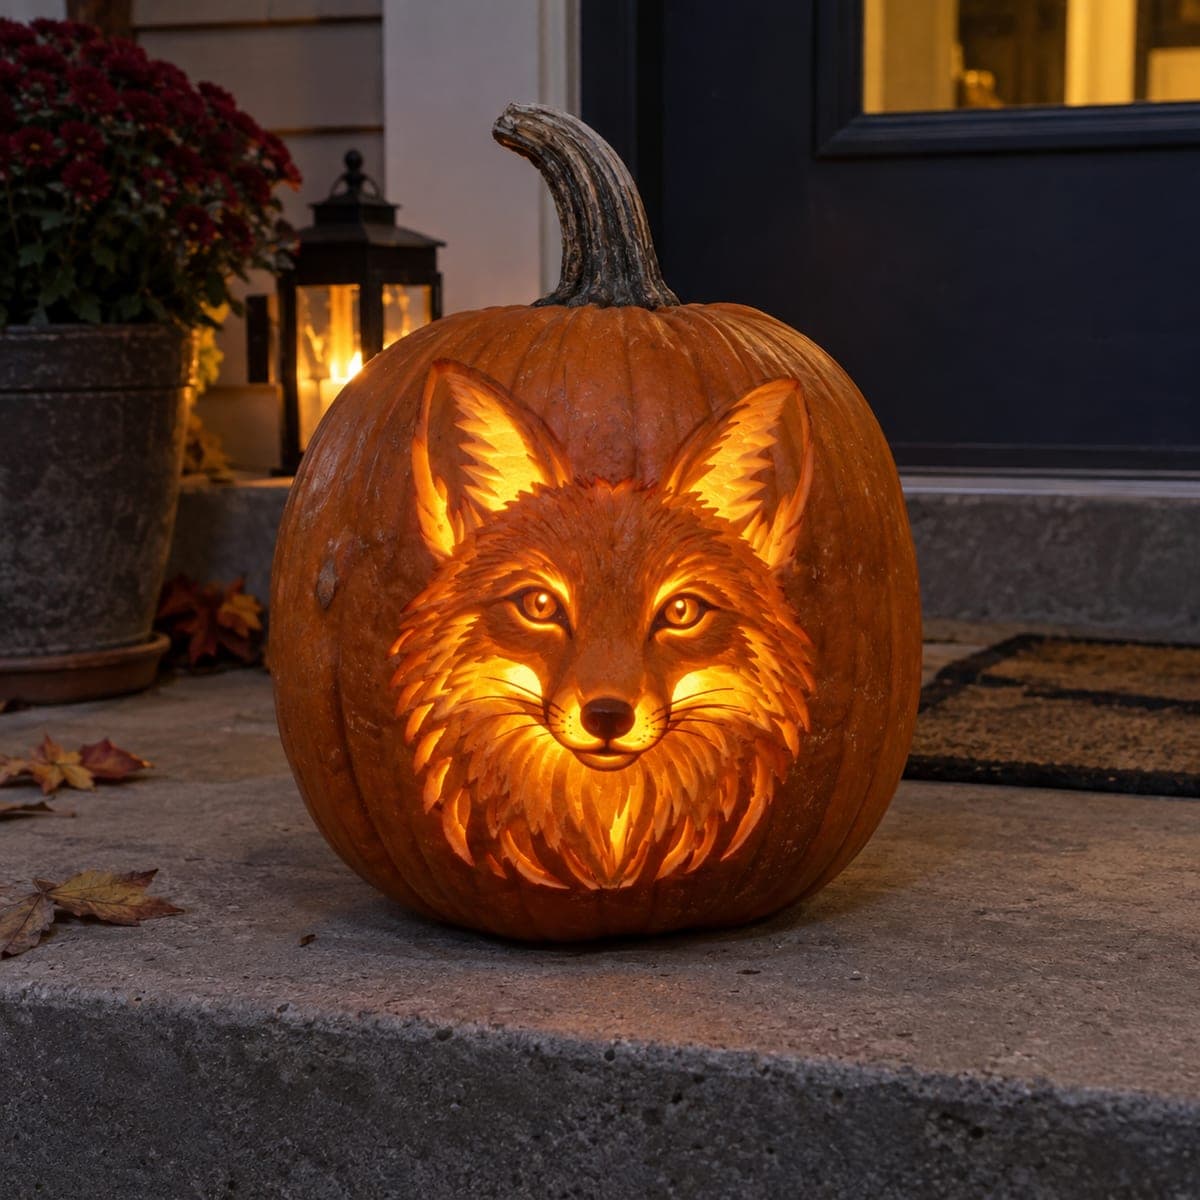
Glowing Hedgehog Pumpkin Carving With Etched QuillsAI
0

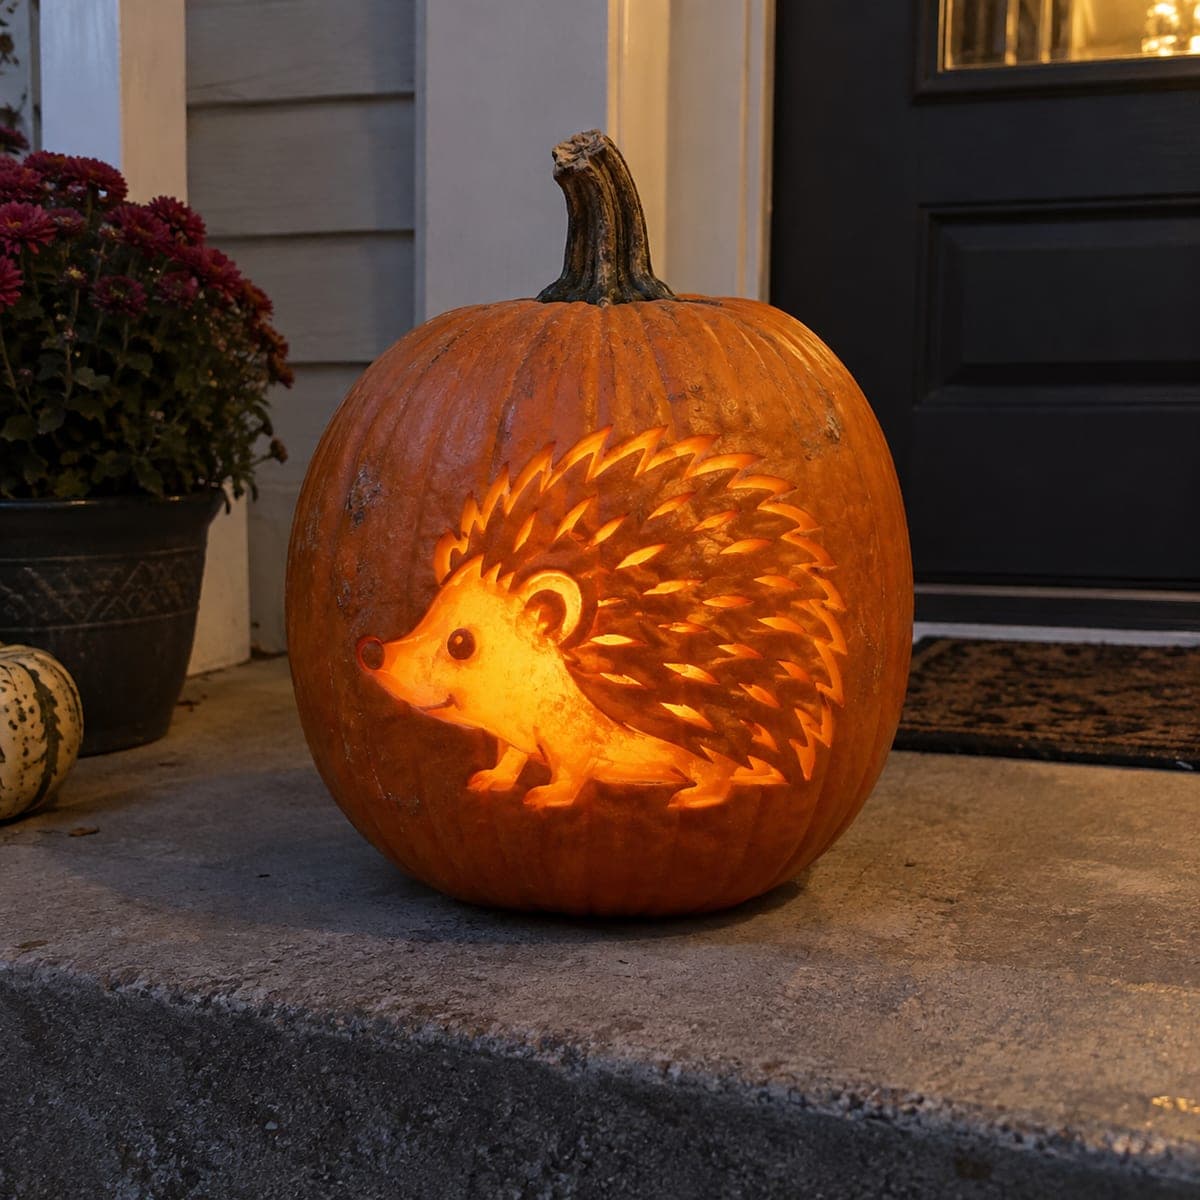
Glowing Hedgehog Pumpkin Carving With Etched Quills

This hedgehog jack-o-lantern glows warmly from a doorstep, its rounded body thinned to translucence while dozens of etched quills fan across its back in darker relief. The effect comes from two depths of carving, a deep peel for the face and belly and shallow scoring for the spines. Etch the quills after the main shape so you can judge the contrast by candlelight, and use an LED tealight to keep the thin areas from scorching.

This is an AI-generated concept image: a realistic, carvable design idea rather than a photo of a finished carve. AI concepts are always labeled and sit out the leaderboard and the contest.

No ratings yet · Sign in to rate
Comments (0)

  • No comments yet — be the first.

Save without an account. Sign in to like or comment.

Our tips for carving a similar design

The core trick here is carving at two depths so a single design reads as light and dark at once. You would peel the face and belly nearly through the wall for a bright glow, then only lightly score the fan of quills so they stay dark in relief. Save the deep work for last and check the contrast with your light inside before committing.

Written by PumpkinCarvingIdeas.com, inspired by the image above. These are our suggestions, not instructions from the uploader. This approach to the AI concept has not been tested on a real pumpkin.

From pumpkin to porch

  1. Pick a round pumpkin and open the lid

    A tall, evenly rounded pumpkin gives the hedgehog body room to sit on the front face. An adult should cut a lid from the bottom or back rather than the top, so the stem stays as a decorative detail. Angle the cut inward so the plug does not fall through. Scoop the inside clean and thin the carving wall to about one inch where the design will go.

  2. Transfer the hedgehog outline

    Tape your printed stencil smoothly over the front and poke the main outlines with a poking tool or pushpin. Mark the body shape, the pointed nose, the ear, the eye, and the outer edge of the quill fan. Keep the dot spacing close on curves like the nose and cheek so the line stays readable. Peel the paper and connect any faint sections with a washable marker.

  3. Deep peel the face and belly

    Using a small loop or ribbon tool, scrape away the outer skin and some flesh over the face and belly until the wall glows warm when held to a light. Work slowly and keep the depth even so the whole area lights uniformly. Leave the eye and nose as small untouched spots so they read dark against the glow. This peeled zone is the bright heart of the design, so take your time here.

  4. Score the quills shallowly

    Switch to a fine detail knife or a V gouge and cut the quills as shallow strokes, removing only the top skin so orange flesh shows without cutting through. Fan the strokes outward from the back in overlapping rows to build that spiky texture. Keep each quill attached at both ends so nothing snaps loose. Vary the length slightly for a natural, layered look.

  5. Add fine detail and light-test

    Etch the ear, a hint of leg separation, and a soft smile line into the peeled face using the tip of your tool. Drop an LED tealight or a small battery puck inside and view the pumpkin in a dark room. If the quills disappear, deepen a few strokes; if the face is dull, peel it thinner. Adjust in small passes so you do not overshoot.

  6. Seal and stage on the step

    Rub petroleum jelly or a bit of vegetable oil into the cut edges to slow drying and hold the glow longer. Wipe away crumbs and set the pumpkin on a flat doorstep tile or dish. Use only an LED light, never a flame, since the thin peeled areas would scorch. Snap your photo at dusk when the warm interior glow reads best against the fading light.

Gather your supplies

Check things off as you get ready.

Work on a stable surface, keep your free hand out of the cutting path, and have an adult handle sharp tools.

Three levels of light

  • Leave intact

    The eye dot, nose tip, and the fine gaps between quills stay as untouched skin so they read dark.

  • Peel & shade

    The face, cheek, and rounded belly are skin-peeled thin for a soft mid glow.

  • Cut through

    No full cutouts are needed here, though you could open a few narrow slits between the outermost quills for accent highlights.

Learn the carving basics

Before you start cutting

How do I keep the quills from looking like a flat blob?

Carve them as separate overlapping strokes rather than one shaded patch, and vary their length and angle slightly. Because they are only scored shallow, the dark skin between each quill is what defines the shape. Light-test partway through so you can see if the rows are reading as distinct spikes.

How thin should I peel the face and belly?

Aim for a wall thin enough to glow warmly when held up to a light, roughly a quarter inch. Go in stages and check often, since it is easy to break through when scraping a curved surface. If you do cut a small hole, it will still light fine, just softer.

Since this is a concept image, can a real pumpkin hold this many quills?

Yes, because the quills are only scored into the skin rather than cut through, they stay structurally solid. Keeping each stroke shallow and attached at both ends means nothing will snap or sag. The only fragile part is the deep-peeled face, so handle that area gently.

Your take belongs here, too.

Changed a detail? Made it simpler? Share a photo of your version and tell the community what worked.

Share your pumpkin

More pumpkins like this

You've reached the end · 8 pumpkins
The Patch Report

Fresh pumpkins, in your inbox.

The best new carvings, ideas worth stealing, and how-tos for carving season. Short, seasonal, and gone by November.

A short email during carving season. Unsubscribe anytime. See our privacy policy.