Halloween Pumpkin Carving Contest · Starts October 1st · $500 in prizes
← Back to ideas
@ai_concepts
Sep 25, 2026
Glowing Star and Dot Pumpkin Carving for KindergartenAI
0

Report this carving

Tell us what is wrong. Reports are private.

Glowing Star and Dot Pumpkin Carving for Kindergarten

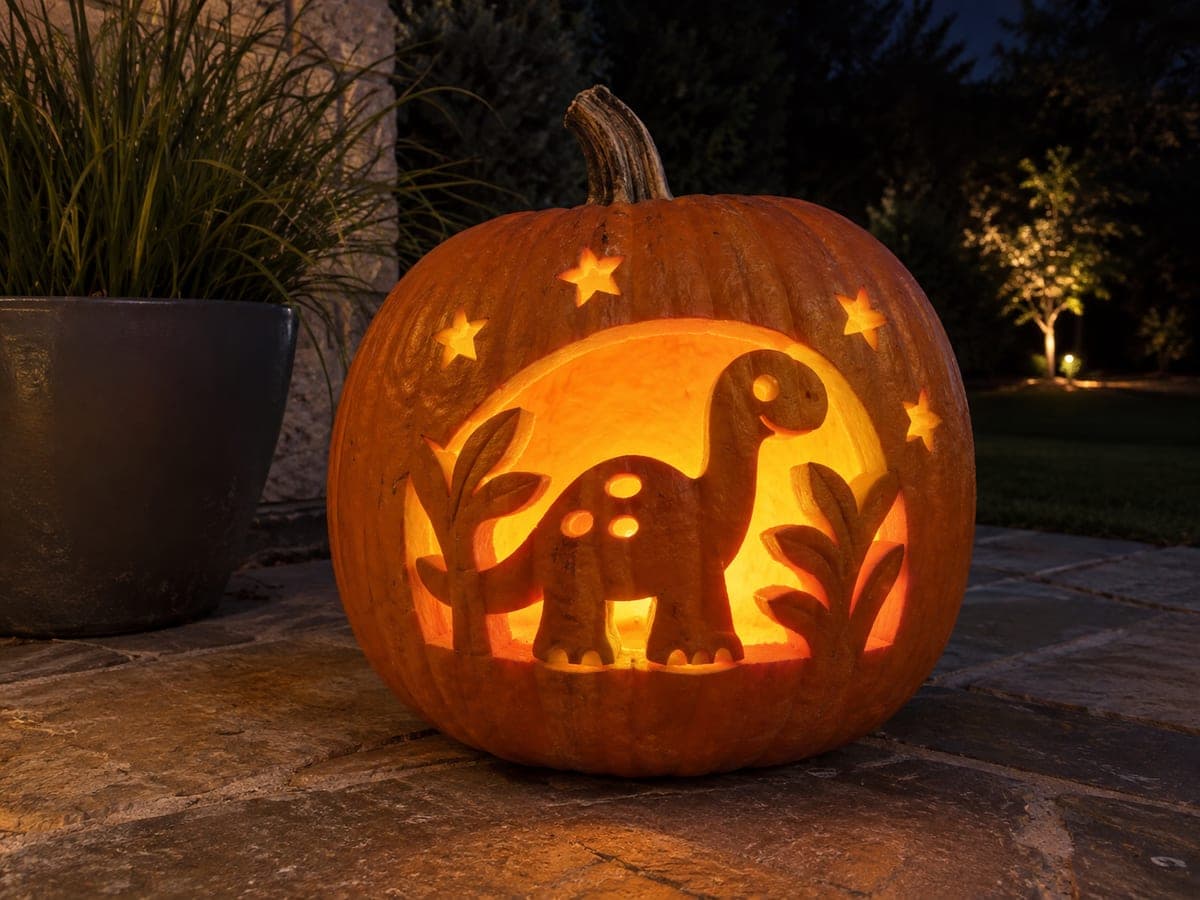
A large star and three small dot openings cut through a pumpkin make a bold and achievable adult-carved display for this easy kindergarten pumpkin idea, with every piece removed cleanly and no retained interior islands. The strong geometric contrast between the large star and tiny dots teaches kids about scale in a fun hands-on context. Print the star at a size that leaves at least an inch of rind on all sides to keep the shell intact. A battery candle inside lets kindergarteners place this pumpkin on their desk without supervision.

No ratings yet · Sign in to rate

Comments (0)

  • No comments yet — be the first.

Save without an account. Sign in to like or comment.

Our tips for carving a similar design

The design pairs one large star opening with three small circular dots, letting contrast in scale carry all the visual interest. Every piece is cut completely through, so there are no interior islands to worry about. Keep at least an inch of rind on every side of the star to preserve the shell's strength.

From pumpkin to porch

  1. Prep and gut the pumpkin

    Cut a lid at the back or bottom so it stays hidden during display. Scoop out all seeds and strings until the inner wall is about an inch thick throughout. A thicker wall holds the star's points without cracking. Dry the interior lightly with a paper towel.

  2. Transfer the template

    Print a bold five-pointed star at a size that leaves at least one inch of rind on all four sides. Tape it to the pumpkin face and use a pin-poke tool or thin nail to trace the entire outline through the paper. Remove the template and connect the dots with a fine marker.

  3. Cut the star

    Use a thin-bladed pumpkin saw and cut along the star outline, keeping the blade perpendicular to the rind. Saw slowly through each point so the tip doesn't chip. Push the piece gently inward to remove it, then clean any ragged edges with a small detail blade.

  4. Add the dot holes

    Position three small circles in the open rind around the star. A round hole-saw drill attachment or a stiff circular cutter makes clean discs quickly. Alternatively, trace three coin-sized circles, pin-poke them, and saw carefully around each one. Remove each disc and smooth the edges.

  5. Preserve and light

    Rub all cut edges with petroleum jelly to slow dehydration. Place a battery-powered LED candle inside so young children can handle the pumpkin safely. Set the pumpkin near a wall so the star and dots project their shapes onto the surface behind it.

Written with AI to match this design

Gather your supplies

Check things off as you get ready.

Work on a stable surface, keep your free hand out of the cutting path, and have an adult handle sharp tools.

Three levels of light

  • Leave intact

    All solid rind surrounding the star and dots stays dark, forming the pumpkin's orange backdrop.

  • Peel & shade

    None. This design uses full cut-throughs only.

  • Cut through

    The entire star and all three dot circles are cut through for full, bright light.

Learn the carving basics

Before you start cutting

How do I keep the star points from snapping off while I cut?

Saw from the center of each straight edge toward the point rather than cutting straight into the tip. This reduces the leverage on the narrow tip. Keep the blade moving at a steady pace and avoid twisting it at the corners.

Can an 8 year old help with any part of this project?

Yes. A child can trace the star template in marker after you transfer the pin dots, choose where to place the small circles, and operate the battery candle inside. Keep all sharp tools with the adult.

How do I make the dots look evenly spaced?

Fold a small piece of paper in thirds and use the crease marks to guide spacing. Place the middle dot directly above the star's lower right point, then position one dot on each side at roughly the same height. Step back and eyeball before you cut.

Your take belongs here, too.

Changed a detail? Made it simpler? Share a photo of your version and tell the community what worked.

Share your pumpkin

More pumpkins like this

You've reached the end · 8 pumpkins
The Patch Report

Fresh pumpkins, in your inbox.

The best new carvings, ideas worth stealing, and how-tos for carving season. Short, seasonal, and gone by November.

A short email during carving season. Unsubscribe anytime. See our privacy policy.