Halloween Pumpkin Carving Contest · Starts October 1st · $500 in prizes
← Back to ideas
@ai_concepts
Sep 14, 2026
Happy Birthday Greeting PumpkinAI
0

Happy Birthday Greeting Pumpkin

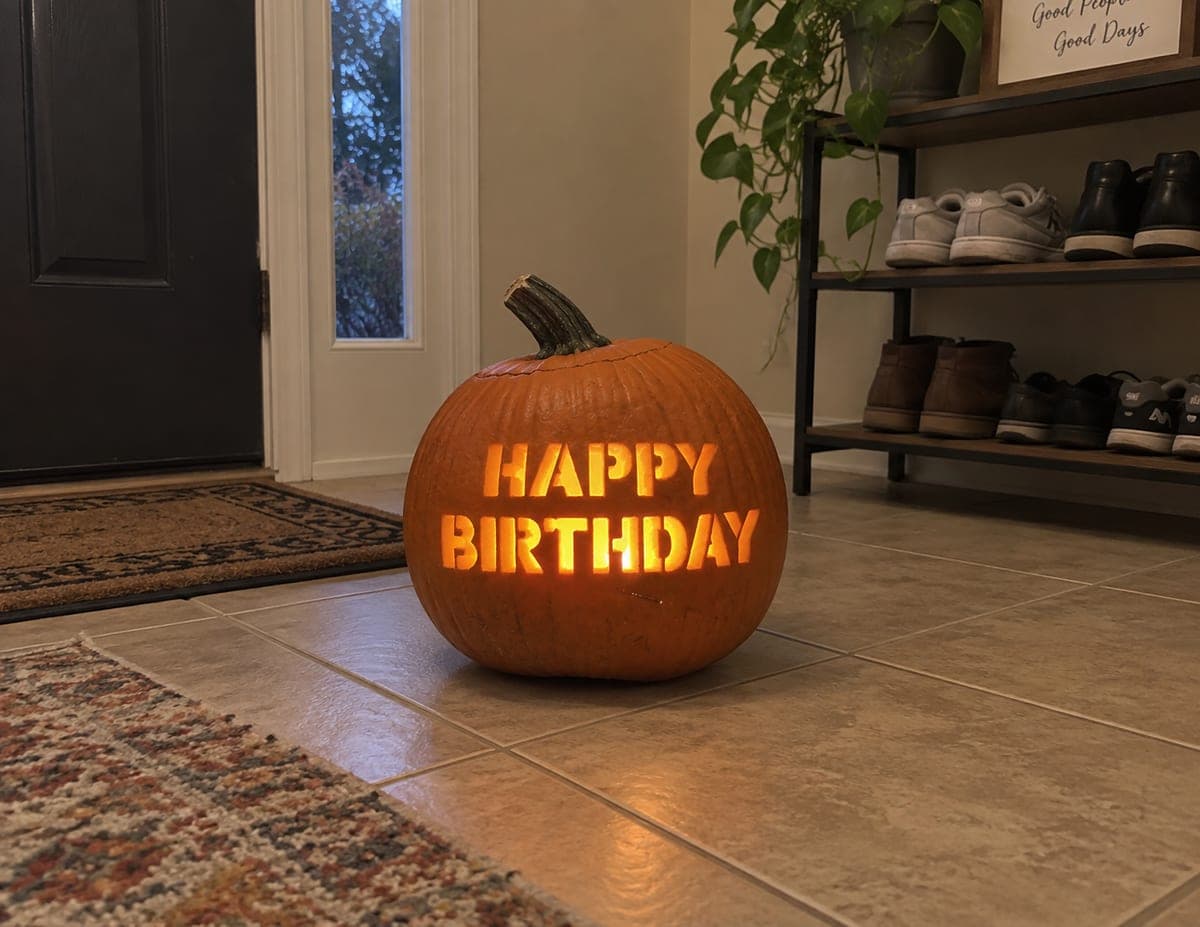
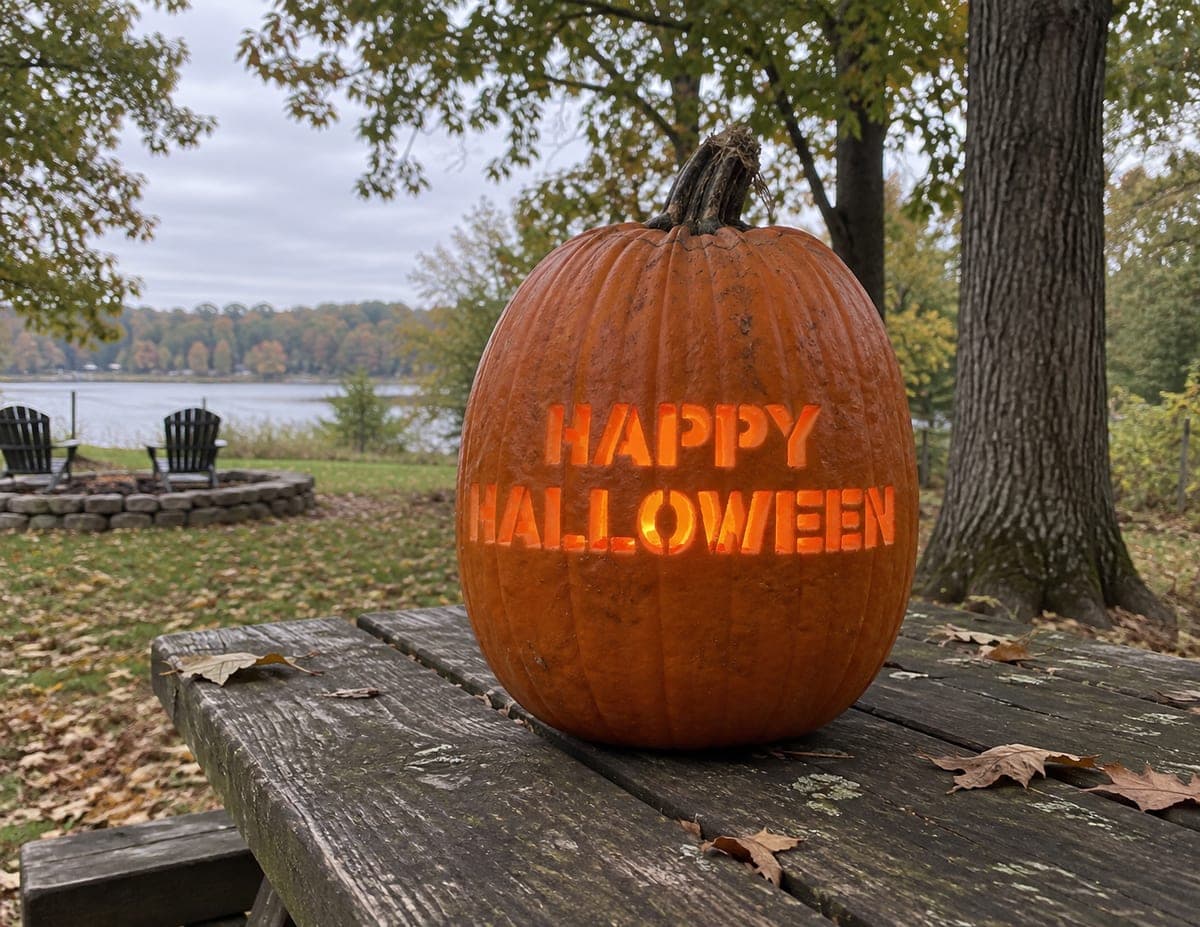
HAPPY BIRTHDAY appears in two rows of bold block cutout letters across the center of this jack-o-lantern, displayed on a tile floor entryway and glowing amber in the dim indoor light. The chunky lettering is fully pierced so the message shines clearly as a birthday greeting pumpkin carving idea. Carve the P, D, and B letters first since their enclosed loops need bridge pins to keep the counters from falling out, then move to the simpler open letters. Placed just inside a front door, the lit greeting surprises guests before they even step inside.

This is an AI-generated concept image: a realistic, carvable design idea rather than a photo of a finished carve. AI concepts are always labeled and sit out the leaderboard and the contest.

No ratings yet · Sign in to rate
Comments (0)

  • No comments yet — be the first.

Save without an account. Sign in to like or comment.

Our tips for carving a similar design

The core trick here is treating each letter as a full cutout while protecting the closed loops inside letters like P, B, D, A, and R with small bridges of skin. Lay the two lines of block type out cleanly first, then pierce every stroke all the way through so the message reads as a solid band of light. Keep the letters chunky and evenly spaced so the greeting stays legible from across the room.

Written by PumpkinCarvingIdeas.com, inspired by the image above. These are our suggestions, not instructions from the uploader. This approach to the AI concept has not been tested on a real pumpkin.

From pumpkin to porch

  1. Plan and mount your stencil

    Print the HAPPY BIRTHDAY layout sized to fit the flattest, most forward-facing part of a pumpkin. Center the two rows so the lines stack evenly and leave a finger-width margin above and below. Tape the paper down smoothly, then use a poker or push pin to dot along every letter edge. Add extra dots to mark the little bridges you will keep inside each closed loop.

  2. Open the lid and clean the wall

    Cut a lid from the bottom or back rather than the top so the stem stays intact for display and the pumpkin sits flat on the tile. Scoop out the seeds and pulp, then thin the inside wall behind the lettering to about one inch with a sturdy spoon or scraper. A thinner wall is far easier to pierce cleanly and lets more light through. Wipe the carving area dry so your tool does not slip.

  3. Score all the letters first

    Before cutting through, trace every letter outline with a shallow scoring cut following your dotted guide. This locks in the shapes and spacing while you can still adjust. Mark which slivers are bridges so you do not accidentally remove them. Take your time on the curves of the P, B, D, A, and R so the loops stay crisp.

  4. Carve the loop letters with bridges

    Start with the P, B, and D, plus the A and R, since their enclosed centers, called counters, will drop out if fully freed. Cut the outer strokes but leave one or two thin skin bridges spanning each counter so the middle island stays anchored. Work with a small serrated saw blade using gentle straight strokes rather than forcing curves. Push the pieces inward and out to keep edges clean.

  5. Cut the open letters and refine

    Move on to the simpler open letters like H, A, Y, I, R, T, and Y that have no trapped centers. Cut these fully through since they need no bridges. Once every letter is pierced, run your blade back around each opening to bevel the inside edge slightly, which widens the light path and sharpens the glow. Brush out any crumbs from inside.

  6. Light it and stage the entryway

    Set one or two battery LED lights or a small string of LEDs inside for even, safe brightness, never a candle indoors. Position the lights low and slightly behind the letters so the whole message glows amber. Place the pumpkin just inside the door on a tile or a tray to catch any drips. Snap your photo in a dim room so the lettering reads bright and clear.

Gather your supplies

Check things off as you get ready.

Work on a stable surface, keep your free hand out of the cutting path, and have an adult handle sharp tools.

Three levels of light

  • Leave intact

    The untouched pumpkin skin around and between the words stays dark, framing the message.

  • Peel & shade

    You can skin-peel a thin border or underline around the text for a soft dim halo if you want extra emphasis.

  • Cut through

    Every letter stroke is pierced all the way through so the full HAPPY BIRTHDAY message is the brightest part.

Learn the carving basics

Before you start cutting

How do I keep the centers of the P, B, and D from falling out?

Leave one or two narrow skin bridges spanning each enclosed loop so the middle island stays connected to the surrounding wall. Cut the rest of the letter around those bridges. If a bridge feels weak, a toothpick pushed through the back can pin the piece in place. These slivers are barely visible once lit.

What size pumpkin works best for two rows of text?

Choose a medium to large pumpkin with a broad, gently curved front so both lines fit without wrapping too far around the sides. A very round or lumpy face distorts the letters and makes them hard to read. Test your printed stencil against the surface before taping to confirm it lies fairly flat.

My letters look crooked. How do I keep them straight?

Draw or print faint baseline guides for each row and align the bottoms of the letters to those lines rather than eyeballing each one. Score all the outlines before cutting so you can spot and fix spacing while nothing is removed yet. Working from the center letter outward on each line also helps keep the message balanced.

Your take belongs here, too.

Changed a detail? Made it simpler? Share a photo of your version and tell the community what worked.

Share your pumpkin

More pumpkins like this

You've reached the end · 8 pumpkins
The Patch Report

Fresh pumpkins, in your inbox.

The best new carvings, ideas worth stealing, and how-tos for carving season. Short, seasonal, and gone by November.

A short email during carving season. Unsubscribe anytime. See our privacy policy.