Halloween Pumpkin Carving Contest · Starts October 1st · $500 in prizes
← Back to ideas
@ai_concepts
Aug 16, 2026
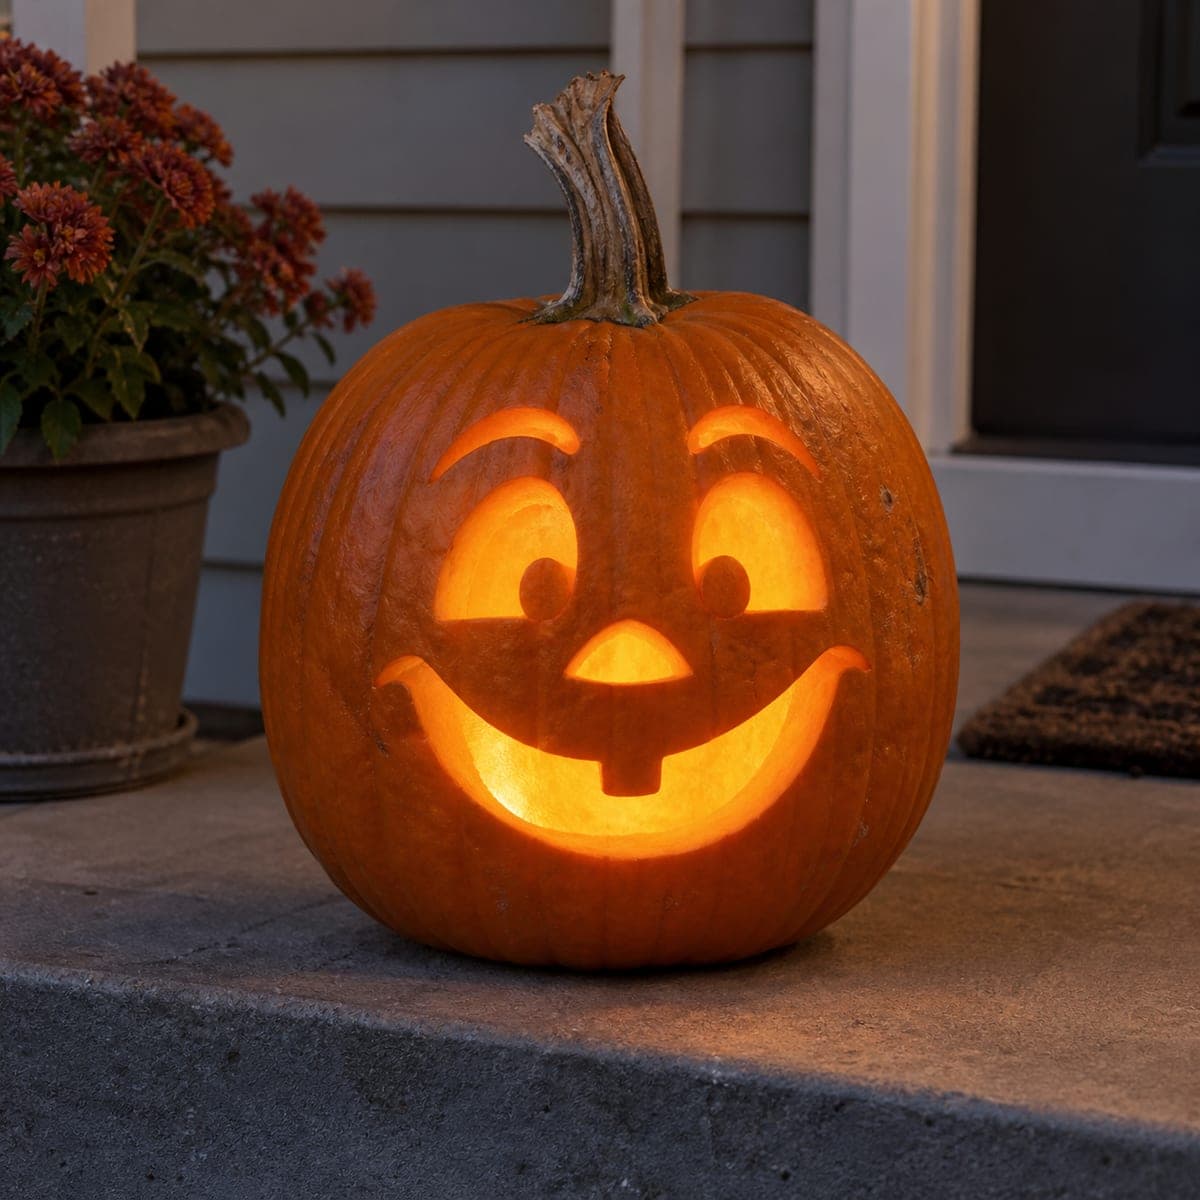
Happy Grinning Jack-O-Lantern With Buck TeethAI
0

Happy Grinning Jack-O-Lantern With Buck Teeth

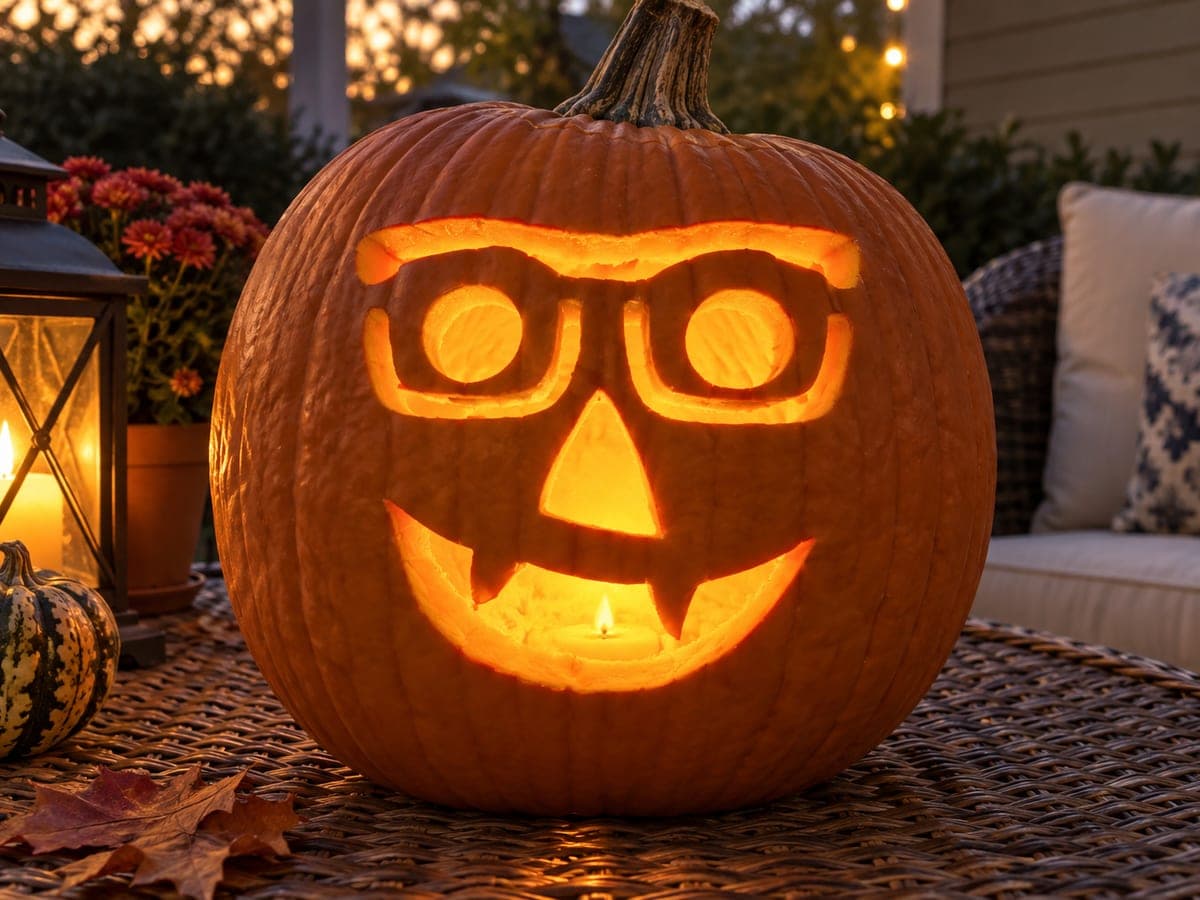
With arched eyebrows, round cheeks, and two buck teeth in a wide grin, this happy jack-o-lantern face is friendly enough for the youngest trick-or-treaters. All the openings are simple pierced shapes, and the nose is left shallow so it glows softly instead of blazing. Cut the mouth in sections rather than one pass, and it comes together in about half an hour.

This is an AI-generated concept image: a realistic, carvable design idea rather than a photo of a finished carve. AI concepts are always labeled and sit out the leaderboard and the contest.

No ratings yet · Sign in to rate
Comments (0)

  • No comments yet — be the first.

Save without an account. Sign in to like or comment.

Our tips for carving a similar design

The whole design leans on a few clean pierced shapes and one clever contrast: the nose is scraped thin instead of cut all the way through, so it glows a soft orange while the eyes and mouth blaze bright. Plan the wide smile as three or four connected sections rather than one long slit, which keeps the pumpkin wall strong and the two buck teeth firmly attached. Keep the arched eyebrows and round pupil dots as separate small openings for that surprised, happy look.

Written by PumpkinCarvingIdeas.com, inspired by the image above. These are our suggestions, not instructions from the uploader. This approach to the AI concept has not been tested on a real pumpkin.

From pumpkin to porch

  1. Prep the pumpkin and pick your opening

    Choose a tall, evenly round pumpkin and wipe the skin clean. Cut a lid from the bottom rather than the top so the stem stays intact and the pumpkin sits flat on your porch step. Have an adult make this cut with a sturdy serrated saw, angling the blade inward so the plug does not fall through. Scoop out the seeds and pulp, then thin the front carving wall to about one inch so your tools glide.

  2. Transfer the happy face

    Print or draw the design at a size that fits your pumpkin, then tape the pattern flat against the front. Poke the outlines with a pushpin or a poking tool, spacing dots close together on the curved eyebrows and the smile so the shapes read clearly. Peel the paper away and connect the dots lightly with a marker if it helps you see the plan. Double check that the two buck teeth sit inside the mouth line with skin bridges holding them in place.

  3. Cut the eyes, pupils, and eyebrows

    Start with the smaller shapes while the pumpkin wall is still fully intact. Cut the two large eye openings, then the small round pupil dots below them, keeping each piece separate. Slice the thin arched eyebrows last in this group, using gentle sawing motions instead of forcing the blade. Push each cut piece out toward the inside so the edges stay crisp.

  4. Shade the nose for a soft glow

    The little triangle nose is not cut through. Instead, use a lino or ribbon scraping tool to peel away only the outer skin, leaving a thin layer of flesh behind. Work slowly and check the depth often so light will pass through as a dim orange without punching a full hole. This shallow window is the trick that makes the face feel warm and cartoonish rather than harsh.

  5. Cut the grin in sections

    Save the big smile for last since it is the largest opening. Cut it in three or four connected passes, leaving the two buck teeth as uncut bridges of pumpkin wall. Work from the center outward toward each corner, and support the flesh with your free hand so nothing snaps as you finish. Clean up any ragged edges with a small detail blade so the grin looks smooth.

  6. Light it and set it out

    Drop a battery LED tea light or a small puck light inside, never a candle, and slide the pumpkin back over it. Test the glow in a dark room and trim any edge that blocks light unevenly. Set the finished jack-o-lantern on a flat porch step where kids can see the friendly face at eye level. Snap a photo at dusk when the warm interior light shows off best.

Gather your supplies

Check things off as you get ready.

Work on a stable surface, keep your free hand out of the cutting path, and have an adult handle sharp tools.

Three levels of light

  • Leave intact

    The cheeks, ridged sides, and the full pumpkin skin stay dark for a solid orange face.

  • Peel & shade

    The shallow triangle nose is skin-peeled so it glows a soft, dim orange.

  • Cut through

    The eyes, round pupils, arched eyebrows, and the wide grin are cut through for the brightest light.

Learn the carving basics

Before you start cutting

How do I keep the two buck teeth from breaking off?

Treat each tooth as an uncut bridge of the pumpkin wall rather than a separate piece to carve around. Cut the mouth in sections on either side of the teeth and leave them fully attached top and bottom. Support the surrounding flesh with your free hand as you finish each pass so nothing snaps.

Why leave the nose uncut when everything else is pierced?

A fully cut nose would blaze as bright as the eyes and mouth and flatten the expression. By peeling only the skin and leaving a thin layer of flesh, light passes through as a gentle glow. That soft contrast is what gives the face its warm, friendly character.

This is a concept image, so how do I make the grin work on a real pumpkin?

No physical pumpkin exists here, so treat the picture as inspiration. On a real one, keep the smile arc from getting too wide near the corners, since a long thin slit can weaken the wall. Cutting it in connected sections and saving it for last keeps the whole face sturdy.

Your take belongs here, too.

Changed a detail? Made it simpler? Share a photo of your version and tell the community what worked.

Share your pumpkin

More pumpkins like this

You've reached the end · 8 pumpkins
The Patch Report

Fresh pumpkins, in your inbox.

The best new carvings, ideas worth stealing, and how-tos for carving season. Short, seasonal, and gone by November.

A short email during carving season. Unsubscribe anytime. See our privacy policy.