@veiledvine
Sep 5, 2026
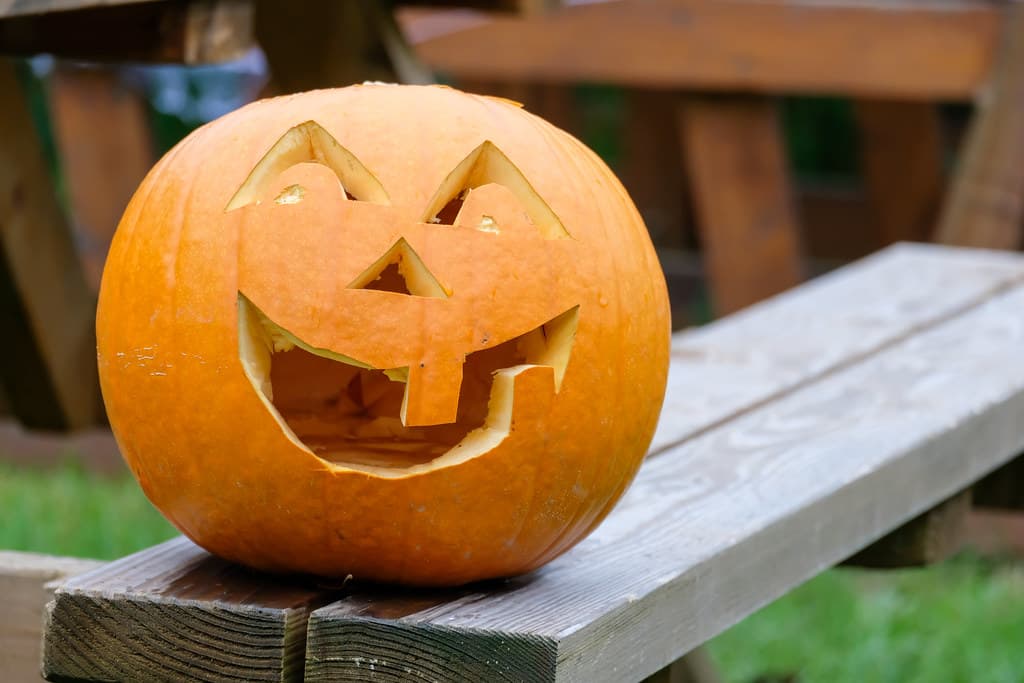
The friendly one
Arched eyebrows, a button nose, and a wide-open smile with two goofy teeth, grinning from the picnic bench in broad daylight.
No ratings yet · Sign in to rate
Arched eyebrows, a button nose, and a wide-open smile with two goofy teeth, grinning from the picnic bench in broad daylight.
The charm here comes from a few bold cutouts arranged into a friendly expression: arched eyebrow eyes, a small triangle nose, and a big open mouth with two teeth left standing. The trick is leaving those teeth attached at top and bottom so they act as bridges and hold their shape. Keep every shape simple and let the wide grin do the work.
Written by PumpkinCarvingIdeas.com, inspired by @veiledvine's photo above. These are our suggestions, not instructions from the uploader, and this approach hasn't been tested on their exact carve.
Choose a round, flat-sided pumpkin so the face sits upright without rolling. Cut a lid around the stem at an angle so it rests back in place later, or cut a hole in the back if you prefer easier lighting access. Scoop out the seeds and pulp, then scrape the front inner wall until it is about one inch thick. A thinner wall is much easier to cut cleanly.
Sketch two eyes shaped like curved eyebrows arching up toward the middle. Add a small triangle or diamond nose below and between them. Draw a wide smiling mouth, then mark two rectangular teeth, one hanging from the top edge and one rising from the bottom, so they overlap in the middle. Step back and adjust before you cut anything.
An adult should handle the knife or carving saw. Start with the smallest shapes, the nose and the two eyes, poking a starter hole in the center of each and sawing out to your lines. Keep steady, gentle pressure and let the tool do the work. Push the cut pieces inward and out to avoid tearing the front.
Save the biggest opening for last so the pumpkin stays strong while you work. Carve the mouth in sections, cutting the dark gaps on each side of the teeth and leaving the two tooth shapes connected to the top and bottom rim. Those attachment points are your bridges, so do not slice all the way around a tooth. Work slowly near the teeth to keep their edges crisp.
Trim any ragged spots with a small paring knife or a loop tool. For a softer, more welcoming look, you can bevel the inside edges slightly so more light spills out. Wipe away loose bits and check that both teeth feel secure. A light coat of petroleum jelly on the cut edges helps slow drying.
Drop in a battery LED tea light or a small LED puck rather than a flame, since the open mouth would blow a candle around anyway. Set the pumpkin at eye level on a porch step or bench and dim the surroundings for the best glow. Take your photo slightly off center so the grin reads clearly. Share it with the community when you are done.
Check things off as you get ready.
Work on a stable surface, keep your free hand out of the cutting path, and have an adult handle sharp tools.
The whole outer orange skin of the face stays untouched and dark.
Optionally shave a thin halo around the mouth or cheeks for a soft dim glow.
The eyes, nose, and open mouth are cut fully through for the brightest light, with the two teeth left as dark standing shapes.
Leave each tooth attached to the mouth rim, one to the top edge and one to the bottom, instead of cutting all the way around it. These connection points act as bridges that hold the teeth in place. Carve the gaps beside them slowly and avoid prying, and they will stay sturdy.
It can if you rush, so cut the mouth last after the eyes and nose are done. Keep the front wall around one inch thick for support, and do not over-widen the smile. If your pumpkin is very soft, a slightly smaller mouth will hold its shape better.
Use a battery LED tea light or small LED puck, never a real candle. The wide mouth lets in air that would flicker or snuff a flame, and an LED is safe to leave glowing for hours. Warm-white LEDs give the most natural jack-o'-lantern color.
Changed a detail? Made it simpler? Share a photo of your version and tell the community what worked.
The best new carvings, ideas worth stealing, and how-tos for carving season. Short, seasonal, and gone by November.





Comments (0)