Halloween Pumpkin Carving Contest · Starts October 1st · $500 in prizes
← Back to ideas
@ai_concepts
Sep 25, 2026
Three-Eyed Monster Jack-O-Lantern for 5 Year OldsAI
0

Report this carving

Tell us what is wrong. Reports are private.

Three-Eyed Monster Jack-O-Lantern for 5 Year Olds

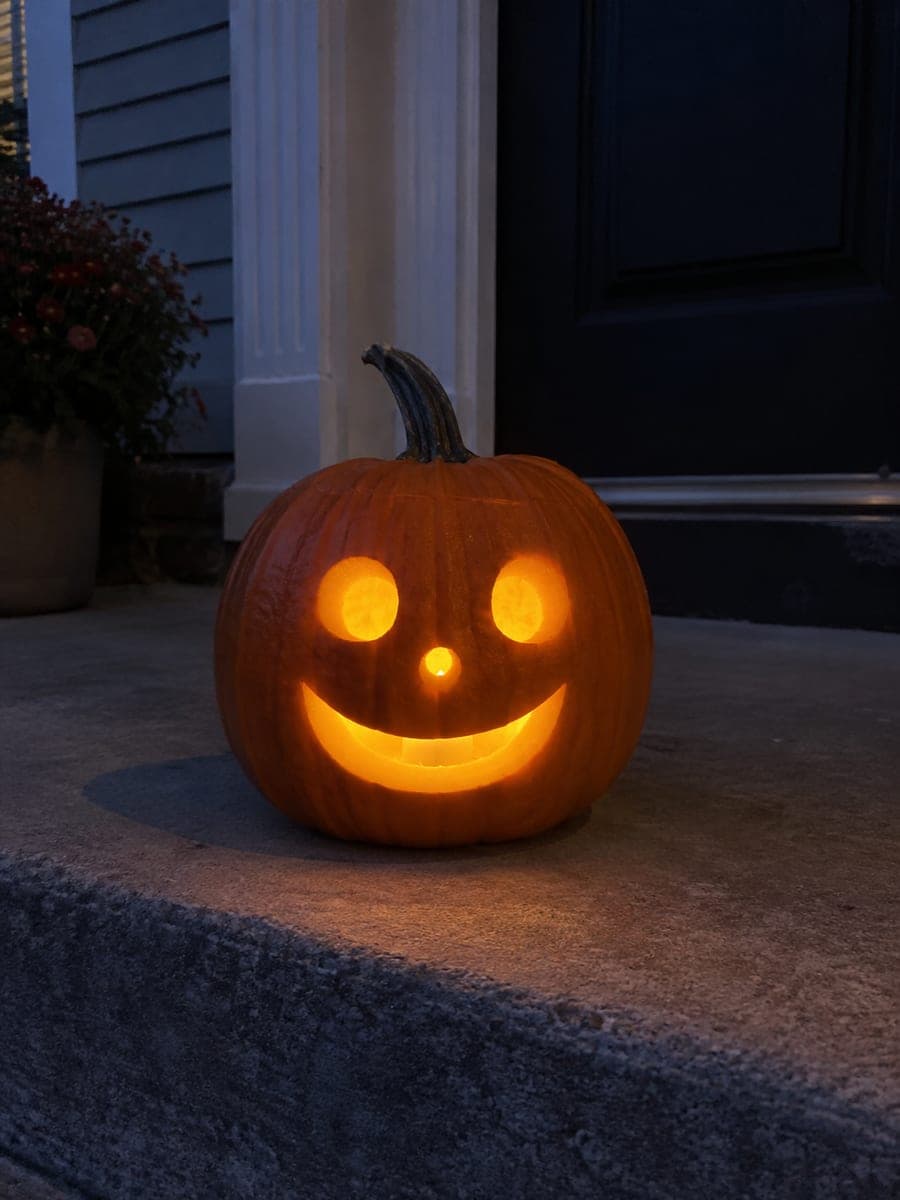
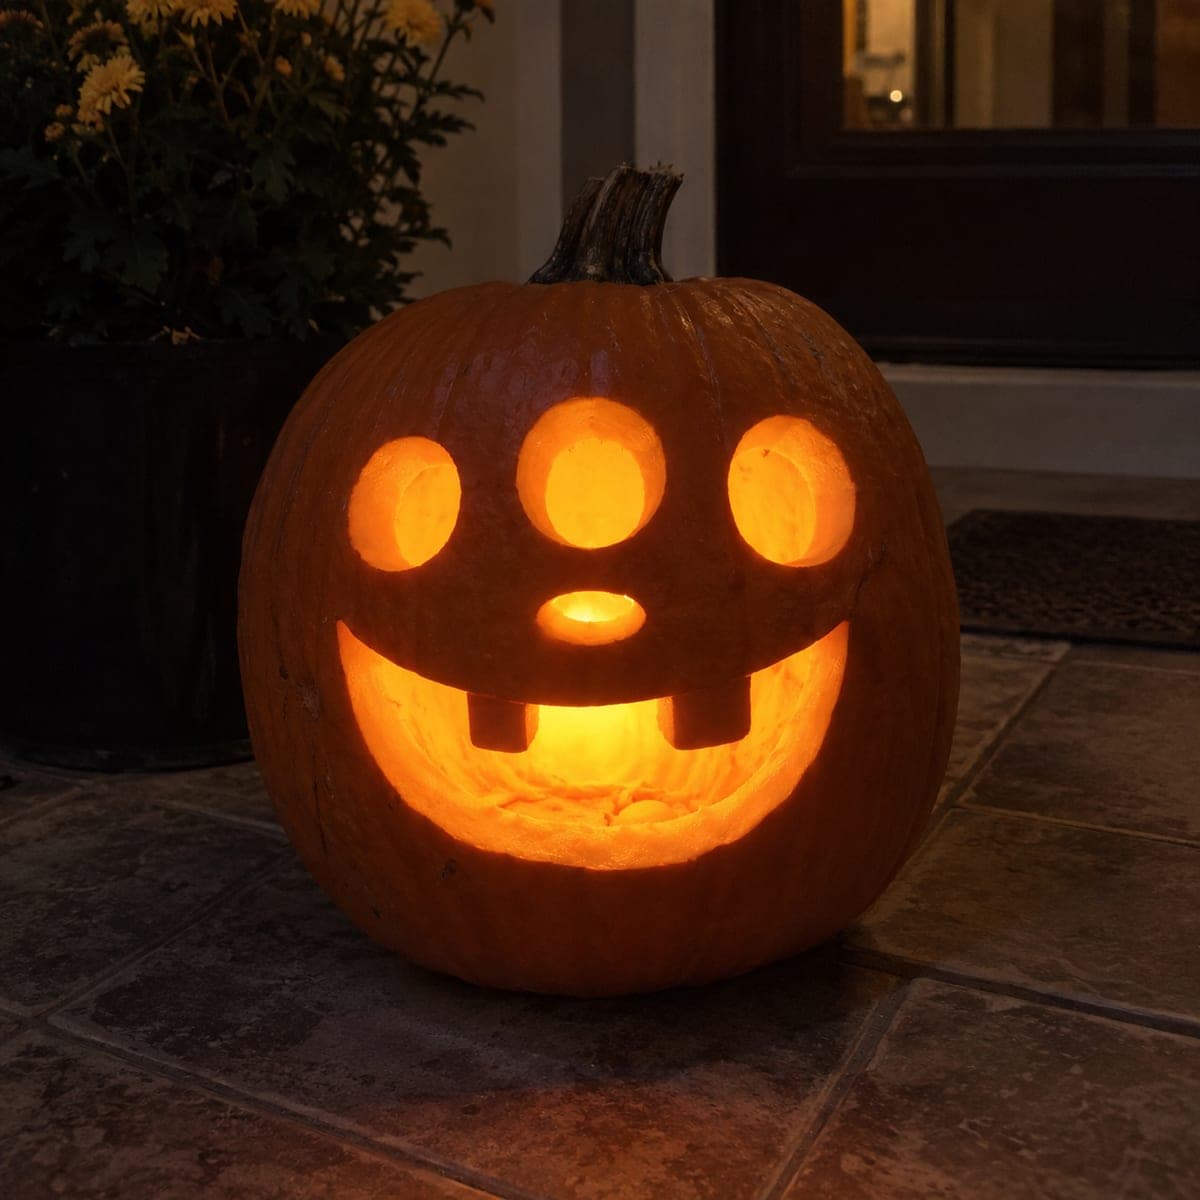
Three round eye holes and an open smile with teeth rooted into the upper edge form a friendly glowing monster on this easy pumpkin carving idea for 5 year olds, carved by an adult for a child-themed display. Round holes are the easiest cuts to make cleanly, so this design is forgiving even on a roughly round pumpkin. Carve the three eyes first, then cut the smile, leaving the tooth stubs attached to the upper rim so nothing falls inward. A 5 year old can help choose the arrangement of the eyes before carving begins.

No ratings yet · Sign in to rate

Comments (0)

  • No comments yet — be the first.

Save without an account. Sign in to like or comment.

Our tips for carving a similar design

Three round holes arranged in a loose triangle form the eyes, and a wide smile with teeth left attached to the upper rim completes the face. Round holes are the most forgiving cut on any pumpkin shape, and rooting the teeth into the top edge of the smile opening keeps them from falling inward. Let the five year old arrange the eye positions before any cutting begins.

From pumpkin to porch

  1. Gut the pumpkin

    Cut a lid at the back so the front face stays clean, and scoop until the walls are about an inch thick. A five year old can help pull seeds out by hand once an adult has made the lid cut. Dry the inside with a paper towel.

  2. Mark the three eye positions

    Let the child choose a rough triangle arrangement for the three circles. Use a coin or bottle cap to trace each eye circle in marker. Vary the sizes slightly for a more characterful look. Make sure all three circles have at least half an inch of rind between them and the outer edge.

  3. Cut the eye holes

    Saw each circle cleanly, keeping the blade perpendicular to the surface. Remove each disc by pressing it gently inward. A round hole-saw bit drilled carefully also works for perfectly circular eyes. Smooth any rough edges with a detail knife tip.

  4. Cut the smile with rooted teeth

    Draw the smile outline with teeth projecting downward from the upper edge of the opening. The tips of the teeth point down into the gap, and their bases stay connected to the upper rind. Saw the sides and the gap between each tooth carefully. Remove the mouth sections between the teeth, leaving each tooth attached above.

  5. Light and display

    Rub petroleum jelly on all cut edges. Drop a battery LED candle inside and display on a flat surface where children can see it. An adult should supervise placement and lighting to keep fingers away from any sharp cut edges.

Written with AI to match this design

Gather your supplies

Check things off as you get ready.

Work on a stable surface, keep your free hand out of the cutting path, and have an adult handle sharp tools.

Three levels of light

  • Leave intact

    All solid rind surrounding the eyes and smile stays dark, giving the monster's face its orange skin.

  • Peel & shade

    None.

  • Cut through

    All three eye holes and the open smile gaps between the teeth are cut entirely through.

Learn the carving basics

Before you start cutting

Can a 5 year old do any of the cutting safely?

Keep all saw and knife work with adults only. However, a five year old can mark eye positions with a marker, scoop seeds with a spoon, and place the battery candle inside once the adult has finished cutting. Those tasks give real ownership of the project.

What if one of the teeth breaks off while I'm cutting between them?

If a tooth snaps, smooth the break with a knife and reassess the smile as a toothless grin or an open-mouthed shout, which is equally fun. To prevent this, keep tooth bases at least a half inch wide and make the gaps no wider than one tooth width.

How do I keep the three eyes from looking accidental rather than intentional?

Make the center eye or the top eye noticeably larger than the other two so it reads as the focal eye. Placing the trio slightly off-center on the pumpkin face also adds a quirky personality that makes the design look deliberate.

Your take belongs here, too.

Changed a detail? Made it simpler? Share a photo of your version and tell the community what worked.

Share your pumpkin

More pumpkins like this

You've reached the end · 8 pumpkins
The Patch Report

Fresh pumpkins, in your inbox.

The best new carvings, ideas worth stealing, and how-tos for carving season. Short, seasonal, and gone by November.

A short email during carving season. Unsubscribe anytime. See our privacy policy.