Halloween Pumpkin Carving Contest · Starts October 1st · $500 in prizes
← Back to ideas
@ai_concepts
Sep 25, 2026
Dinosaur and Egg Silhouette Pumpkin for 5 Year OldsAI
0

Report this carving

Tell us what is wrong. Reports are private.

Dinosaur and Egg Silhouette Pumpkin for 5 Year Olds

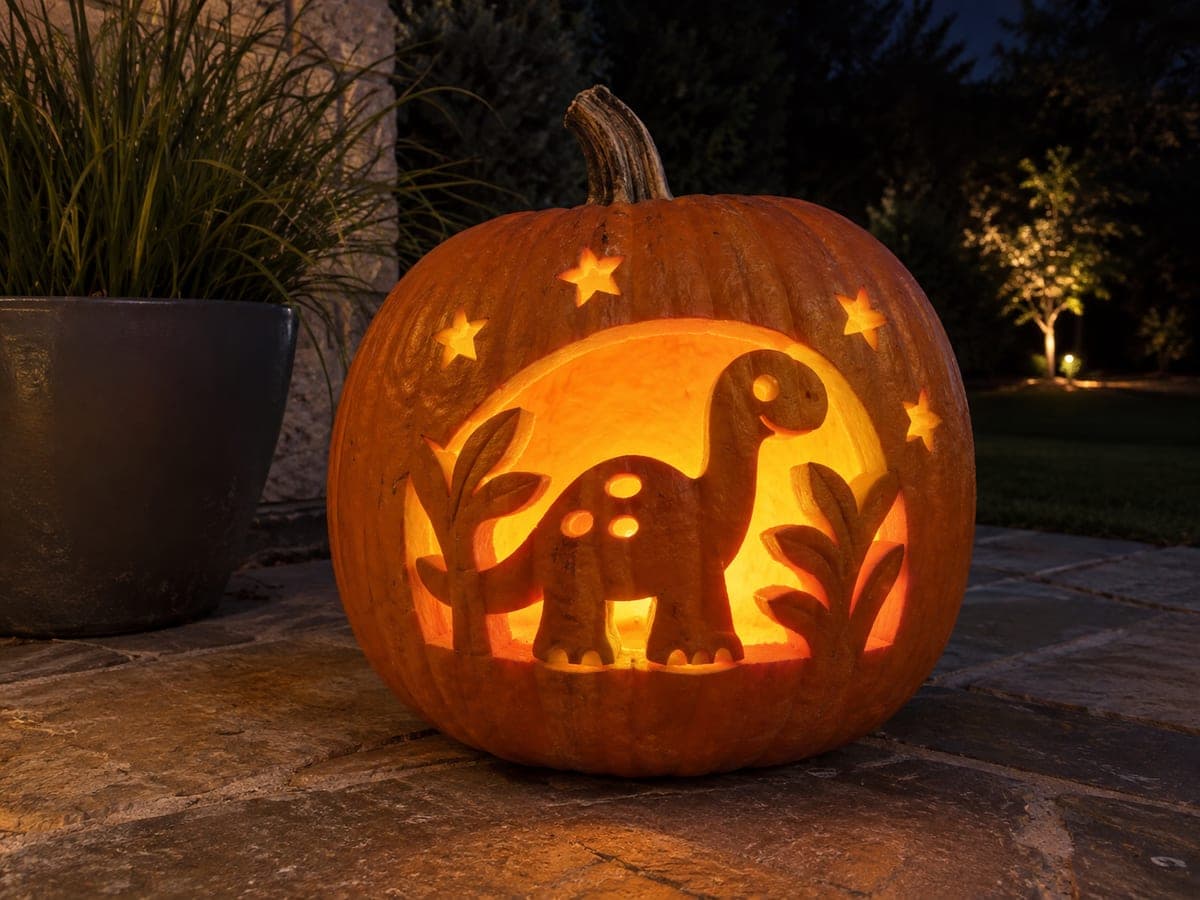
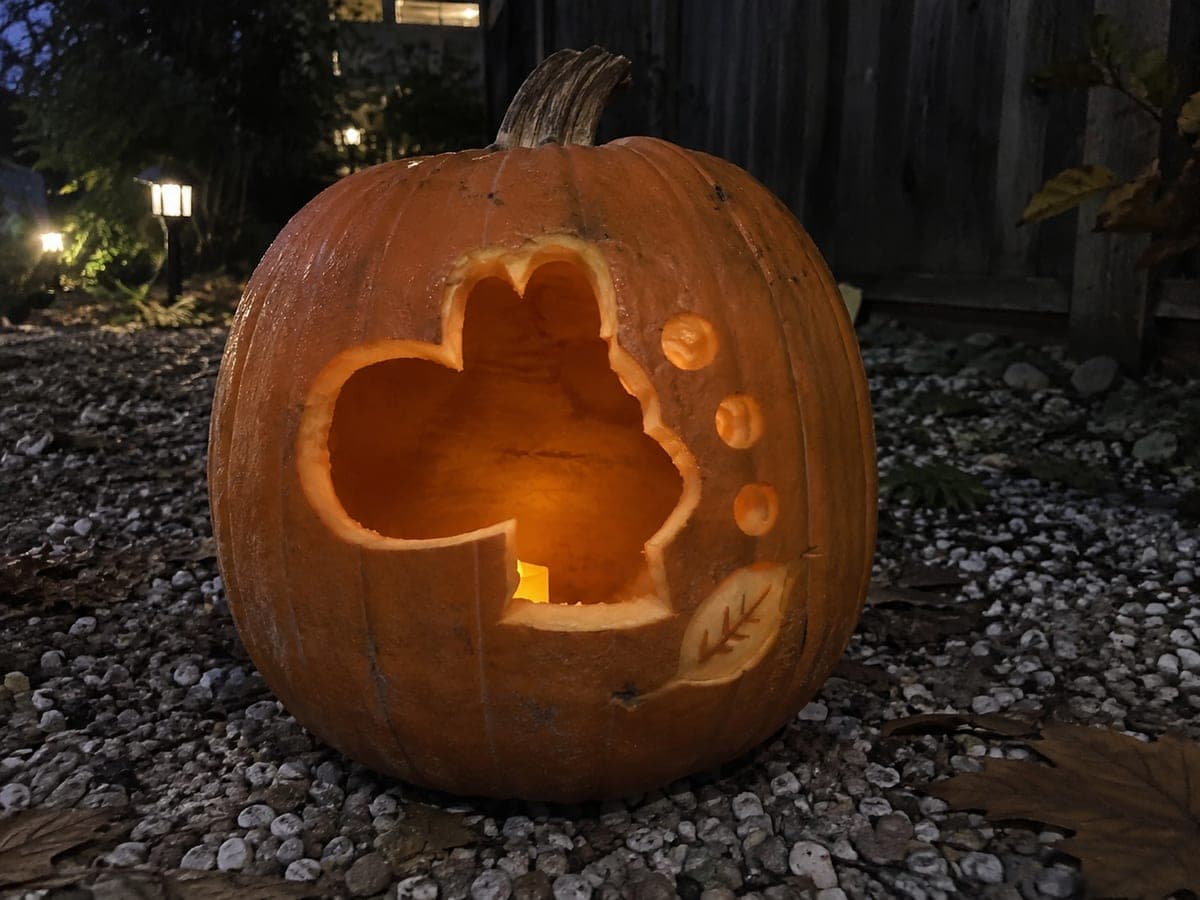
A friendly dinosaur silhouette and egg-shaped openings glow together on this intermediate adult-carved pumpkin carving idea for 5 year olds, with the full dinosaur shape and each egg removed entirely and no retained interior panels to manage. The dino-and-eggs pairing tells a simple story that resonates with young children's imaginative play. Place the dinosaur template slightly left of center and scatter the egg holes to one side for a natural-looking composition. A warm candle glow inside makes this a cozy bedroom nightlight-style display.

No ratings yet · Sign in to rate

Comments (0)

  • No comments yet — be the first.

Save without an account. Sign in to like or comment.

Our tips for carving a similar design

The dinosaur silhouette and each egg are cut entirely through as individual openings, leaving solid orange rind surrounding them to create the negative-space effect. Arranging the dino template slightly left of center and scattering the eggs to the right gives the composition a natural, storytelling feel. Because there are no retained interior islands, every piece comes out cleanly without secondary bracing.

From pumpkin to porch

  1. Hollow the pumpkin

    Cut a lid at the back and scoop to a consistent one-inch wall. The silhouette technique depends on a uniform wall thickness so the light comes through evenly across the whole opening. Pat the inside dry.

  2. Position and transfer the template

    Print the dinosaur silhouette and egg shapes at a size that fills roughly two-thirds of the face, with the eggs scattered to one side. Tape the template down and pin-poke the full outline of each shape. Remove the paper and trace all outlines in marker.

  3. Cut the dinosaur silhouette

    Begin with the largest shape. Saw steadily along the outline, pivoting the pumpkin rather than the blade around tight curves like the neck and tail. Keep cuts smooth and avoid jagged edges that will show up in the glow. Tap the piece inward to free it once the cut is complete.

  4. Cut the egg openings

    Cut each egg oval individually, working from largest to smallest. Each egg is a simple closed oval, so the cuts are straightforward. Push each piece out carefully from the front and smooth any rough spots.

  5. Seal edges and light

    Coat all cut edges with petroleum jelly. Place a battery LED candle inside, centering it so light distributes across both the dino and the egg openings. A warm yellow LED enhances the amber glow for a cozy bedroom nightlight effect.

Written with AI to match this design

Gather your supplies

Check things off as you get ready.

Work on a stable surface, keep your free hand out of the cutting path, and have an adult handle sharp tools.

Three levels of light

  • Leave intact

    All solid rind around and between the dinosaur and eggs stays orange and dark, creating the silhouette contrast.

  • Peel & shade

    None. This design relies on full cut-throughs only.

  • Cut through

    The entire dinosaur shape and every egg oval are cut completely through for full light.

Learn the carving basics

Before you start cutting

How do I cut the dinosaur's thin tail without it breaking?

Thicken the tail slightly when printing the template, keeping it at least three-quarters of an inch wide at its narrowest. Saw tail-end to body rather than the reverse so any minor wobble in the cut happens where the rind is thicker.

Should all the eggs be the same size?

Varying egg sizes slightly looks more natural and adds visual rhythm. Try one large, one medium, and one small egg, or scatter four eggs of two different sizes. This storytelling detail makes the scene feel more alive.

Why is a silhouette technique different from a regular cutout?

In a silhouette design the image appears in the glow itself rather than in the solid rind. The cutout IS the picture. Because the whole shape is removed, the surrounding dark rind forms the background. This means accuracy of the outline matters more than interior detail.

Your take belongs here, too.

Changed a detail? Made it simpler? Share a photo of your version and tell the community what worked.

Share your pumpkin

More pumpkins like this

You've reached the end · 8 pumpkins
The Patch Report

Fresh pumpkins, in your inbox.

The best new carvings, ideas worth stealing, and how-tos for carving season. Short, seasonal, and gone by November.

A short email during carving season. Unsubscribe anytime. See our privacy policy.