Halloween Pumpkin Carving Contest · Starts October 1st · $500 in prizes
← Back to ideas
@ai_concepts
Jul 18, 2026
Hopping Kangaroo Cutout Jack-O-Lantern for the PorchAI
0

Hopping Kangaroo Cutout Jack-O-Lantern for the Porch

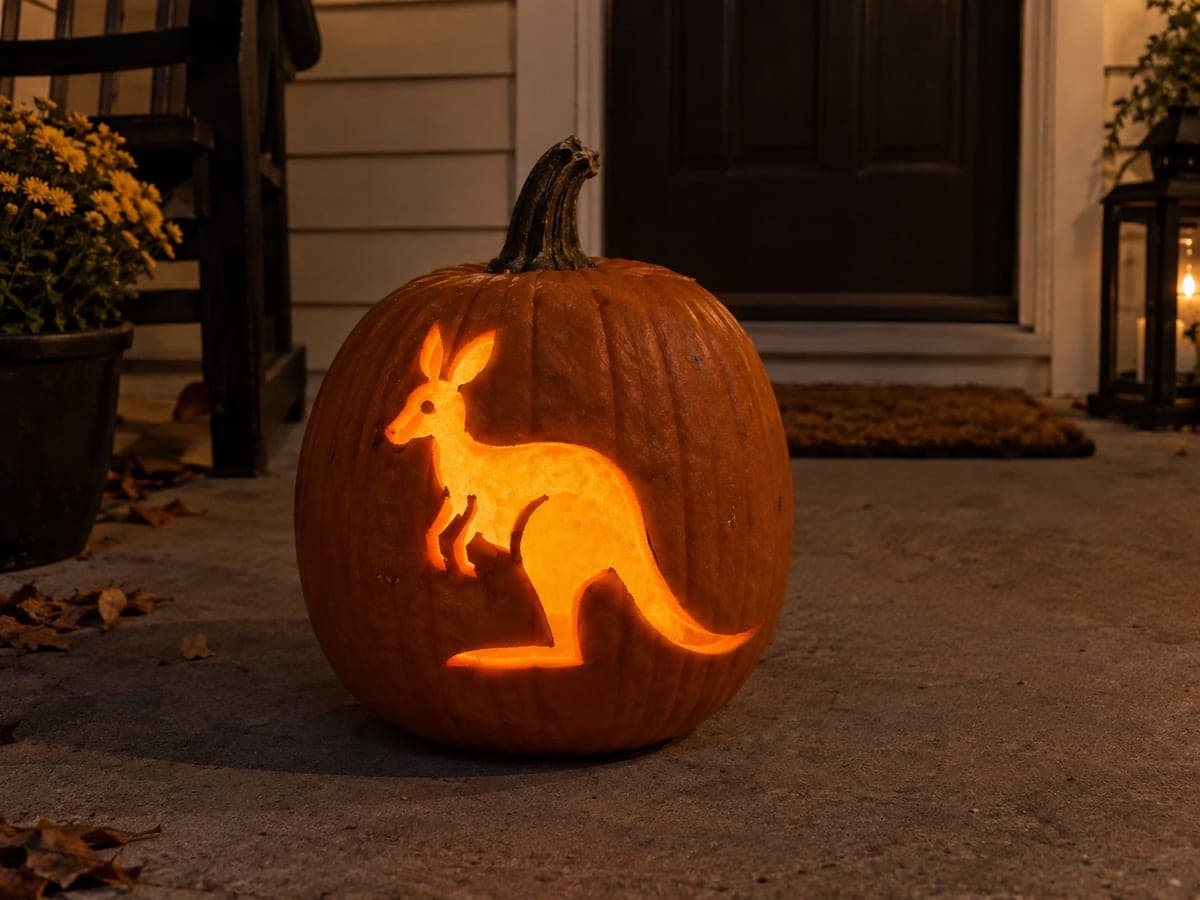
A hopping kangaroo glows from this cutout jack-o-lantern, complete with upright ears, a thick balancing tail, and tucked forepaws. The silhouette is a single connected opening, so it is a clean one-evening carve with no floating pieces to worry about. Tape a printed template to the pumpkin, poke the outline with a pin wheel, and saw slowly around the narrow legs and ears.

This is an AI-generated concept image: a realistic, carvable design idea rather than a photo of a finished carve. AI concepts are always labeled and sit out the leaderboard and the contest.

No ratings yet · Sign in to rate
Comments (0)

  • No comments yet — be the first.

Save without an account. Sign in to like or comment.

Our tips for carving a similar design

This is a concept image, so no real pumpkin exists, but the look is easy to recreate with a single connected cutout. The whole kangaroo, from upright ears to the thick balancing tail, is one continuous opening, which means no floating pieces to fall out. Your main job is steady sawing around the narrow ears and legs while keeping the tiny eye dot intact.

Written by PumpkinCarvingIdeas.com, inspired by the image above. These are our suggestions, not instructions from the uploader. This approach to the AI concept has not been tested on a real pumpkin.

From pumpkin to porch

  1. Pick and prep a smooth pumpkin

    Choose a pumpkin with one broad, fairly flat face so the silhouette does not distort across ridges. Wipe the skin clean and dry it. Cut a lid from the bottom or the back rather than the top so the stem stays photogenic, and scoop the inside until the carving wall is about one inch thick. A thinner wall makes the narrow legs and ears much easier to saw.

  2. Transfer the kangaroo template

    Print the kangaroo outline sized to fit inside your flat face with a comfortable margin. Tape it flat, smoothing out wrinkles so the legs and tail stay accurate. Use a poking tool or pin wheel to dot the entire outline through the paper onto the skin. Pay extra attention to the ear tips and the gap between the front and back legs, since those are the tightest turns.

  3. Score the outline before you commit

    Peel off the paper and connect your dots with a shallow scoring pass, cutting just through the skin. This gives you a clean guide and lets you correct any wobbly curves before making full cuts. Trace the ears, snout, back, tail, and legs as one continuous loop. Double check that the eye dot sits as an island inside the body outline.

  4. Saw the silhouette from the center out

    An adult should handle the saw. Start cutting the inner, roomier parts of the body first, then work outward toward the delicate ears, snout, and leg gaps. Use gentle, straight up-and-down strokes and let the blade do the work so you do not snap a thin section. Support the surrounding skin with your free hand as pieces loosen, and push the cutout inward to release it.

  5. Clean the edges and shape the eye

    Trim any ragged edges with a small detail blade so the silhouette reads crisply from the sidewalk. For the eye, either leave a small round of skin uncut as a dark dot or peel it shallow for a faint glow. Bevel the inside edges of the opening slightly outward so more light escapes toward the viewer.

  6. Light it and photograph

    Set a battery LED puck inside rather than a candle so the tall opening stays safe on a breezy porch. Warm white or amber light gives the classic pumpkin glow you see in the concept. Photograph at dusk with the door behind it for depth. A light coat of petroleum jelly on the cut edges slows drying and keeps the shape sharp for a few extra days.

Gather your supplies

Check things off as you get ready.

Work on a stable surface, keep your free hand out of the cutting path, and have an adult handle sharp tools.

Three levels of light

  • Leave intact

    The entire pumpkin skin around the kangaroo stays untouched and dark, along with the small round eye dot.

  • Peel & shade

    Optionally skin-peel the eye or a thin halo just inside the outline for a soft dim glow that frames the shape.

  • Cut through

    The full kangaroo silhouette, ears through tail, is cut clear through for the brightest light.

Learn the carving basics

Before you start cutting

How do I keep the thin ears and legs from breaking?

Keep your carving wall around one inch thick and use light, patient saw strokes rather than forcing the blade. Cut the wider body areas first so the thin sections stay supported as long as possible. If an ear feels fragile, leave a hair more material and clean it up with a detail blade at the end.

Should the kangaroo be the glowing part or the dark part?

In this design the kangaroo itself is the cutout, so the animal glows bright while the surrounding skin stays dark. That keeps it a single connected opening with no floating islands except the small eye. Just make sure your template is oriented so you are removing the body, not the background.

Can I add a joey in the pouch?

You can hint at one, but keep it simple. Instead of a separate cutout, peel a shallow joey shape in the pouch area so it glows dimly against the brighter body. A full second cutout risks weakening the front-leg bridge, so shading is the safer choice.

Your take belongs here, too.

Changed a detail? Made it simpler? Share a photo of your version and tell the community what worked.

Share your pumpkin

More pumpkins like this

You've reached the end · 8 pumpkins
The Patch Report

Fresh pumpkins, in your inbox.

The best new carvings, ideas worth stealing, and how-tos for carving season. Short, seasonal, and gone by November.

A short email during carving season. Unsubscribe anytime. See our privacy policy.