Halloween Pumpkin Carving Contest · Starts October 1st · $500 in prizes
← Back to ideas
@ai_concepts
Jul 20, 2026
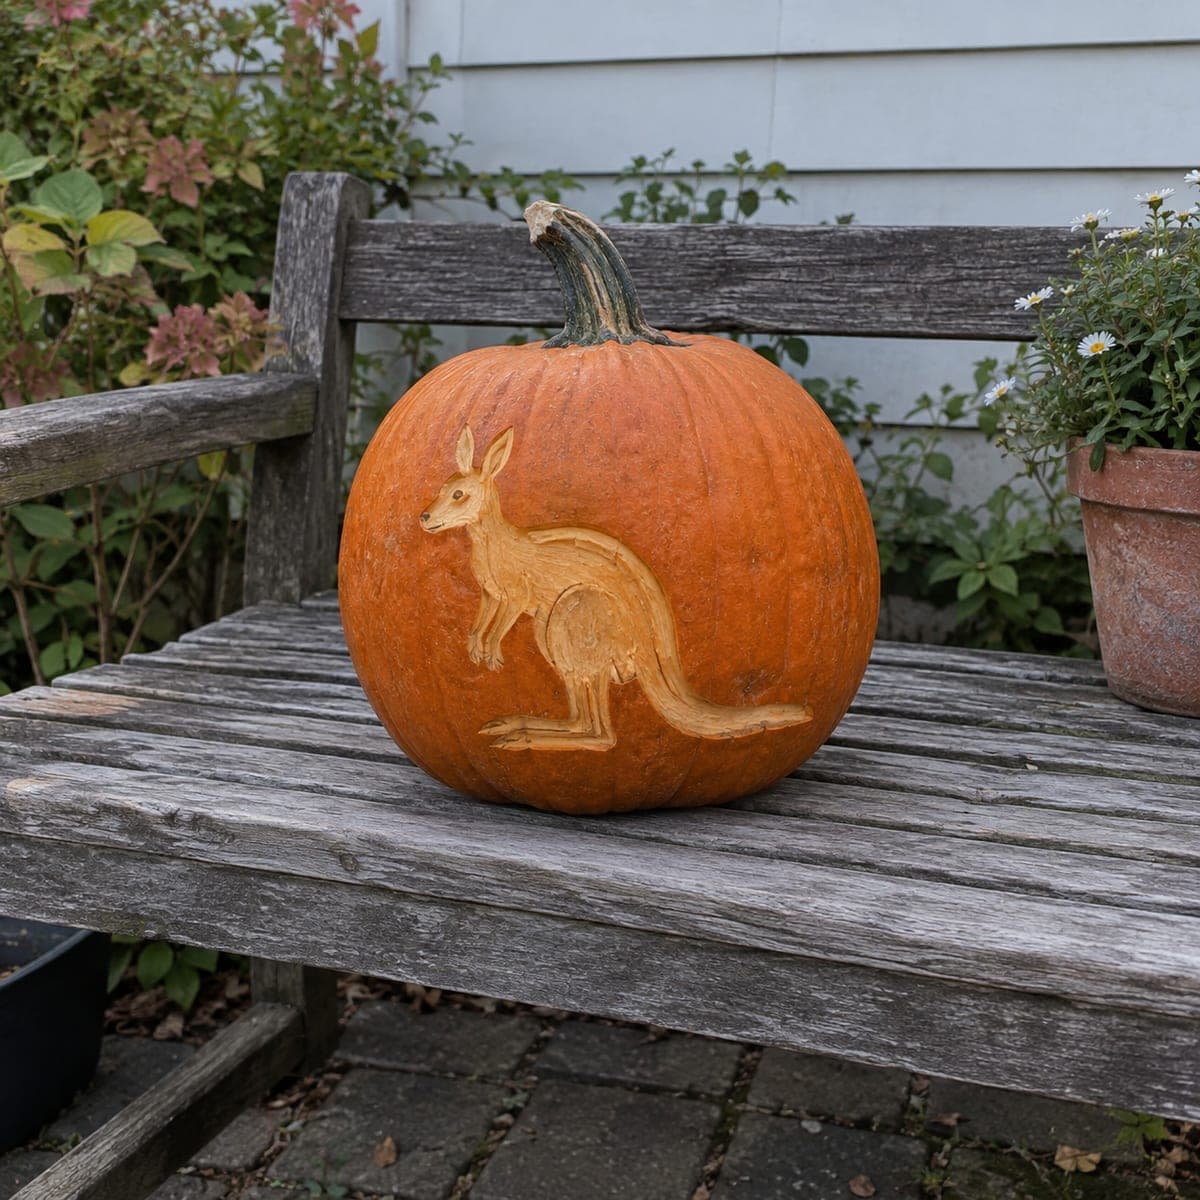
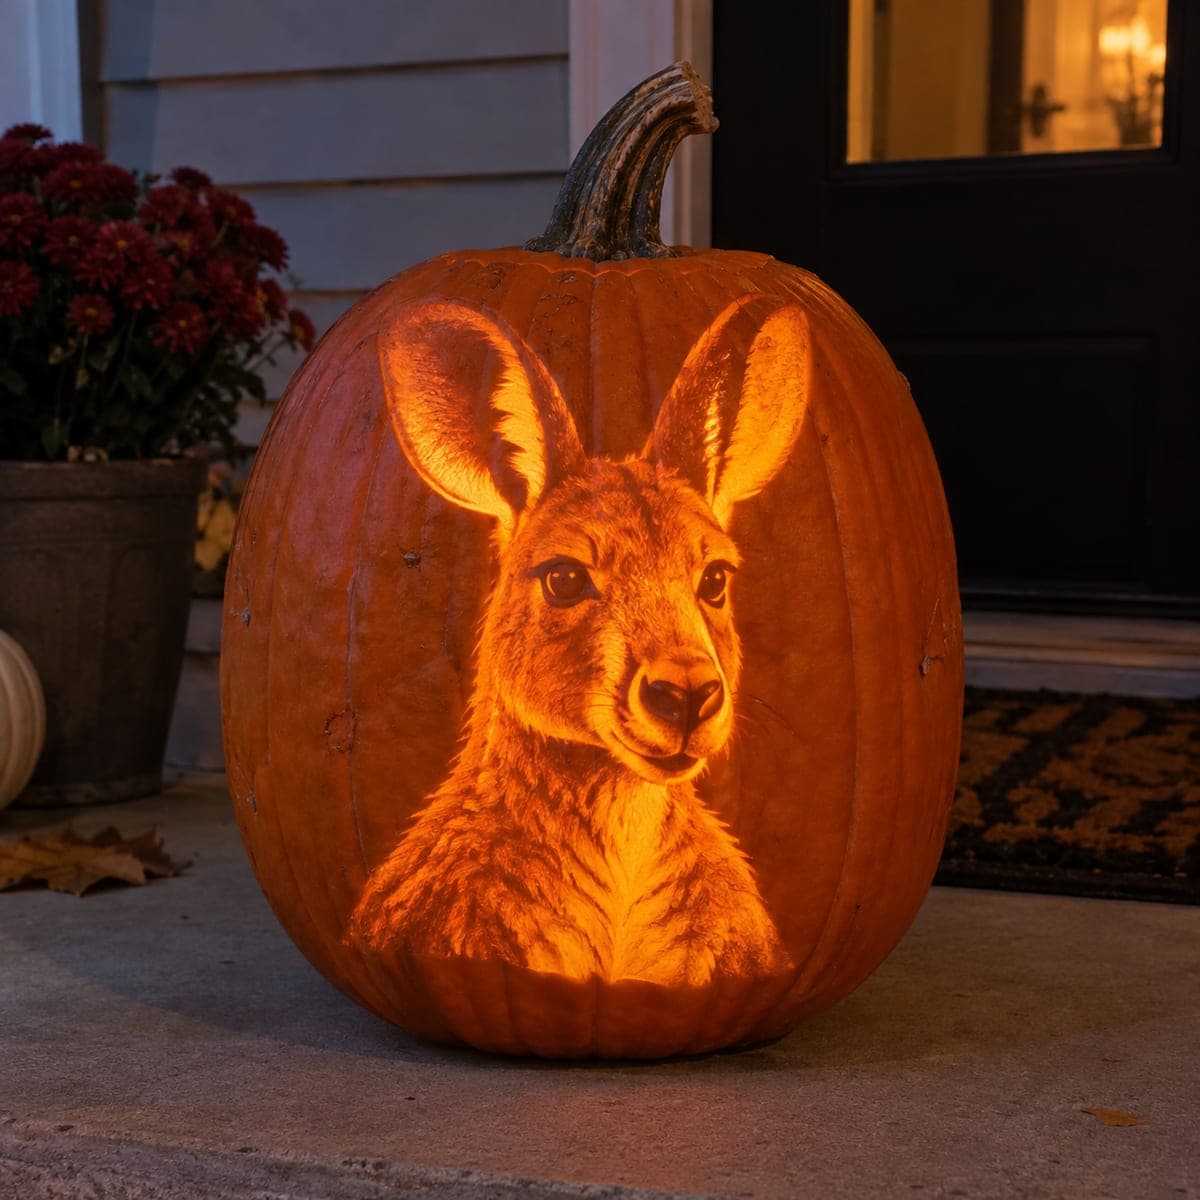
Outback Kangaroo Etched Pumpkin DesignAI
0

Outback Kangaroo Etched Pumpkin Design

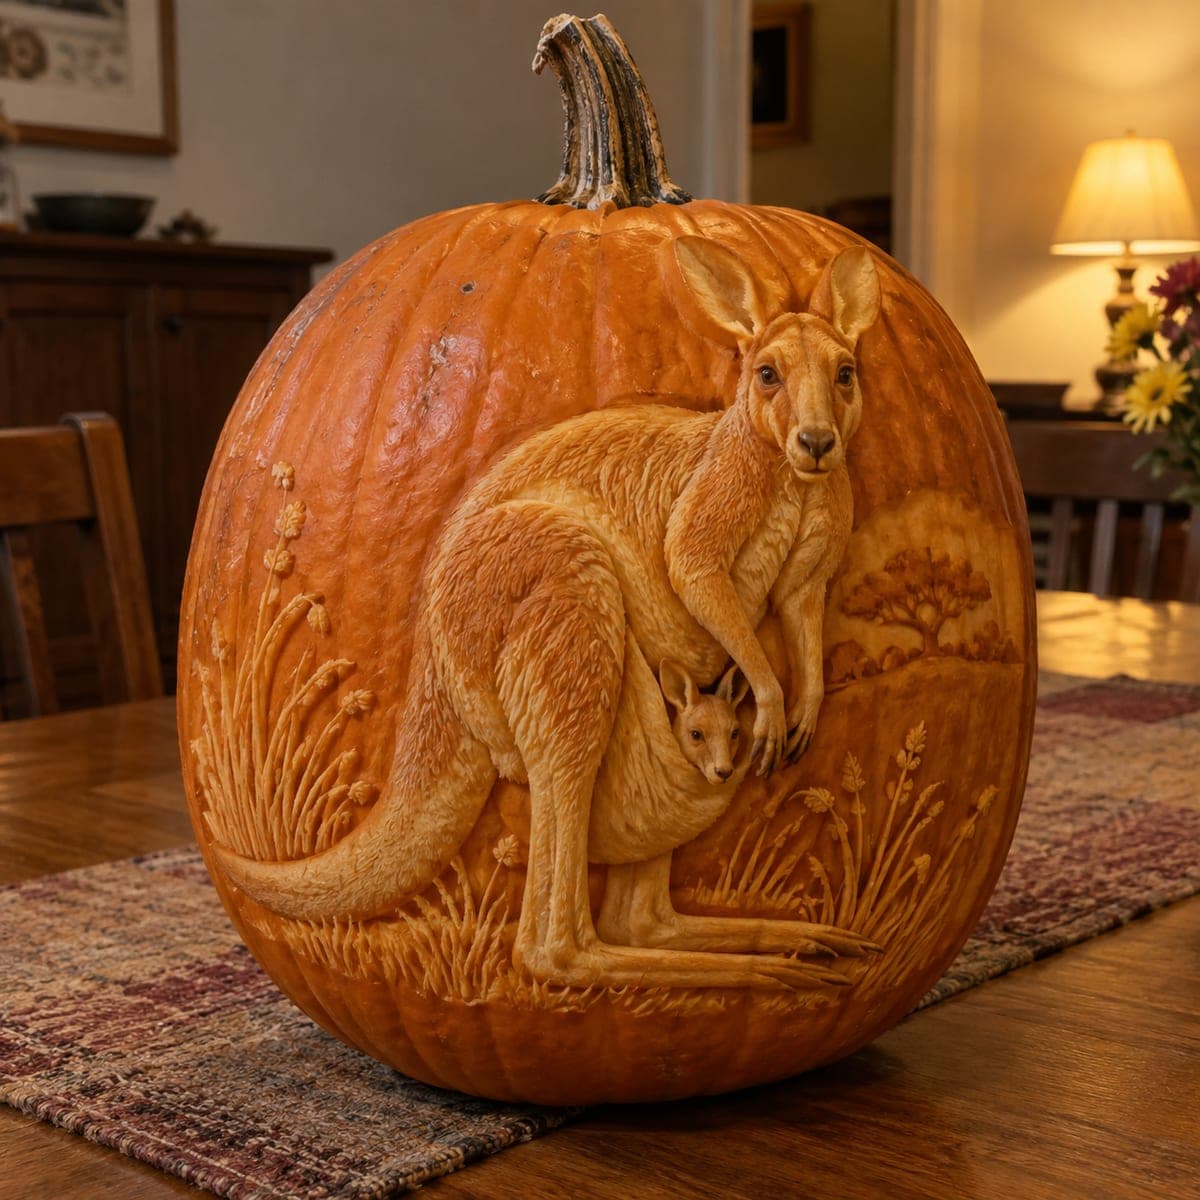
A kangaroo rests on its haunches and thick tail in this etched pumpkin, the whole body peeled to warm gold with scored lines defining the ears, arms, and powerful legs. Because the figure is one continuous relief shape, the project suits carvers stepping up from basic cutouts to surface work. Peel the silhouette with a vegetable peeler for even depth, then add the interior lines with a single confident pass of a V-tool. Displays well in daylight on a garden bench.

This is an AI-generated concept image: a realistic, carvable design idea rather than a photo of a finished carve. AI concepts are always labeled and sit out the leaderboard and the contest.

No ratings yet · Sign in to rate
Comments (0)

  • No comments yet — be the first.

Save without an account. Sign in to like or comment.

Our tips for carving a similar design

The trick here is a single continuous relief shape rather than any cut-through openings. You peel the whole kangaroo silhouette down to the bright skin layer so it glows warm gold, then score just a few interior lines to suggest the ears, arms, and heavy back legs. Keep the light interior detail simple, since the shape does most of the work.

Written by PumpkinCarvingIdeas.com, inspired by the image above. These are our suggestions, not instructions from the uploader. This approach to the AI concept has not been tested on a real pumpkin.

From pumpkin to porch

  1. Pick a smooth pumpkin and transfer the outline

    Choose a large pumpkin with a fairly flat, blemish-free panel to hold the whole figure. Wipe it clean and dry it well. Tape your kangaroo stencil in place and poke closely spaced dots along the outline with a pin or awl. Connect the dots lightly with a washable marker so you have a clear silhouette to follow.

  2. Outline the silhouette with a shallow score

    Before peeling, trace the full outline with a V-tool or a detail knife, cutting only through the skin and no deeper. This gives you a clean edge that keeps the peeled area from spreading past the drawing. Go slow around the head, ears, and tail where the curves are tight. Adults should handle all the sharp tools.

  3. Peel the body to warm gold

    Using a vegetable peeler or a loop tool, shave off the orange skin inside the outline to reveal the lighter flesh underneath. Aim for one even depth across the whole shape so it glows consistently. Work in small overlapping strokes and check the surface in raking light for missed patches. Keep the depth shallow and uniform rather than digging deep pockets.

  4. Score the interior lines

    With a fine V-tool, add the interior detail in single confident passes: the ear openings, the front arm, the belly line, and the crease of the powerful hind leg. These lines should be slightly deeper than the peeled surface so they read as soft shadows. Practice the stroke on the pumpkin's back first if you are unsure. Resist adding too many lines, since a few clean marks look better than many shaky ones.

  5. Clean up and seal the surface

    Brush away shavings and wipe the peeled area with a damp cloth. Even out any ragged edges with the tip of your knife. Rub a thin coat of petroleum jelly over the exposed flesh to slow drying and keep the gold color fresh. Wipe off the excess so it does not look glossy.

  6. Stage it for daylight and add gentle light

    This design shines in daylight, so set it on a garden bench or step where the sun rakes across the relief. For evening, tuck a small battery LED behind or beside it rather than inside, since there are no cutouts to pass light through. Skip candles entirely. Photograph it in soft morning or late afternoon light to catch the texture.

Gather your supplies

Check things off as you get ready.

Work on a stable surface, keep your free hand out of the cutting path, and have an adult handle sharp tools.

Three levels of light

  • Leave intact

    The background pumpkin skin around the kangaroo stays orange and dark.

  • Peel & shade

    The full kangaroo body is peeled to a warm gold mid glow.

  • Cut through

    No areas are cut through on this design, keeping the figure as one solid relief.

Learn the carving basics

Before you start cutting

Do I need to cut all the way through anywhere?

No, this is a surface relief design, so nothing is cut through. You only peel the skin and score shallow lines. That is what makes it a good step up from basic cutouts without the risk of weakening the pumpkin wall.

How do I keep the peeled kangaroo from turning brown before Halloween?

Exposed flesh dries and browns quickly, so plan to display it within a day or two of carving. Coat the peeled area with a thin layer of petroleum jelly to slow moisture loss. Storing it somewhere cool and out of direct sun overnight also helps it last.

Since this is a concept image, will a real pumpkin look the same?

The pictured pumpkin is an AI concept, so no real carving exists, but the technique is entirely doable. A real peeled surface will show more grain and texture, which actually adds character. Keep your scored lines shallow and even and you will get a very similar golden effect.

Your take belongs here, too.

Changed a detail? Made it simpler? Share a photo of your version and tell the community what worked.

Share your pumpkin

More pumpkins like this

You've reached the end · 8 pumpkins
The Patch Report

Fresh pumpkins, in your inbox.

The best new carvings, ideas worth stealing, and how-tos for carving season. Short, seasonal, and gone by November.

A short email during carving season. Unsubscribe anytime. See our privacy policy.