Halloween Pumpkin Carving Contest · Starts October 1st · $500 in prizes
← Back to ideas
@ai_concepts
Aug 30, 2026
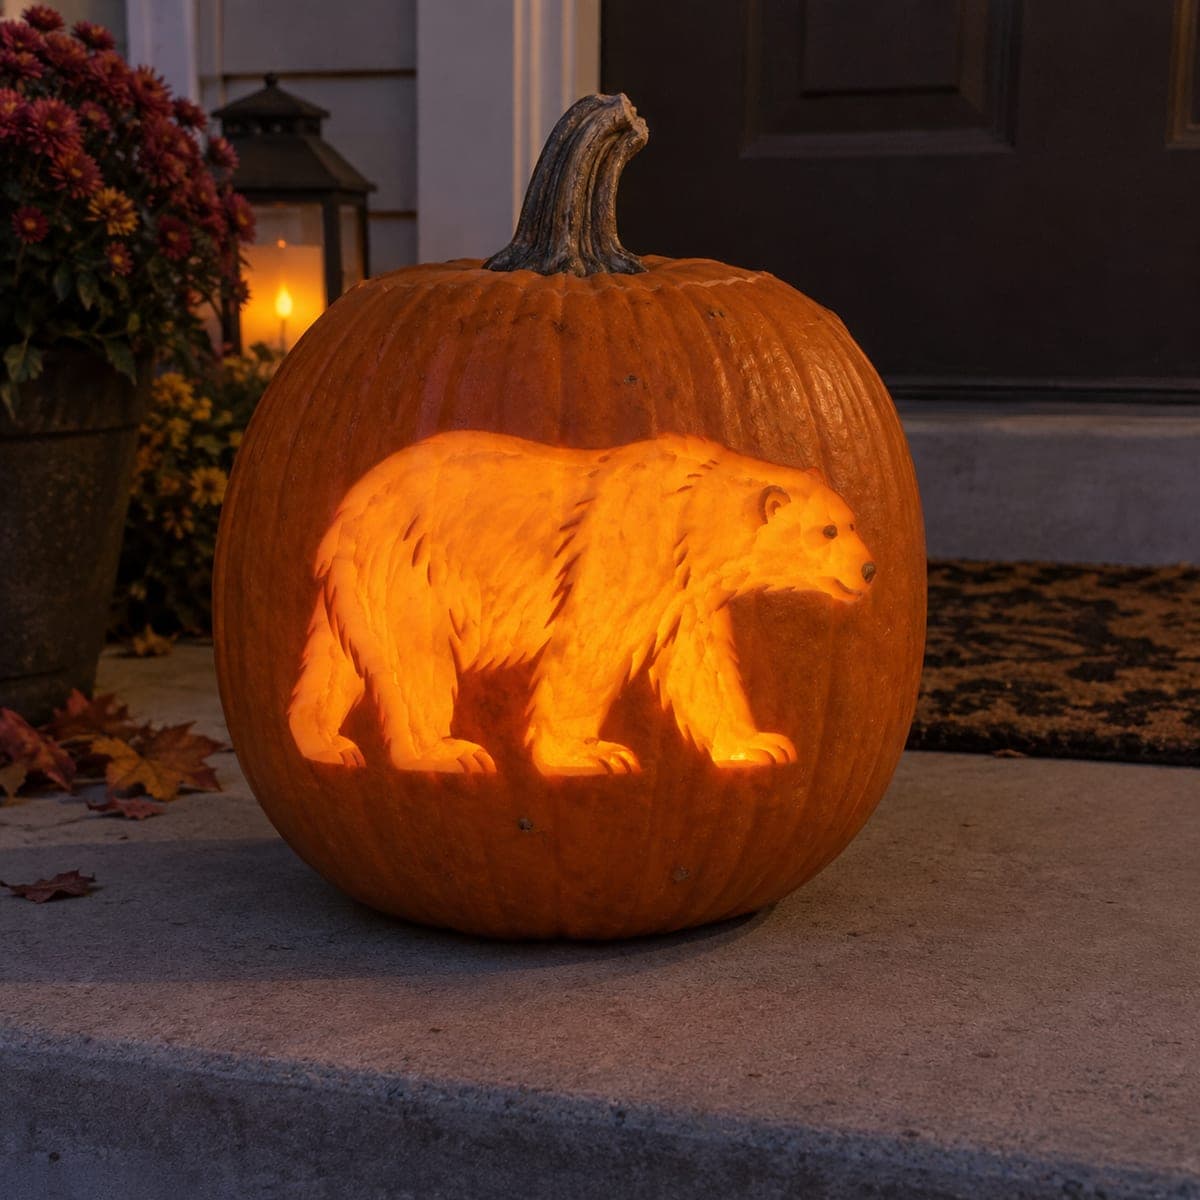
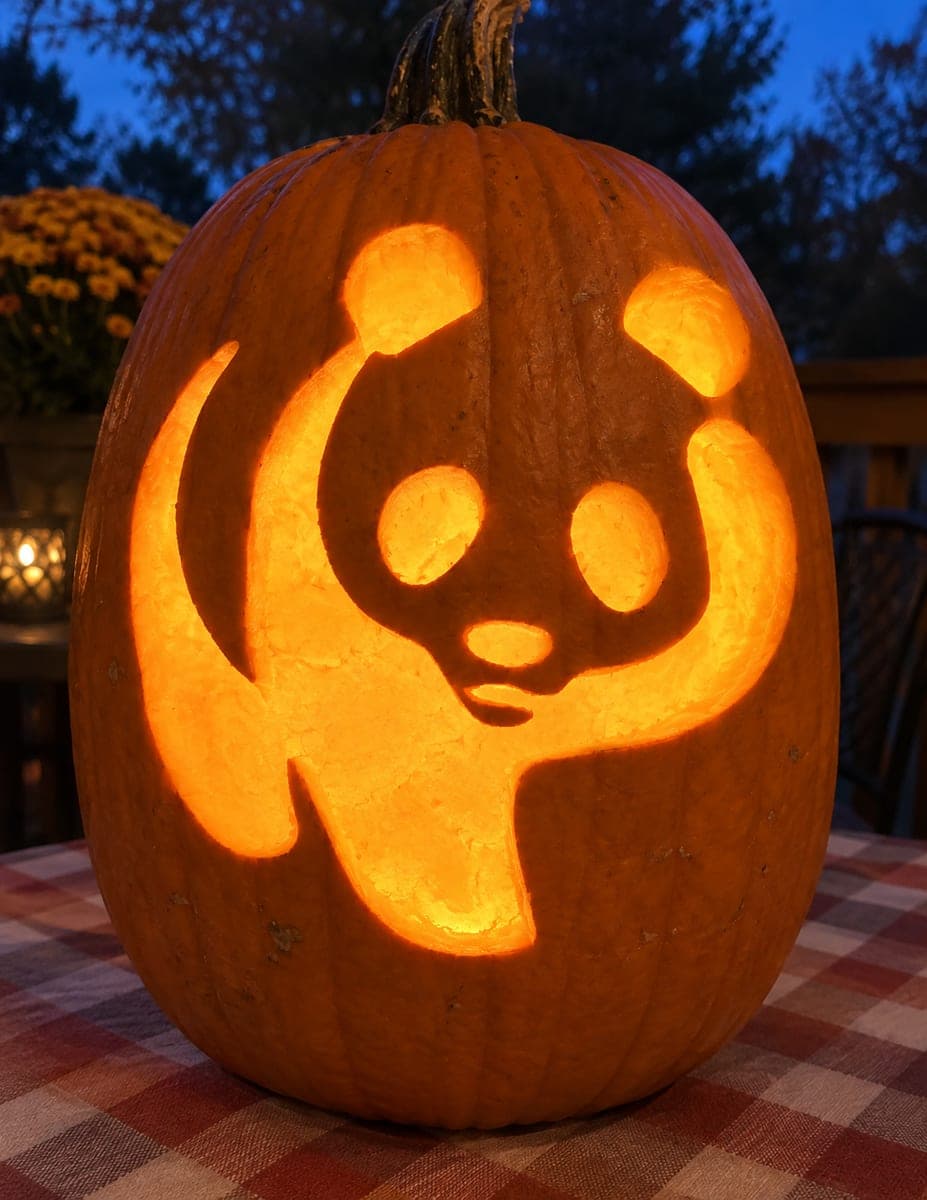
Walking Bear Silhouette Etched PumpkinAI
0

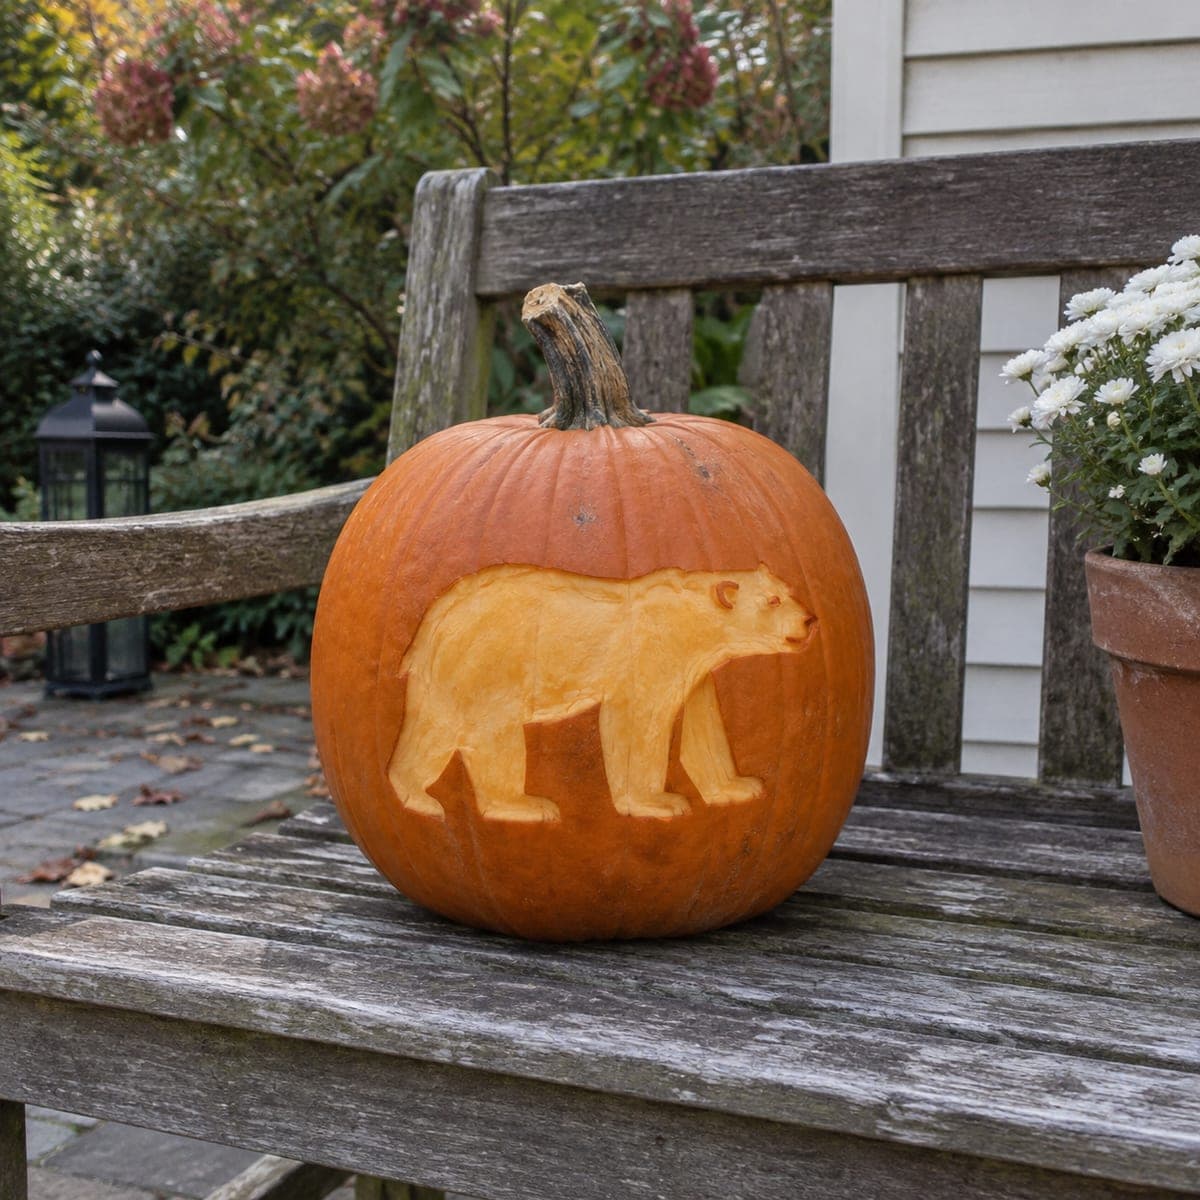
Walking Bear Silhouette Etched Pumpkin

A bear ambles across this pumpkin in a clean peeled silhouette, its pale body standing out against the orange skin for a design that looks finished in full daylight. Etch-only projects like this are perfect for front steps where you never light the pumpkin, and the simple outline suits a first attempt at surface carving. Trace a printed bear template, score the outline, then lift the skin inside it with a peeler in even strokes. Pairs nicely with a mum-and-lantern porch arrangement.

This is an AI-generated concept image: a realistic, carvable design idea rather than a photo of a finished carve. AI concepts are always labeled and sit out the leaderboard and the contest.

No ratings yet · Sign in to rate
Comments (0)

  • No comments yet — be the first.

Save without an account. Sign in to like or comment.

Our tips for carving a similar design

The core trick here is skin-only etching: the bear is not cut all the way through, it is a peeled silhouette that glows pale against the darker orange skin. You score the outline once, then shave away just the top layer of skin inside the shape so the body reads as a soft light patch. Because nothing is cut through, this design shows off best in daylight and holds up well on a breezy front step.

Written by PumpkinCarvingIdeas.com, inspired by the image above. These are our suggestions, not instructions from the uploader. This approach to the AI concept has not been tested on a real pumpkin.

From pumpkin to porch

  1. Pick your pumpkin and plan the panel

    Choose a pumpkin with a broad, fairly flat front face so the bear sits on one smooth panel. Wipe the skin clean and dry it. Since this is an etch-only design, you do not need to open the top or gut the whole pumpkin. Just clear a hand-sized inner area behind the panel if you plan to add a battery light later.

  2. Transfer the bear template

    Print a walking bear silhouette sized to fit comfortably within the front panel with orange border all around. Tape it flat, smoothing out wrinkles over the curve, and trim slits in the paper edges so it lies snug. Poke closely spaced dots along the whole outline with a pin or transfer tool, including the ear, snout, and each leg. Peel the paper and connect the dots lightly in pencil so you can see the full shape.

  3. Score the outline

    With a small detail saw or a craft knife, score along the outline about an eighth of an inch deep. You are cutting into the skin and a little flesh, not all the way through the wall. Keep the blade steady around the legs and the gap between the front and back legs, since those narrow spots define the walking pose. Take your time on the snout and ear where the curves are tight.

  4. Peel the skin inside the shape

    Switch to a vegetable peeler or a loop ribbon tool and start lifting the skin inside the scored line. Work in even, overlapping strokes so the exposed flesh looks smooth and consistent. Peel to a uniform shallow depth, roughly a sixteenth to an eighth of an inch, so the whole body glows the same pale tone. Leave a crisp edge right at the scored line for a sharp silhouette.

  5. Refine edges and depth

    Step back and check the bear from a few feet away. Clean up any ragged spots along the outline and touch up thin areas so the peeled body stays one even shade. If you want a hint of shading, peel the legs and belly a touch deeper than the back for subtle contrast. Blot the surface dry with a paper towel.

  6. Seal, display, and photograph

    Rub the peeled area with a thin coat of petroleum jelly or a spray sealer to slow browning and keep the pale tone fresh. Set the pumpkin on a porch step and stage it with a potted mum and a lantern nearby. For daytime this needs no light at all. If you want a soft evening glow, tuck a small battery LED behind a peeled area, never a candle.

Gather your supplies

Check things off as you get ready.

Work on a stable surface, keep your free hand out of the cutting path, and have an adult handle sharp tools.

Three levels of light

  • Leave intact

    The orange skin surrounding the bear stays untouched and dark, framing the shape.

  • Peel & shade

    The entire bear body is skin-peeled to a soft pale glow, the star of this design.

  • Cut through

    Nothing is cut through here, so there are no full-bright openings; keep it etch-only.

Learn the carving basics

Before you start cutting

Do I need to cut all the way through for the bear to show up?

No. This design works entirely on the surface, so the pale peeled skin contrasts with the darker orange around it. That contrast is strongest in daylight, which is exactly what makes etch-only bears great for unlit porches. Cutting through would change the whole look and weaken the wall.

How do I keep the peeled bear from turning brown?

Exposed pumpkin flesh oxidizes and darkens within a day or two. Coat the peeled area with a thin layer of petroleum jelly or a light spray sealer right after carving to slow this down. Keep the pumpkin cool and out of direct sun, and it will hold its pale tone longer.

The gap between the front and back legs looks tricky. Any tips?

Score that inner gap carefully so you keep a clean orange strip between the legs, since that space is what makes the bear read as walking. Peel right up to the scored edges but do not remove the orange band itself. Working slowly with a small loop tool gives you the most control in those narrow spots.

Your take belongs here, too.

Changed a detail? Made it simpler? Share a photo of your version and tell the community what worked.

Share your pumpkin

More pumpkins like this

You've reached the end · 8 pumpkins
The Patch Report

Fresh pumpkins, in your inbox.

The best new carvings, ideas worth stealing, and how-tos for carving season. Short, seasonal, and gone by November.

A short email during carving season. Unsubscribe anytime. See our privacy policy.