Halloween Pumpkin Carving Contest · Starts October 1st · $500 in prizes
← Back to ideas
@ai_concepts
Sep 25, 2026
Bold T. Rex Silhouette Jack-O-Lantern for BeginnersAI
0

Report this carving

Tell us what is wrong. Reports are private.

Bold T. Rex Silhouette Jack-O-Lantern for Beginners

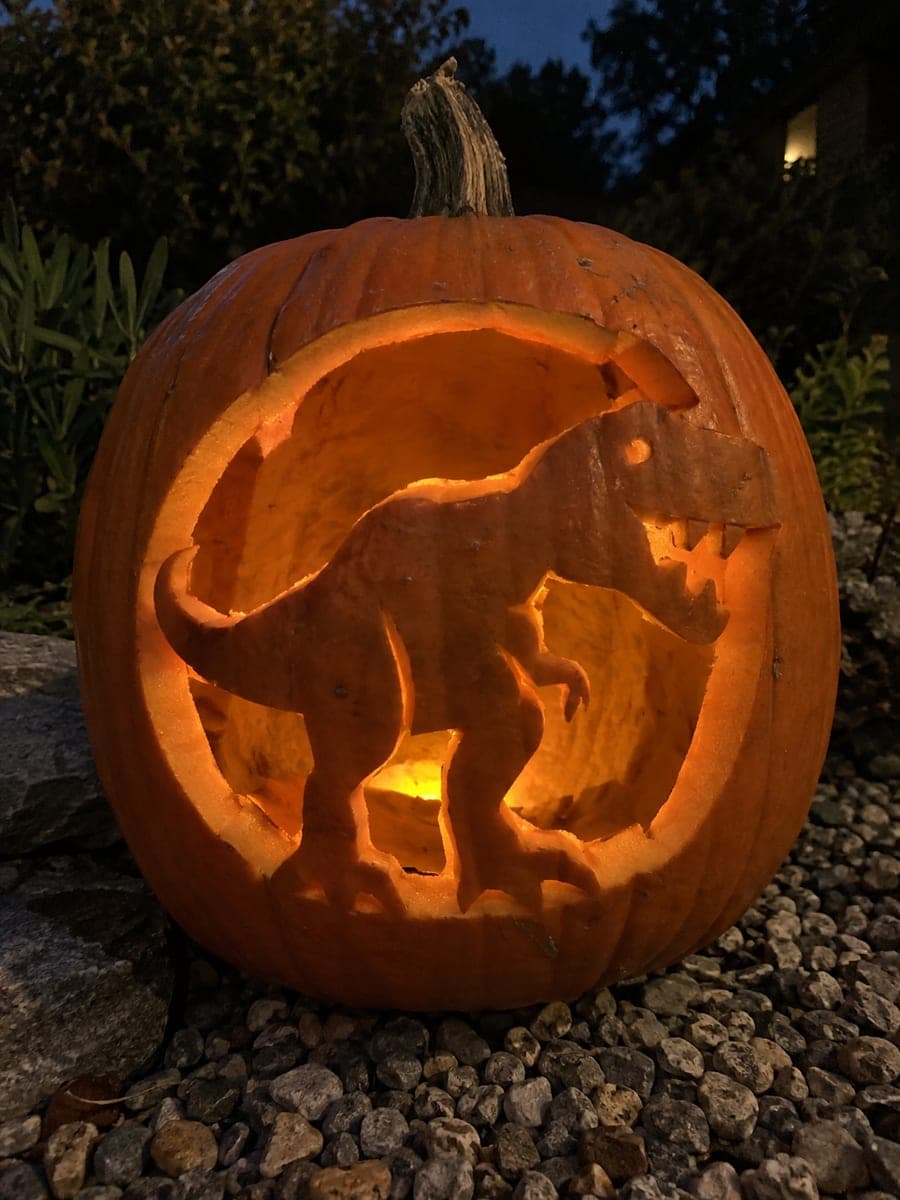
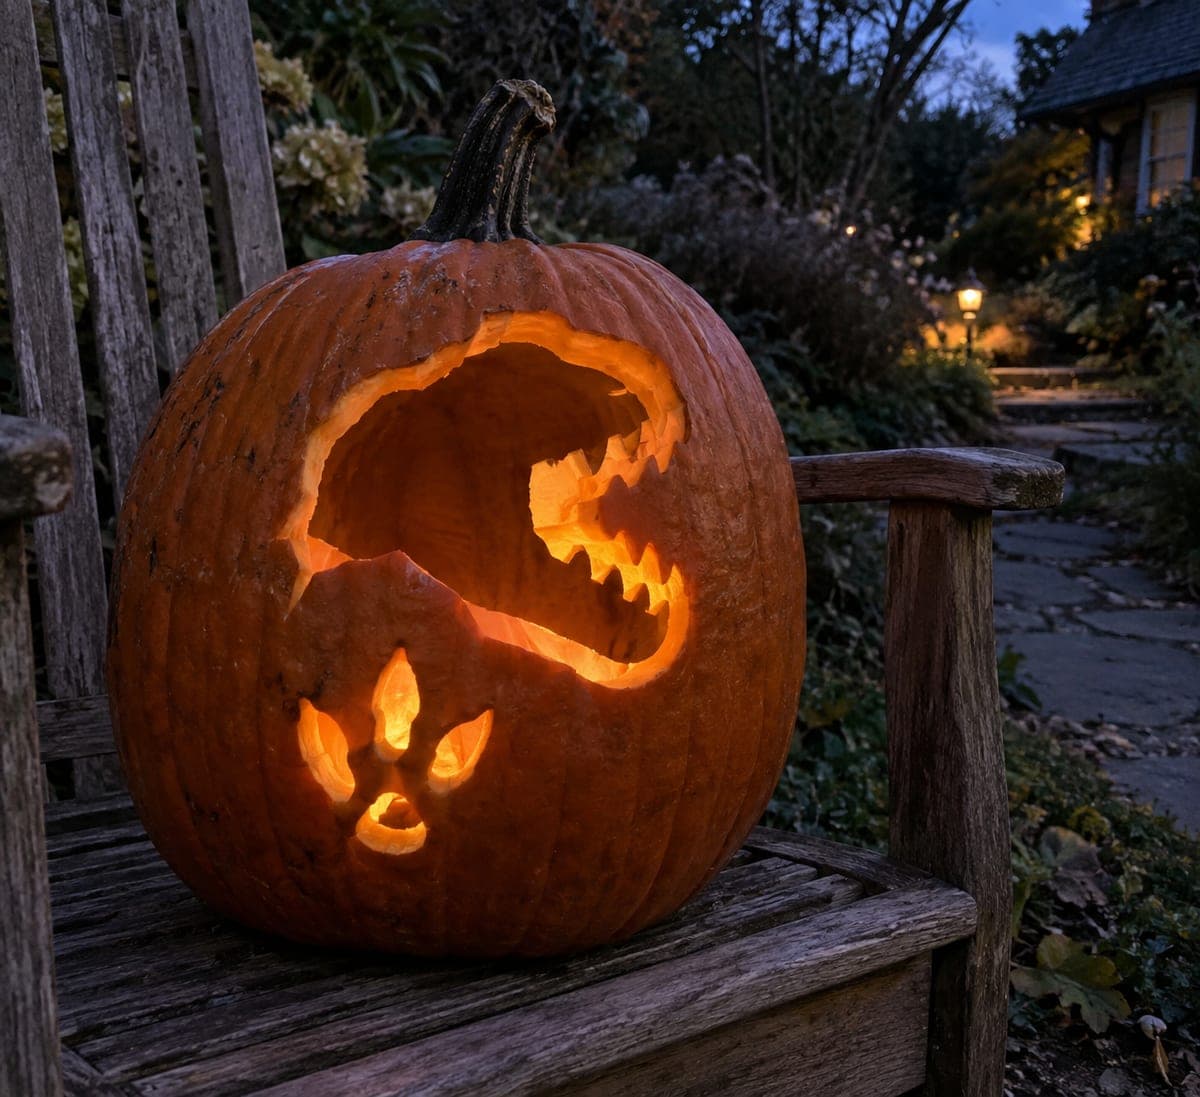
An upright T. rex profile is removed as one clean opening on this easy T. rex pumpkin carving, its broad head, short arms, sturdy legs, and long tail all cut away together. Because the entire shape is one hole with no internal islands, beginners can tackle it confidently with a basic pumpkin saw. Keep the snout contour rounded and the legs wide to avoid any thin sections that could crack. Warm house light in the background adds depth when this jack-o-lantern sits on a concrete patio step.

No ratings yet · Sign in to rate
Comments (0)

  • No comments yet — be the first.

Save without an account. Sign in to like or comment.

Our tips for carving a similar design

The entire T. rex, broad head, short arms, sturdy legs, and long thick tail, is removed as one clean opening with no internal islands or floating teeth. The blunt snout contour and wide legs are deliberately simplified to make the cut forgiving for first-time carvers using a basic pumpkin saw. A distant warm house light behind the pumpkin adds depth when it is placed on a concrete patio step.

From pumpkin to porch

  1. Prep the pumpkin

    Cut the lid from the back and scoop out all seeds and stringy pulp until the walls reach about one inch thick. Wipe the face dry before applying any template. A round, smooth-faced pumpkin gives the cleanest silhouette edge.

  2. Scale and transfer the template

    Print a side-view T. rex silhouette sized so the figure fits within the pumpkin face with at least two inches of rind around it on every side. Tape the template flat and pin-punch the entire outline. Remove the paper and connect the dots with a marker.

  3. Check the proportions before cutting

    Confirm the legs are at least three quarters of an inch wide at their narrowest and the snout contour is rounded rather than coming to a sharp point. Narrow legs and pointed snouts are the two most common breakage points on dinosaur silhouettes.

  4. Saw the T. rex shape

    Follow the outline in one continuous pass with a thin pumpkin saw blade, moving slowly around the head and tail curves. Keep the blade perpendicular to the pumpkin face for vertical, clean-cut edges throughout.

  5. Remove the cutout and clean edges

    Push the T. rex piece out from inside and trim any rough spots with a small craft knife. Coat all cut edges with petroleum jelly immediately after cutting.

  6. Display on a patio step

    Place a battery-powered LED puck inside and set the pumpkin on a concrete step with a warm house light visible in the background. The solid orange rind surrounding the glowing dinosaur shape creates a crisp, dramatic silhouette visible from the street.

Written with AI to match this design

Gather your supplies

Check things off as you get ready.

Work on a stable surface, keep your free hand out of the cutting path, and have an adult handle sharp tools.

Three levels of light

  • Leave intact

    The entire surrounding orange rind stays dark

  • Peel & shade

    None on this design

  • Cut through

    The complete T. rex silhouette aperture is cut through for full warm glow

Learn the carving basics

Before you start cutting

How do I keep the tail from snapping when I remove the cutout piece?

Support the tail from inside with a finger as you push the piece out. The tail is the longest unsupported section, so applying gentle, even pressure across the whole piece rather than pushing from one end prevents it from levering and cracking at the base.

Can I add a simple eye hole without it becoming too advanced?

A single small round eye hole is straightforward to add with an apple corer once the main silhouette is cut. It does not create any floating pieces and upgrades the design visually. Place it in the upper portion of the head before cutting the main silhouette while the rind is still fully supported.

Is a basic pumpkin saw from a carving kit enough for this design?

Yes, this design was specifically built around what a standard kit saw can handle. The blunt snout, wide legs, and broad tail mean there are no narrow sections that would demand a detail blade. The main thing is to move slowly and let the saw do the work.

Your take belongs here, too.

Changed a detail? Made it simpler? Share a photo of your version and tell the community what worked.

Share your pumpkin

More pumpkins like this

You've reached the end · 8 pumpkins
The Patch Report

Fresh pumpkins, in your inbox.

The best new carvings, ideas worth stealing, and how-tos for carving season. Short, seasonal, and gone by November.

A short email during carving season. Unsubscribe anytime. See our privacy policy.