Halloween Pumpkin Carving Contest · Starts October 1st · $500 in prizes
← Back to ideas
@ai_concepts
Sep 25, 2026
Roaring T. Rex Head Profile Pumpkin with Claw FootprintAI
0

Report this carving

Tell us what is wrong. Reports are private.

Roaring T. Rex Head Profile Pumpkin with Claw Footprint

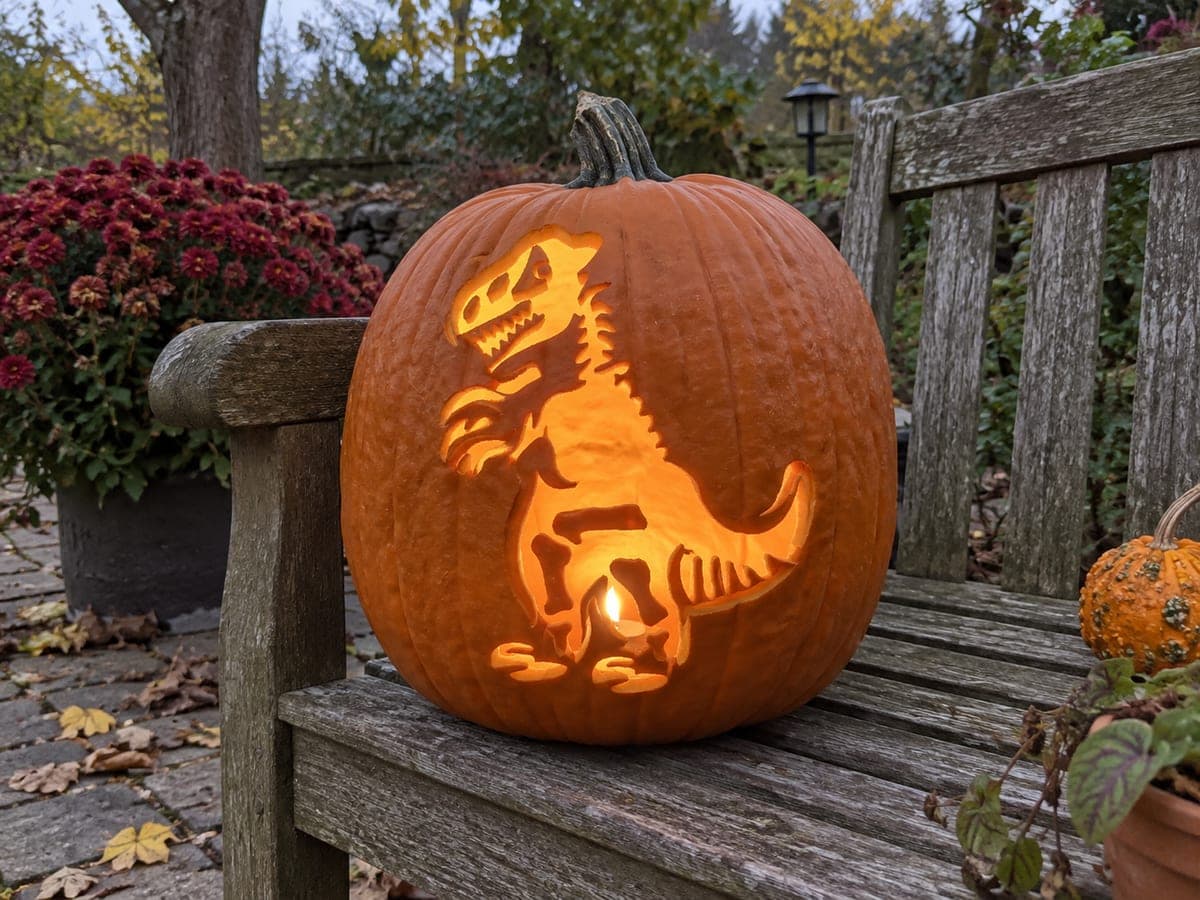
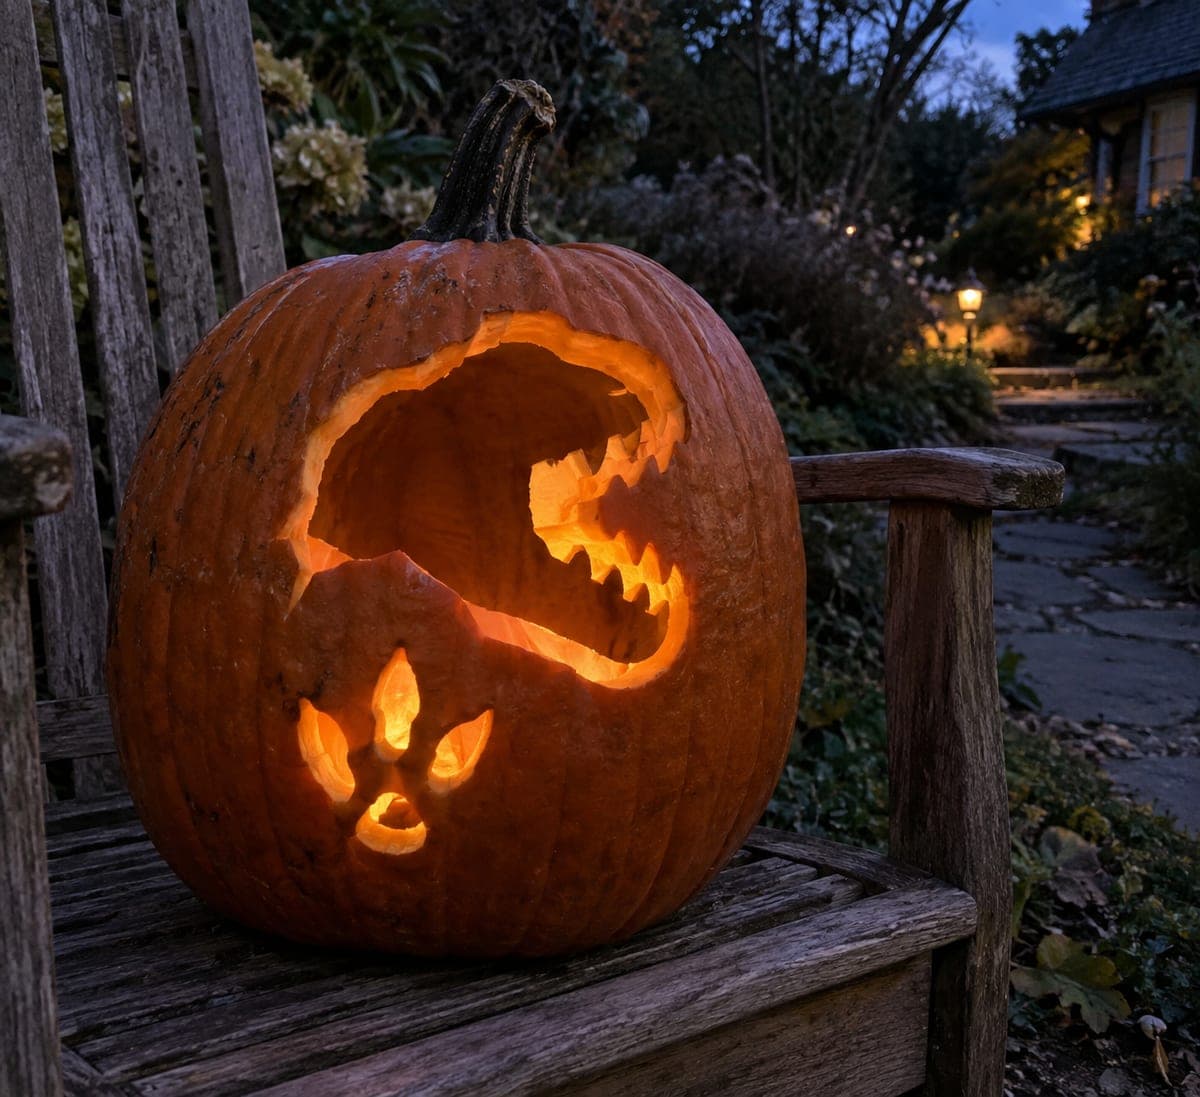
An angular T. rex jaw with six blunt tooth notches glows beside a separate three-claw footprint made from round and teardrop holes on this intermediate T. rex pumpkin carving. The tooth notches stay attached to the rim of the shell rather than floating, which keeps the design sturdy. Cut the footprint openings first while the pumpkin is at full structural strength, then tackle the larger jaw silhouette. Setting this pumpkin on a wooden outdoor chair at dusk lets both the carved details and the garden path behind it catch the warm glow.

No ratings yet · Sign in to rate

Comments (0)

  • No comments yet — be the first.

Save without an account. Sign in to like or comment.

Our tips for carving a similar design

An angular T. rex jaw silhouette with six blunt tooth notches attached to the shell rim glows beside a separate three-claw footprint made from round and teardrop holes. Because the tooth notches stay connected to the rim rather than floating, the design remains structurally stable despite the irregular jaw outline. Cutting the footprint components first while the pumpkin is at full strength, then tackling the larger jaw silhouette, is the safest sequence.

From pumpkin to porch

  1. Prepare and plan both elements

    Scoop the pumpkin to about one inch of wall thickness. Sketch the jaw position in the upper two-thirds of the face and the footprint cluster in the lower third. Leave at least an inch of rind between the elements and between each element and the pumpkin edge.

  2. Transfer the footprint holes first

    Pin-transfer the footprint layout: four separate round and teardrop shapes forming a three-claw impression. Confirm each hole has at least half an inch of rind between it and its neighbors before cutting.

  3. Cut the footprint apertures

    Saw the three teardrop claw holes and the round pad hole while the pumpkin face is still fully intact. Use a small drill bit or detail blade for the round hole and a thin saw for the teardrops. Clean up any rough edges before moving to the jaw.

  4. Transfer and cut the jaw silhouette

    Pin-transfer the jaw outline, checking that all six tooth notches connect to the upper or lower shell rim rather than floating. Saw the jaw aperture in one pass, moving carefully around each notch. Adults should handle the saw work.

  5. Clean edges and apply petroleum jelly

    Trim any rough spots across both elements and coat all cut edges with petroleum jelly. Check that the tooth notches are still firmly attached to the rim after the main jaw piece is removed.

  6. Display at dusk on a wooden chair

    Place a bright LED inside and set the pumpkin on a wooden outdoor chair at blue hour. Both the jaw and footprint glow clearly and the garden path behind adds depth. The separate footprint element below the jaw implies scale and movement.

Written with AI to match this design

Gather your supplies

Check things off as you get ready.

Work on a stable surface, keep your free hand out of the cutting path, and have an adult handle sharp tools.

Three levels of light

  • Leave intact

    The upper and lower shell rims, the tooth notch connections, and all rind between elements stay dark

  • Peel & shade

    None on this design

  • Cut through

    The jaw silhouette opening and all four footprint apertures are cut through for full glow

Learn the carving basics

Before you start cutting

How do I keep the six tooth notches from snapping off?

The key is ensuring each notch remains rooted in the shell rim rather than becoming a free-floating point. Cut each notch by entering from the main jaw opening and stopping at the rim, rather than cutting from outside the pumpkin inward. Blunt, rounded notch tips hold far better than sharp points.

Does the footprint need to be exactly below the jaw, or can I position it anywhere?

Any position on the lower third of the face works. Placing it slightly off-center from the jaw creates a more dynamic composition, as if the dinosaur is stepping forward. Just maintain at least an inch of rind between the footprint and the jaw opening edge.

Can I carve this design on a smaller pumpkin?

A smaller pumpkin can work if you scale both elements down proportionally. The tooth notches become a greater structural risk on a thin-walled small pumpkin, so round them even more and keep them short. A medium-sized carving pumpkin of eight to ten inches diameter is the sweet spot.

Your take belongs here, too.

Changed a detail? Made it simpler? Share a photo of your version and tell the community what worked.

Share your pumpkin

More pumpkins like this

You've reached the end · 8 pumpkins
The Patch Report

Fresh pumpkins, in your inbox.

The best new carvings, ideas worth stealing, and how-tos for carving season. Short, seasonal, and gone by November.

A short email during carving season. Unsubscribe anytime. See our privacy policy.