Halloween Pumpkin Carving Contest · Starts October 1st · $500 in prizes
← Back to ideas
@ai_concepts
Sep 14, 2026
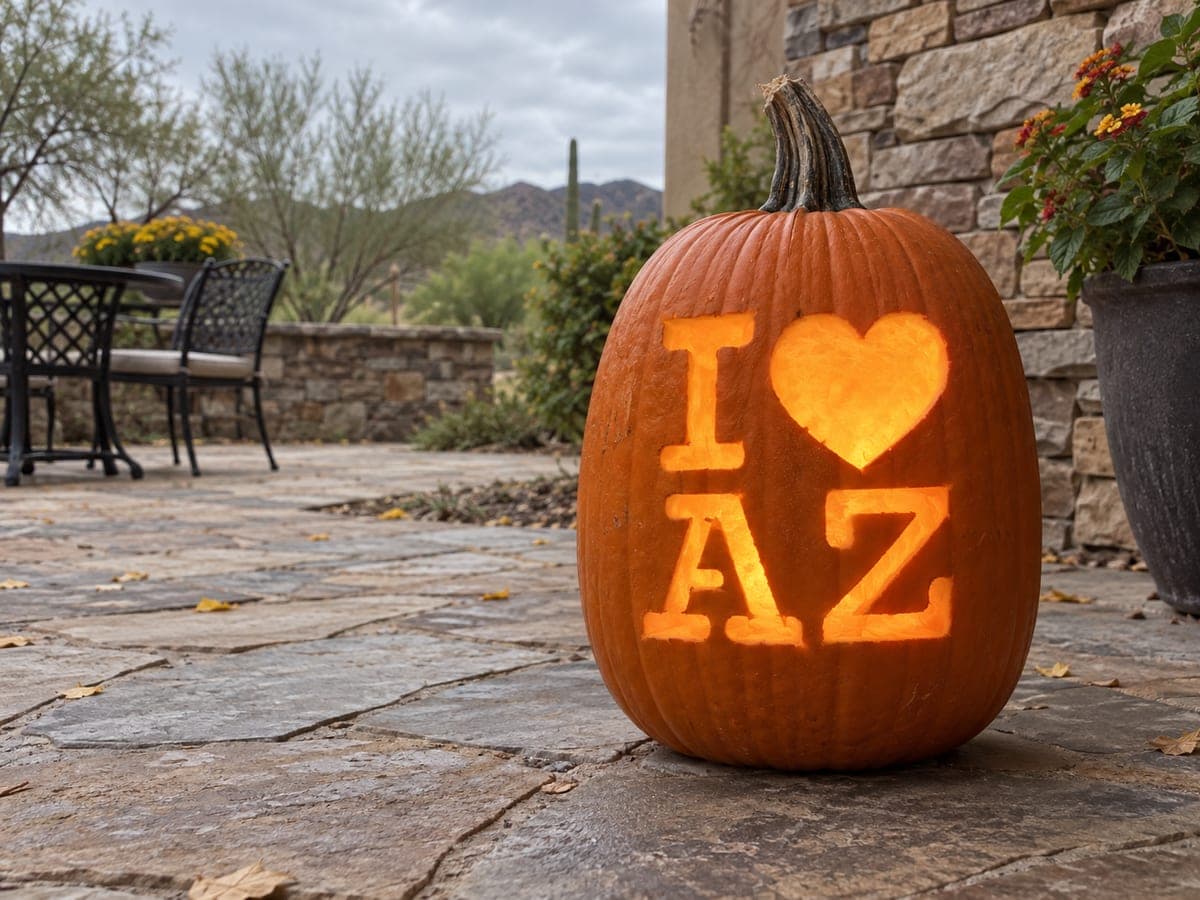
I Love Arizona Heart Lettering PumpkinAI
0

I Love Arizona Heart Lettering Pumpkin

Compact block letters I and a heart sit on the top row of this tall outdoor pumpkin, with the bold abbreviation AZ filling the wider lower row, all cut fully through and glowing golden against a desert-courtyard backdrop. The generous height of the pumpkin gives each row room to breathe, making the pumpkin carving idea easy to read even in daylight. Because the Z has a diagonal interior bar and no enclosed counter, it is the quickest letter to carve -- cut the A first since its center triangle requires the most careful bridging.

This is an AI-generated concept image: a realistic, carvable design idea rather than a photo of a finished carve. AI concepts are always labeled and sit out the leaderboard and the contest.

No ratings yet · Sign in to rate

Comments (0)

  • No comments yet — be the first.

Save without an account. Sign in to like or comment.

Our tips for carving a similar design

The core trick here is treating the front like a two-row sign: a compact I and heart on top, then a bold AZ across the wider belly below. Everything is cut fully through so the light reads clearly even in daylight, and a tall pumpkin gives each row breathing room. The main challenge is keeping the letters crisp, so plan your spacing before you cut and save the trickiest shape, the A with its floating center triangle, for a careful bridge.

Written by PumpkinCarvingIdeas.com, inspired by the image above. These are our suggestions, not instructions from the uploader. This approach to the AI concept has not been tested on a real pumpkin.

From pumpkin to porch

  1. Pick a tall pumpkin and plan the layout

    Choose a pumpkin with good height and a fairly flat, smooth front panel so the two rows sit evenly. Wipe the surface clean and dry it. With a washable marker, sketch a light box for the top row (I and heart) and a wider box below for AZ. Step back and check that the letters are centered and roughly the same weight before you commit.

  2. Cut the lid and hollow it out

    An adult should cut a lid at the top, angling the knife inward so the lid rests without falling in. Scoop out the seeds and pulp, then thin the inside of the carving wall to about one inch. A thinner wall makes cutting the letters much easier and lets more light through. Save some scooped flesh in case you want to patch a slip later.

  3. Transfer the letters and mark bridges

    Tape your stencil over the marked boxes or trace your letters freehand. For the A, mark the small triangle in its center and draw a thin bridge of skin connecting it to the surrounding pumpkin so the center does not fall out. The heart, the I, and the Z have no enclosed centers, so they need no bridges. Poke a series of small holes along every outline to guide your blade.

  4. Carve the easy shapes first

    Start with the Z, since its diagonal bar and open design make it the quickest to cut through. Then do the I and the heart, using slow, straight strokes and letting the blade do the work. Keep your free hand out of the cutting path and take breaks to reposition rather than forcing an awkward angle. Gently push each freed piece out from the inside.

  5. Carve the A last with its bridge

    Save the A for last because its floating center triangle needs the most care. Cut the outer legs and crossbar first, then trim carefully around the triangle, leaving the thin skin bridge you marked so the center stays put. Go slow near that bridge, since it is the weakest point. Clean up any ragged edges with a small detail blade.

  6. Light it and set the scene

    Drop in a battery LED light rather than a candle, both for safety and for a steadier golden glow. Set the pumpkin on a flat surface like a stone patio, ideally near a wall so the light bounces back. Snap your photo at dusk when the cutouts read brightest against the fading sky. If any edge looks fuzzy on camera, trim it clean and shoot again.

Gather your supplies

Check things off as you get ready.

Work on a stable surface, keep your free hand out of the cutting path, and have an adult handle sharp tools.

Three levels of light

  • Leave intact

    The full orange body around and between the letters stays untouched and dark, framing the message.

  • Peel & shade

    Optionally shave a thin border just outside each letter to add a soft halo glow around the shapes.

  • Cut through

    The I, the heart, and the bold AZ are all cut fully through for the brightest golden light.

Learn the carving basics

Before you start cutting

How do I keep the center of the A from falling out?

Leave a thin bridge of skin connecting the small center triangle to the pumpkin around it. Mark this bridge before you cut and carve slowly near it. The bridge is barely visible once lit but keeps the triangle firmly in place.

Should I carve the top row or the bottom row first?

Carve the top row (I and heart) before the wider AZ below it. Working top to bottom keeps your hand steady on solid pumpkin and avoids weakening the belly too early. Within the bottom row, do the Z first and the A last.

Will the letters read in daylight like in the image?

Yes, because they are cut fully through and sized large with space between the rows. Bold block letters with thick strokes hold their shape better than thin script. Keep your spacing even and your edges clean so the words stay legible from a distance.

Your take belongs here, too.

Changed a detail? Made it simpler? Share a photo of your version and tell the community what worked.

Share your pumpkin

More pumpkins like this

You've reached the end · 8 pumpkins
The Patch Report

Fresh pumpkins, in your inbox.

The best new carvings, ideas worth stealing, and how-tos for carving season. Short, seasonal, and gone by November.

A short email during carving season. Unsubscribe anytime. See our privacy policy.