Halloween Pumpkin Carving Contest · Starts October 1st · $500 in prizes
← Back to ideas
@ai_concepts
Sep 14, 2026
I Love Hawaii Heart Lettering PumpkinAI
0

I Love Hawaii Heart Lettering Pumpkin

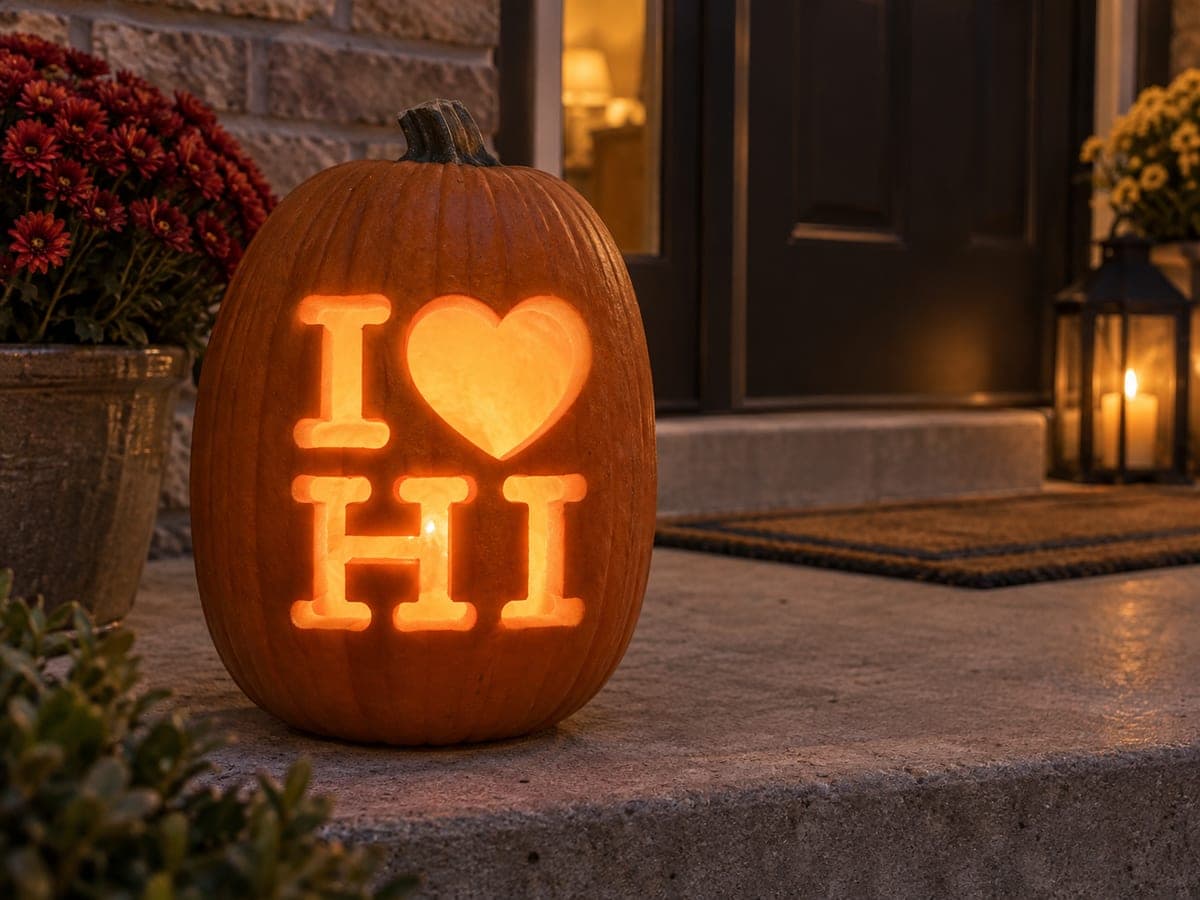
The familiar I-heart-state format is used here with HI in the lower row, the chunky block H and I letters cut fully through a tall porch pumpkin and glowing alongside a lantern and mums at the front door. The H is structurally straightforward because its crossbar connects two identical vertical pillars, but that crossbar is the single weakest point -- carve both vertical legs first, leaving the crossbar until last so the two pillars brace it. Placing this pumpkin carving idea beside the lantern as seen in the image reinforces the warm, welcoming effect by letting both light sources complement each other.

This is an AI-generated concept image: a realistic, carvable design idea rather than a photo of a finished carve. AI concepts are always labeled and sit out the leaderboard and the contest.


No ratings yet · Sign in to rate

Comments (0)

  • No comments yet — be the first.

Save without an account. Sign in to like or comment.

Our tips for carving a similar design

The core trick here is treating the whole design as a set of full cutouts, letting the LED inside blast through the I, the heart, and the block letters H and I. The one part to respect is the H crossbar, which is the weakest link, so you carve both vertical legs first and let those pillars brace the crossbar you save for last. Keep the letters chunky and evenly spaced so they read clearly from the sidewalk.

Written by PumpkinCarvingIdeas.com, inspired by the image above. These are our suggestions, not instructions from the uploader. This approach to the AI concept has not been tested on a real pumpkin.

From pumpkin to porch

  1. Plan the layout and prep the pumpkin

    Pick a tall, evenly shaped pumpkin with one flat, blemish-free face so the two rows of lettering have room. Have an adult cut a lid from the bottom or the back rather than the top, which keeps the front face clean and makes the light easy to service. Scoop the insides and thin the carving wall from the inside to about one inch so cuts go smoothly. A thinner wall also lets more light through the letters.

  2. Transfer the stencil

    Print or draw the design as two rows: a capital I next to a heart on top, and a block H and I on the bottom. Tape the stencil flat to the front and poke closely spaced dots along every outline with a pushpin or transfer tool. Space the dots tighter on the curves of the heart so it stays smooth. Peel the paper and connect the dots lightly with a marker if you want a clear guide.

  3. Carve the vertical legs and simple shapes first

    Start with the top I and the two vertical legs of the H, since these are solid, stable openings. Use a small carving saw and keep the blade straight, cutting with gentle even strokes. Push the cut pieces out toward you once each shape is free. Doing these first means the H already has two firm pillars standing before you touch the fragile part.

  4. Save the H crossbar for last

    The crossbar connecting the two H pillars is the single weakest point, so cut it only after both legs are done and bracing it. Make short, controlled strokes and support the crossbar with your free hand as you finish each side. Cut the heart and the bottom I next, again pushing pieces out cleanly. Work slowly on the heart's point and dip so the curves stay crisp.

  5. Clean the edges and add a glow accent

    Trace each opening from the inside with your saw or a small knife to square up the walls and remove ragged bits. For extra warmth, lightly peel a shallow border of skin just outside the letters so a faint orange halo surrounds the bright cutouts. Wipe the cut edges and rub a little petroleum jelly on them to slow drying. Test-fit your light before setting it out.

  6. Light it and stage the photo

    Drop in one or two bright LED lights or a battery puck, never a candle, so the letters glow steadily and safely. Set the pumpkin on a porch step beside a lantern and some mums, as in the concept image, so both light sources play off each other. Shoot at dusk when the sky still holds a little blue for the warmest contrast. Angle the camera slightly to one side so the lettering reads without glare.

Gather your supplies

Check things off as you get ready.

Work on a stable surface, keep your free hand out of the cutting path, and have an adult handle sharp tools.

Three levels of light

  • Leave intact

    The main body of the pumpkin skin stays untouched and dark, framing the message.

  • Peel & shade

    A shallow skin-peeled halo just outside the letters and heart for a soft mid glow.

  • Cut through

    The I, the heart, and the block H and I are cut fully through for the brightest light.

Learn the carving basics

Before you start cutting

How do I keep the H crossbar from breaking?

Carve both vertical legs of the H first so the two pillars are standing and solid before you touch the crossbar. Save the crossbar for the very last cut and support it with your free hand as you work. Short, gentle strokes and a thinned wall make this easy.

What is the best way to space two rows of letters evenly?

Sketch or print the layout as a single stencil so the top row and bottom row align before you start. Center the block letters and leave equal gaps so the message reads clearly from the sidewalk. A quick marker guideline across the pumpkin helps you keep the baselines level.

Can I make the heart glow warmer than the letters?

Yes, peel a shallow layer of skin inside or around the heart instead of cutting it all the way through if you want a softer, deeper orange. You can also aim a second LED slightly toward the heart opening. Test both looks before deciding, since a full cutout will always be the brightest.

Your take belongs here, too.

Changed a detail? Made it simpler? Share a photo of your version and tell the community what worked.

Share your pumpkin

More pumpkins like this

You've reached the end · 8 pumpkins
The Patch Report

Fresh pumpkins, in your inbox.

The best new carvings, ideas worth stealing, and how-tos for carving season. Short, seasonal, and gone by November.

A short email during carving season. Unsubscribe anytime. See our privacy policy.