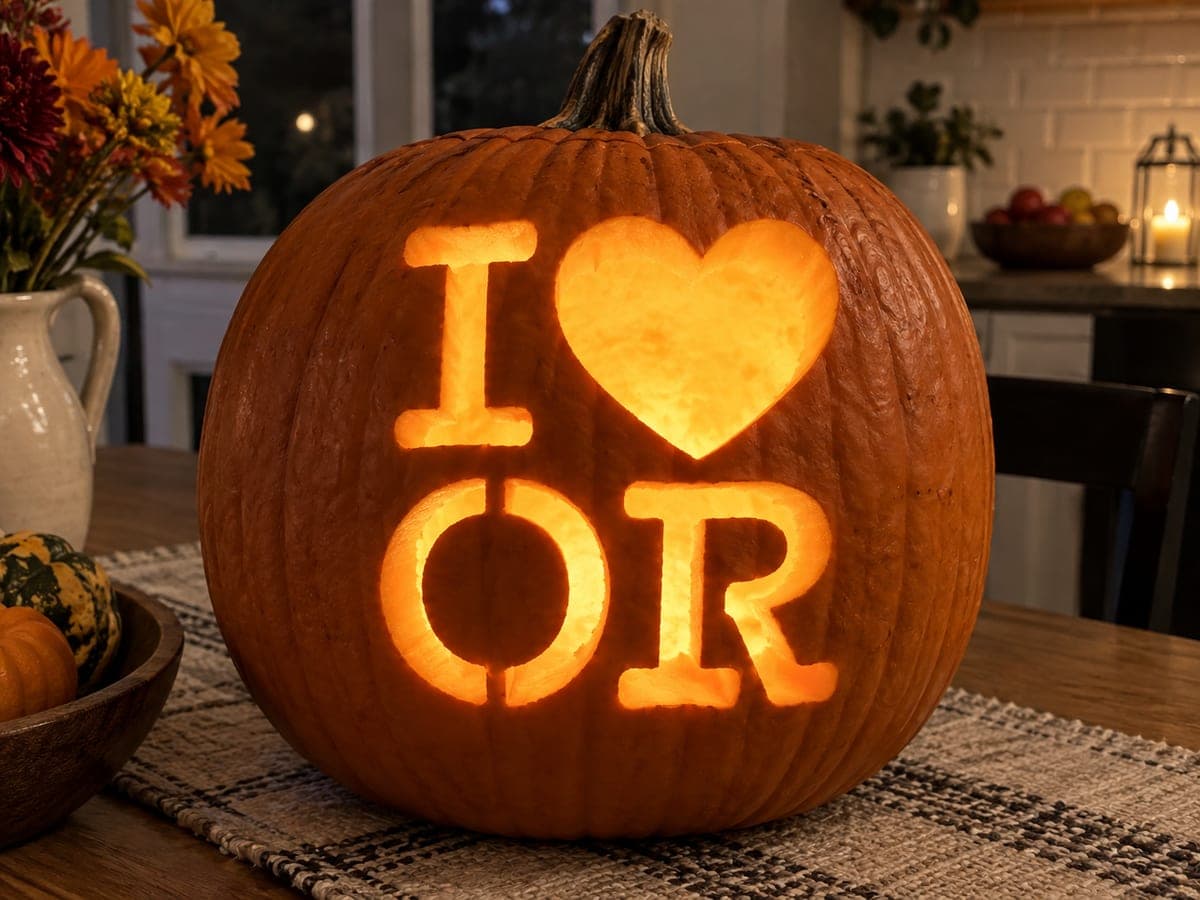
Bold block letters spell out "I" and "ID" in two rows on this glowing Idaho pumpkin carving idea, with a solid heart shape pierced through between them. The cutout technique leaves generous rind walls around each character, which keeps the jack-o-lantern sturdy even on a carved-through face. Thin the walls inside the pumpkin to about half an inch before cutting so candlelight passes evenly through all four shapes. Display outdoors at night so the warm amber glow reads clearly from the sidewalk.
This is an AI-generated concept image: a realistic, carvable design idea rather than a photo of a finished carve. AI concepts are always labeled and sit out the leaderboard and the contest.
The core trick here is treating four simple shapes, the letter I, a solid heart, and the letters I and D, as full cutouts framed by thick rind bridges so the face stays strong. Since this is a concept image, you would recreate it by transferring a clean block-letter pattern, thinning the wall from the inside, then cutting each shape all the way through. Keep the negative space between characters generous so the front never turns fragile.
Written by PumpkinCarvingIdeas.com, inspired by the image above. These are our suggestions, not instructions from the uploader. This approach to the AI concept has not been tested on a real pumpkin.
From pumpkin to porch
1
Pick a tall, flat-faced pumpkin
Choose a pumpkin with a broad, even front so all four shapes sit on one plane. A rounder, less ribbed face keeps the letters from distorting. Wipe the surface clean and dry it before you mark anything. Set it on a stable work surface at a comfortable height.
2
Cut the lid and clean out the inside
Have an adult cut a lid from the top or the back at an angle so it rests without falling in. Scoop out all seeds and pulp with a sturdy scraper. Focus on the front wall and thin it to about half an inch using a fleshing loop. An even inner wall lets light pass through all four shapes at the same brightness.
3
Transfer the layout
Print or draw your I on the top row and I and D on the bottom row, with a solid heart in the top right. Tape the pattern flat and poke holes along every outline to transfer it, or trace lightly with a washable marker. Space the characters so at least an inch of rind separates each one. Step back and check that the two rows line up before you cut.
4
Carve the small shapes first
Start with the letters using a fine carving saw, cutting slowly and letting the blade do the work. Do the letter I on top, then the I and D on the bottom row. Push each freed piece gently inward or out. Leaving the largest opening for later keeps the face rigid while you work the tighter cuts.
5
Cut the heart last
The heart is the biggest single opening, so save it for the end when the surrounding rind is still supported. Cut smoothly around its curves and lift the piece out. Clean up any ragged edges with your saw tip so the outline reads sharp from a distance. Take your time on the point at the bottom so it stays crisp.
6
Light it and photograph at dusk
Drop in one or two battery LED lights and skip real candles, especially with a fully cut-through face. Set the pumpkin outdoors on a step or stump as the sky goes dark. Rotate it so the letters and heart face the sidewalk. Shoot at dusk when the amber glow contrasts nicely with the deep blue sky.
Gather your supplies
Check things off as you get ready.
Work on a stable surface, keep your free hand out of the cutting path, and have an adult handle sharp tools.
Three levels of light
Leave intact
The untouched orange rind around and between the characters stays dark and frames the design.
Peel & shade
Lightly skin-peeled edges or a shaved border around each shape can glow a soft dim orange for a halo effect.
Cut through
The letter I, the letters I and D, and the heart are cut fully through for the brightest amber light.
How do I keep the face from getting too weak with four openings?
Leave at least an inch of solid rind between every character and around the outer edges. Cut the small letters first and save the large heart for last so the surrounding wall stays supported the whole time. Thick bridges are what hold a carved-through face together.
Should the heart be a cutout or just shaded?
For the bold glowing look in this concept, cut the heart all the way through so it reads as the brightest shape. If you want it softer, you can peel just the skin instead for a dimmer orange glow. A full cutout gives the strongest sidewalk visibility at night.
What letter style works best for a clean read?
Use thick, simple block letters with wide strokes so they hold their shape once cut. Thin script or serifs can snap and are hard to read from a distance. Keep the two rows aligned and evenly spaced for a balanced, easy-to-read layout.
Your take belongs here, too.
Changed a detail? Made it simpler? Share a photo of your version and tell the community what worked.
 AI
AI





Comments (0)