Halloween Pumpkin Carving Contest · Starts October 1st · $500 in prizes
← Back to ideas
@ai_concepts
Sep 14, 2026
I Love Kentucky Heart Lettering PumpkinAI
0

I Love Kentucky Heart Lettering Pumpkin

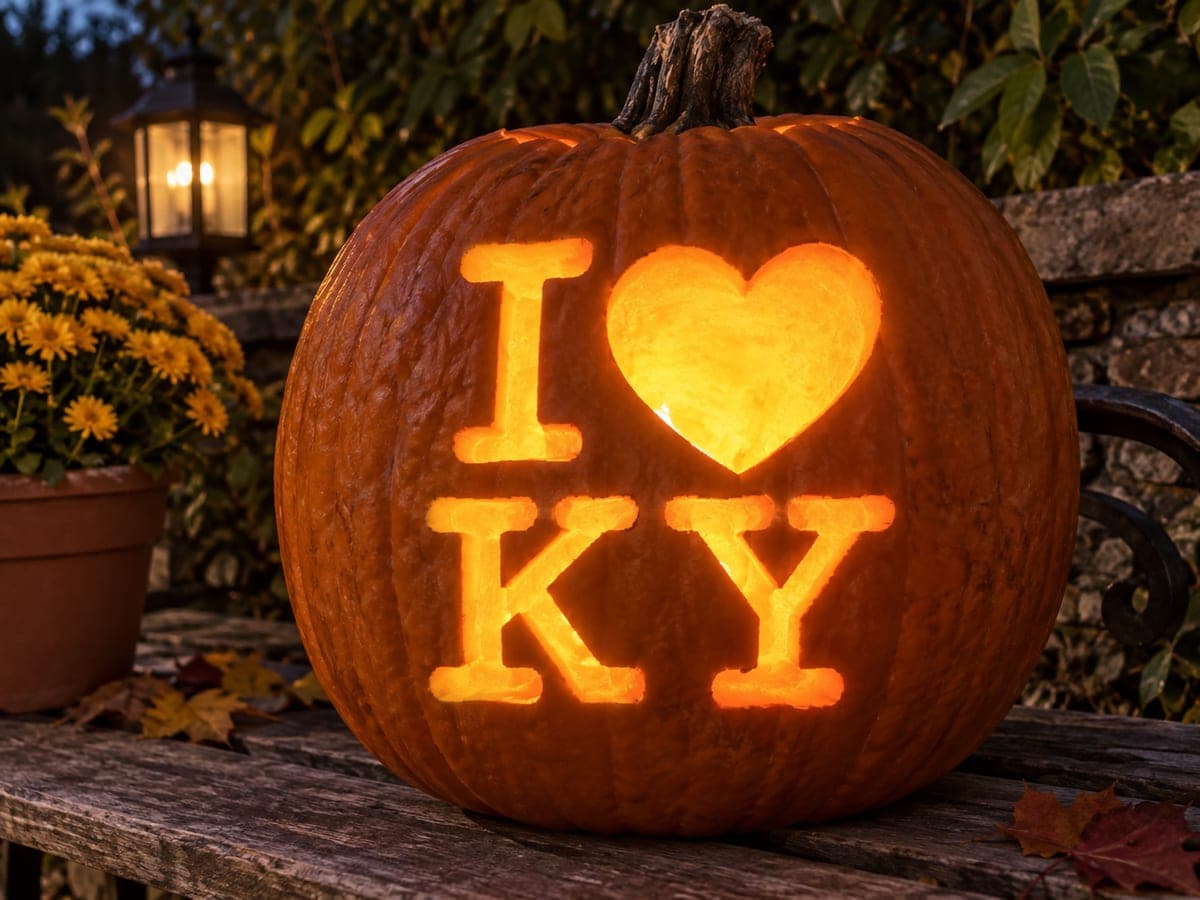
Glowing on a garden bench beside yellow chrysanthemums, this Kentucky jack-o-lantern carries I, a heart, and KY pierced cleanly through the rind in a serif-influenced block font. The Y in KY is the most delicate element, with three strokes meeting at a central point; carve the two upper arms before removing the lower stem so the junction stays supported. Backlit by the candle inside, all four shapes read crisply from a distance against the deep orange skin. Place the pumpkin at eye level on the bench or porch railing so passing visitors can read the full state tribute without bending down.

This is an AI-generated concept image: a realistic, carvable design idea rather than a photo of a finished carve. AI concepts are always labeled and sit out the leaderboard and the contest.


No ratings yet · Sign in to rate

Comments (0)

  • No comments yet — be the first.

Save without an account. Sign in to like or comment.

Our tips for carving a similar design

The whole design lives in four bold shapes pierced clean through the rind: the letter I, a heart, and the letters K and Y. The trick is treating each shape as a full cutout with generous spacing so the wall between letters stays strong, and saving the fragile Y junction for last. Keep the font chunky and serif influenced so every stroke reads from across the yard.

Written by PumpkinCarvingIdeas.com, inspired by the image above. These are our suggestions, not instructions from the uploader. This approach to the AI concept has not been tested on a real pumpkin.

From pumpkin to porch

  1. Plan the layout and transfer

    Since this is a concept image, pick a tall pumpkin with a broad, flat front to fit two rows of shapes. Print or draw I, a heart, and KY in a thick block serif font, then tape the pattern flat and poke the outlines with a pushpin. Space the letters well apart so the rind between them stays solid. Step back and check the four shapes look balanced before you cut anything.

  2. Open the pumpkin and clean the wall

    An adult should cut a lid from the bottom or the back rather than the top, which keeps the stem intact for looks. Scoop out the seeds and pulp, then scrape the inside of the carving face down to about one inch thick. A thinner wall cuts more easily and lets more light through. Keep a paper towel handy to blot the slick interior.

  3. Cut the solid shapes first

    Start with the I and the heart, since they are single clean openings with no fragile joints. Use a small serrated saw and let the blade do the work with gentle strokes, holding it perpendicular to the surface. Push each cut piece inward or outward and lift it free rather than forcing it. Clean up the edges with light passes so the serifs stay crisp.

  4. Carve the K, then the Y carefully

    Cut the K as its vertical stroke plus two angled arms, keeping the small gaps clean. For the Y, carve the two upper arms first and leave the lower stem attached until those are done, so the central junction stays supported while you work. Remove the stem stroke last with short, patient cuts. Go slow here, this is the most delicate meeting point in the whole design.

  5. Test the glow and true up edges

    Drop in a battery LED and view the pumpkin in a dark room. Look for thin spots, ragged serifs, or letters that read as blobs, and shave the inner edges to sharpen them. Angling the cut edges outward slightly widens the light beam and makes the shapes pop. Adjust until all four elements read clearly from a distance.

  6. Stage it at eye level and photograph

    Set the finished pumpkin on a bench or porch railing at eye level so passersby can read the tribute without bending down. Surround it with fall props like yellow mums and a lantern for warm context. Use an LED light, never a candle, especially with this much open cutout. Shoot at dusk so the glow balances against the sky.

Gather your supplies

Check things off as you get ready.

Work on a stable surface, keep your free hand out of the cutting path, and have an adult handle sharp tools.

Three levels of light

  • Leave intact

    The untouched orange skin around and between the shapes stays dark and frames the message.

  • Peel & shade

    Shallow skin peeling just inside each serif edge can add a soft halo if you want the letters to feel less hard edged.

  • Cut through

    The I, the heart, and both letters of KY are cut clean through for the brightest full glow.

Learn the carving basics

Before you start cutting

How do I keep the Y from breaking at the center?

Carve the two upper arms of the Y first while the lower stem is still attached, since that stem supports the junction as you work. Remove the stem stroke last with short, gentle cuts. Keeping your saw perpendicular and not twisting it protects the fragile meeting point.

What font works best for a state tribute like this?

A thick block serif reads well from a distance and gives you enough width to cut cleanly without weak spots. Avoid thin script fonts, which leave fragile bridges that can snap. Keep the letters spaced apart so the rind between them stays strong.

Should I carve the heart before or after the letters?

Carve the heart early since it is a large single opening with no fragile joints, along with the I. Save the K and especially the Y for last because their thin strokes are the weakest parts. Cutting the big easy shapes first lets you build confidence before the delicate work.

Your take belongs here, too.

Changed a detail? Made it simpler? Share a photo of your version and tell the community what worked.

Share your pumpkin

More pumpkins like this

You've reached the end · 8 pumpkins
The Patch Report

Fresh pumpkins, in your inbox.

The best new carvings, ideas worth stealing, and how-tos for carving season. Short, seasonal, and gone by November.

A short email during carving season. Unsubscribe anytime. See our privacy policy.