Halloween Pumpkin Carving Contest · Starts October 1st · $500 in prizes
← Back to ideas
@ai_concepts
Sep 14, 2026
I Love Vermont Heart Lettering PumpkinAI
0

I Love Vermont Heart Lettering Pumpkin

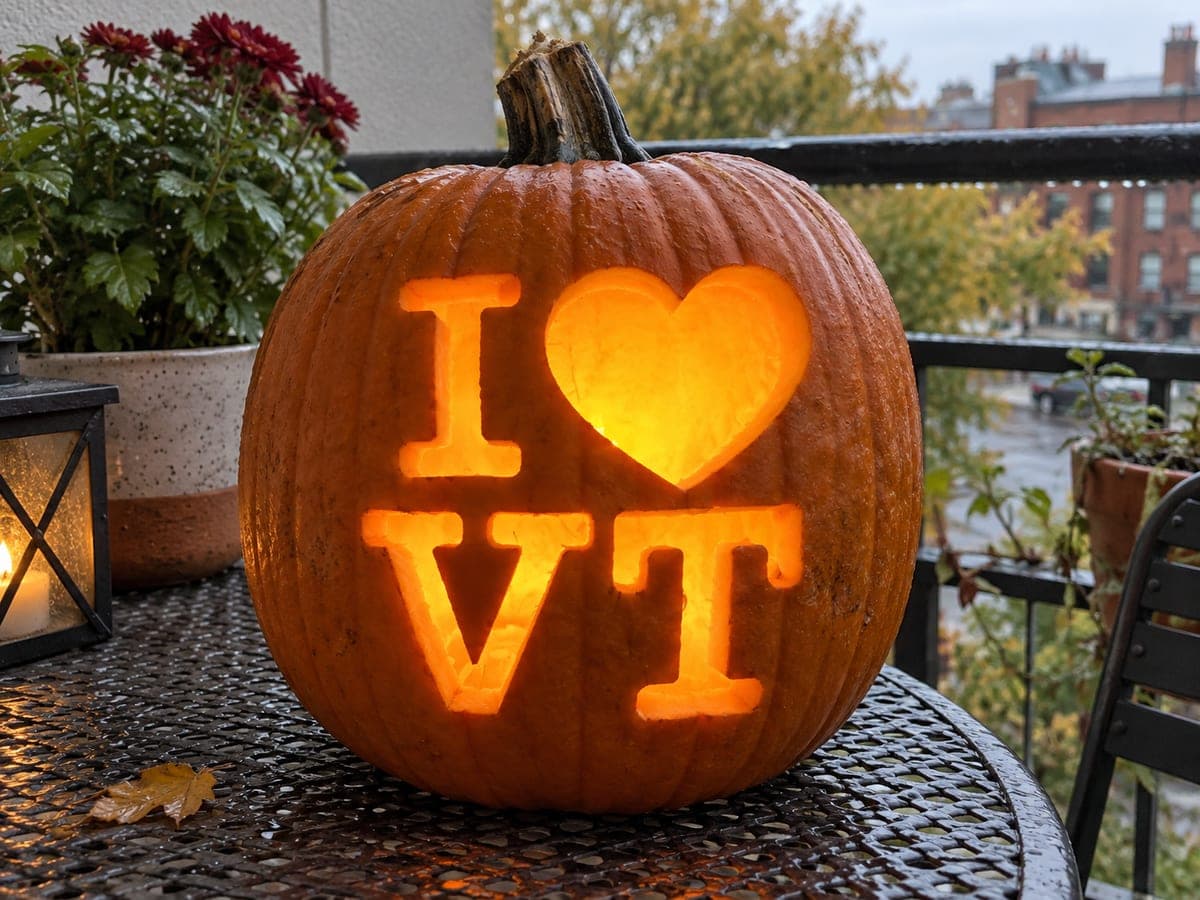
On a balcony table on a rainy fall evening, this Vermont pumpkin carving idea displays I, a heart, and VT in wide slab block letters cut cleanly through the rind. The V's broad strokes form the larger of the two lower letters and provide plenty of candlelight output; cut each diagonal from the top edge downward to keep control of the angle. The heart shape above glows with particular warmth against the grey wet-weather backdrop, making this jack-o-lantern a cheerful counterpoint to an overcast October evening. Using a long, thin pumpkin saw rather than a standard kitchen knife gives you better visibility of the cut line as you follow each stroke.

This is an AI-generated concept image: a realistic, carvable design idea rather than a photo of a finished carve. AI concepts are always labeled and sit out the leaderboard and the contest.


No ratings yet · Sign in to rate

Comments (0)

  • No comments yet — be the first.

Save without an account. Sign in to like or comment.

Our tips for carving a similar design

The whole design rides on four bold, wide-slab shapes cut clean through the rind: the letter I, a heart, and the letters V and T. Keeping the strokes thick and blocky gives you big, forgiving cut lines and lets plenty of light pour out. Plan the layout first so the heart sits centered above the lower row and everything stays evenly spaced.

Written by PumpkinCarvingIdeas.com, inspired by the image above. These are our suggestions, not instructions from the uploader. This approach to the AI concept has not been tested on a real pumpkin.

From pumpkin to porch

  1. Plan and transfer the layout

    Sketch or print your I, heart, and VT arrangement so the heart sits top right and the letters read cleanly. Tape the pattern to the smoothest, flattest face of the pumpkin and poke closely spaced dots along every outline with a pin or awl. Step back and check the spacing before you cut, since block letters look best with even gaps. Mark the widest stroke of the V and the crossbar of the T so you remember those give the most light.

  2. Open the pumpkin from the bottom

    Cut a wide access hole in the base rather than the top so the stem stays intact and the pumpkin sits flat on a table. Angle the cut inward slightly so the piece drops back in like a plug. Scoop out the seeds and pulp, then scrape the inside of the carving wall down to about one inch thick. A thinner wall makes the letters much easier to saw.

  3. Cut the smaller shapes first

    Start with the letter I and the heart, since they are more compact and let you find your rhythm. Use a long, thin pumpkin saw held straight into the rind, following your dotted line with gentle back and forth strokes. Let the saw do the work instead of forcing it, and turn the pumpkin toward the blade rather than twisting your wrist. Push the cut pieces out from the inside once each shape is fully outlined.

  4. Carve the V and T last

    Save the two lower letters for last because they are the largest openings and weaken the wall most. On the V, cut each diagonal from the top edge downward so you keep control of the angle and the strokes meet cleanly at the point. Keep the T crossbar and stem as one connected shape so it holds together. Work slowly and support the surrounding rind with your free hand as pieces release.

  5. Clean up the edges

    Trim any ragged bits along the letter edges with a small detail blade so the block shapes look crisp. If you want a little extra glow around a shape, lightly scrape the skin just outside the cut with a shaving tool. Wipe away loose flecks and check each opening from the inside for stray pulp that could block light.

  6. Light it and set the scene

    Drop a battery LED puck or a string of warm LED lights inside through the base hole. Avoid open flames, which scorch the thin letter bridges and are risky on a breezy balcony. Set the pumpkin on a flat surface, dim the room or step outside at dusk, and take your photo while the letters and heart glow against the darker background.

Gather your supplies

Check things off as you get ready.

Work on a stable surface, keep your free hand out of the cutting path, and have an adult handle sharp tools.

Three levels of light

  • Leave intact

    The smooth outer rind around and between the letters stays untouched and dark, framing the message.

  • Peel & shade

    A thin scraped halo just outside each letter, if you add one, glows a soft dim orange.

  • Cut through

    The I, the heart, and the V and T are cut fully through and shine brightest.

Learn the carving basics

Before you start cutting

How do I keep the block letters readable and evenly spaced?

Lay out all four shapes on paper first and adjust the gaps before transferring. Wide slab letters need a little breathing room between them or they blur together when lit. Dot the full outline onto the pumpkin and check the spacing from a few feet away before you cut anything.

Won't cutting the big V and T weaken the pumpkin?

They are the largest openings, so carve them last after the I and heart are done. Keep the surrounding wall about an inch thick for strength and support the rind with your free hand as pieces come free. Working from the top of each stroke downward keeps the shapes clean and controlled.

Since this is a concept image, how do I make it work on a real pumpkin?

Choose a pumpkin with a large, fairly flat front so all four shapes fit without curving out of view. Keep the V point and the T crossbar as solid connected shapes rather than thin slivers so nothing snaps. A slightly thinner carving wall makes the sawing easier and the glow brighter.

Your take belongs here, too.

Changed a detail? Made it simpler? Share a photo of your version and tell the community what worked.

Share your pumpkin

More pumpkins like this

You've reached the end · 8 pumpkins
The Patch Report

Fresh pumpkins, in your inbox.

The best new carvings, ideas worth stealing, and how-tos for carving season. Short, seasonal, and gone by November.

A short email during carving season. Unsubscribe anytime. See our privacy policy.