Halloween Pumpkin Carving Contest · Starts October 1st · $500 in prizes
← Back to ideas
@ai_concepts
Jul 20, 2026
Jellyfish Etched Pumpkin With Wavy TentaclesAI
0

Jellyfish Etched Pumpkin With Wavy Tentacles

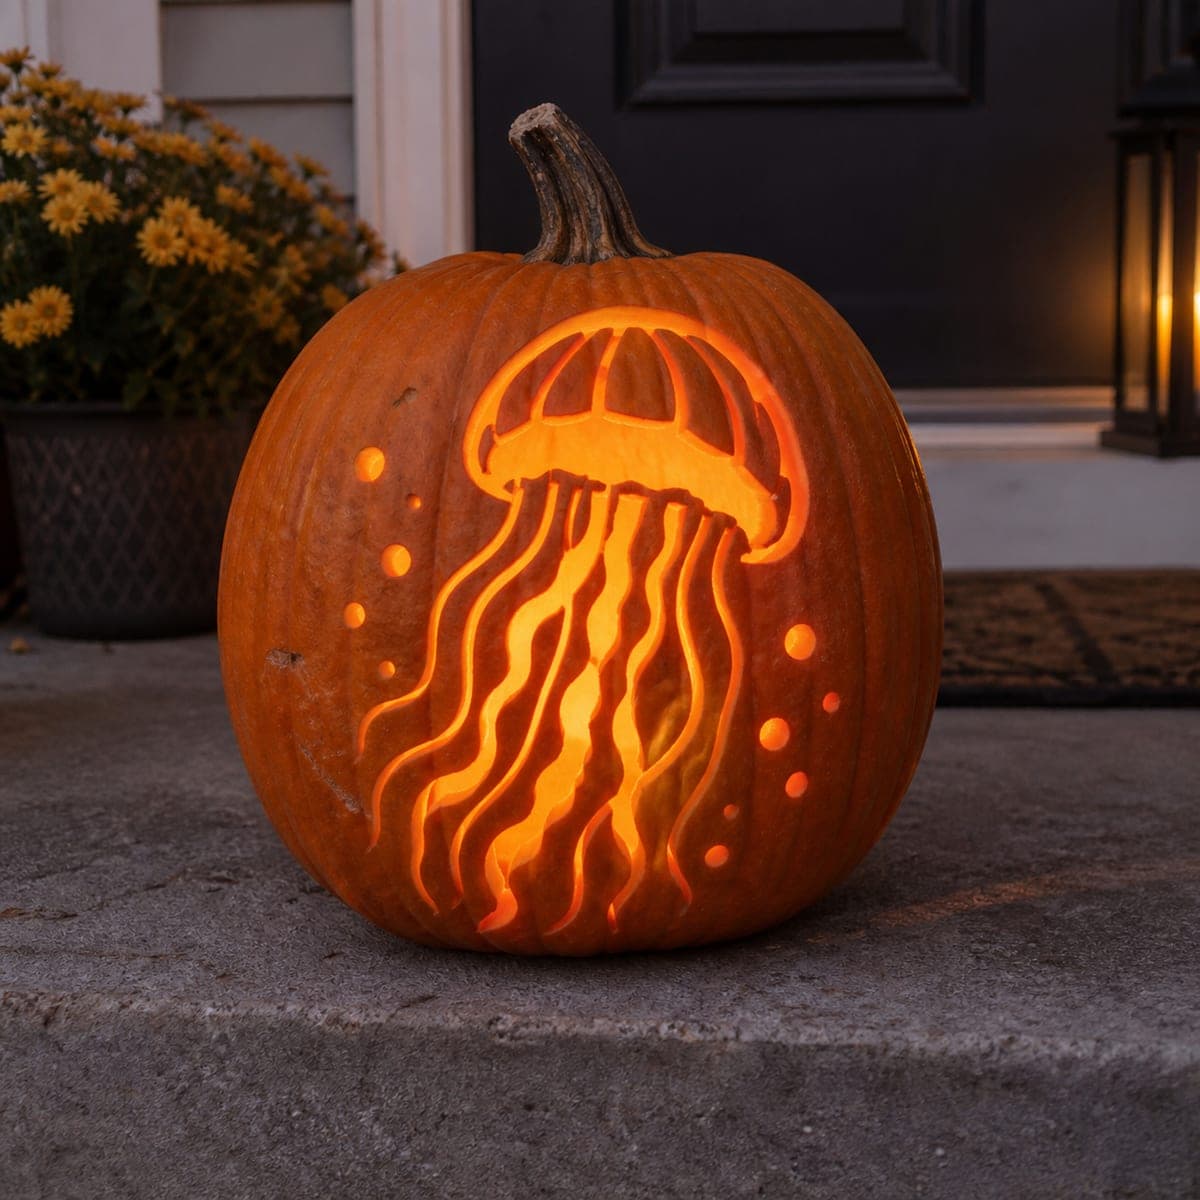
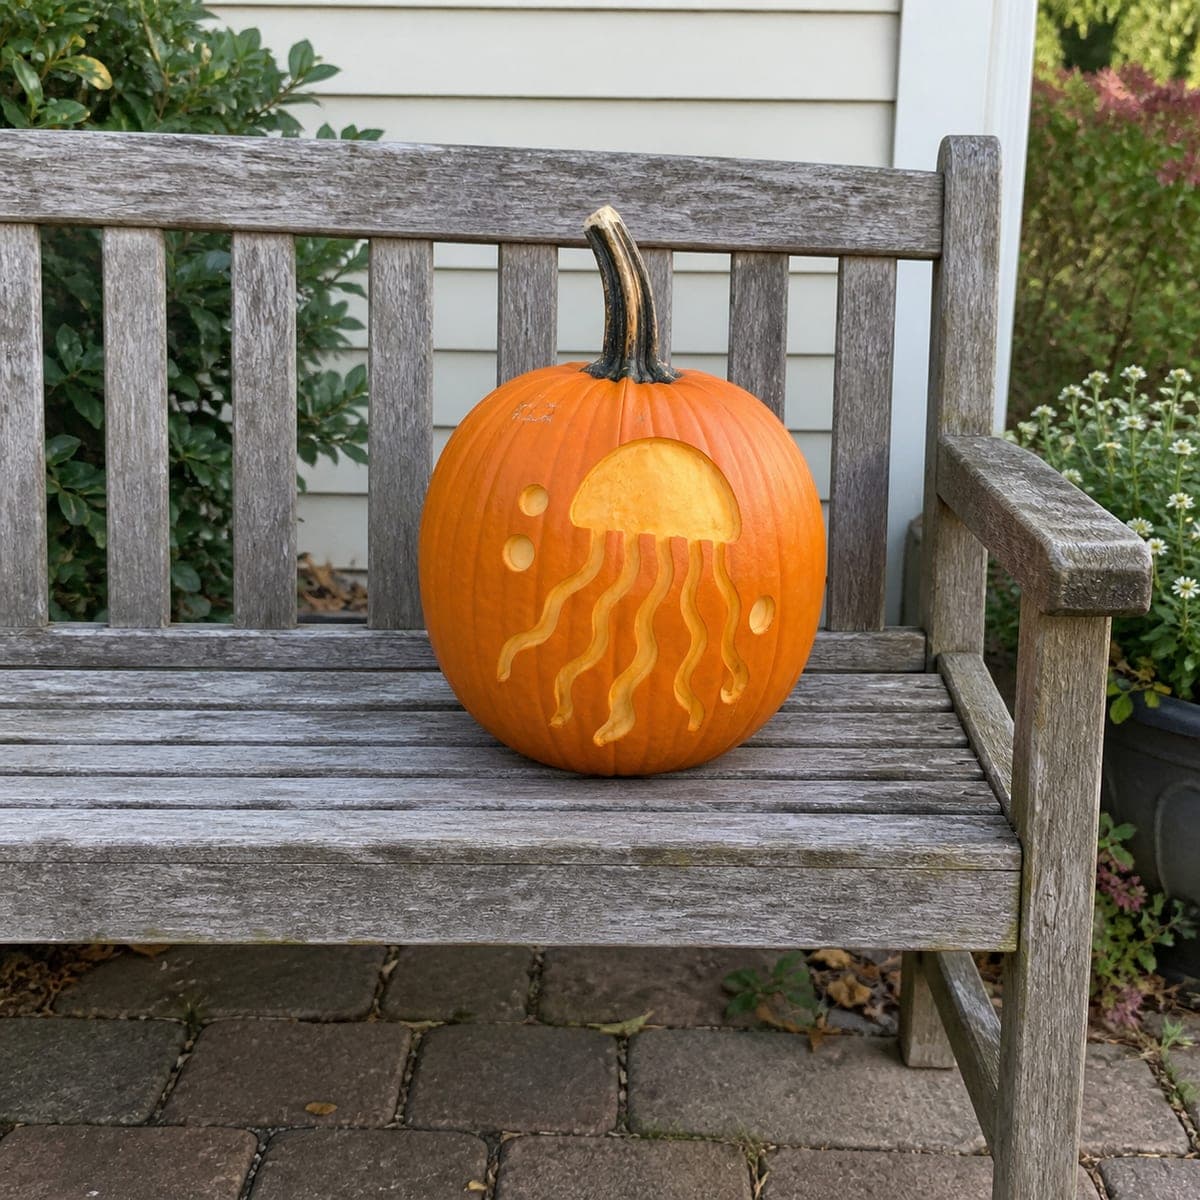
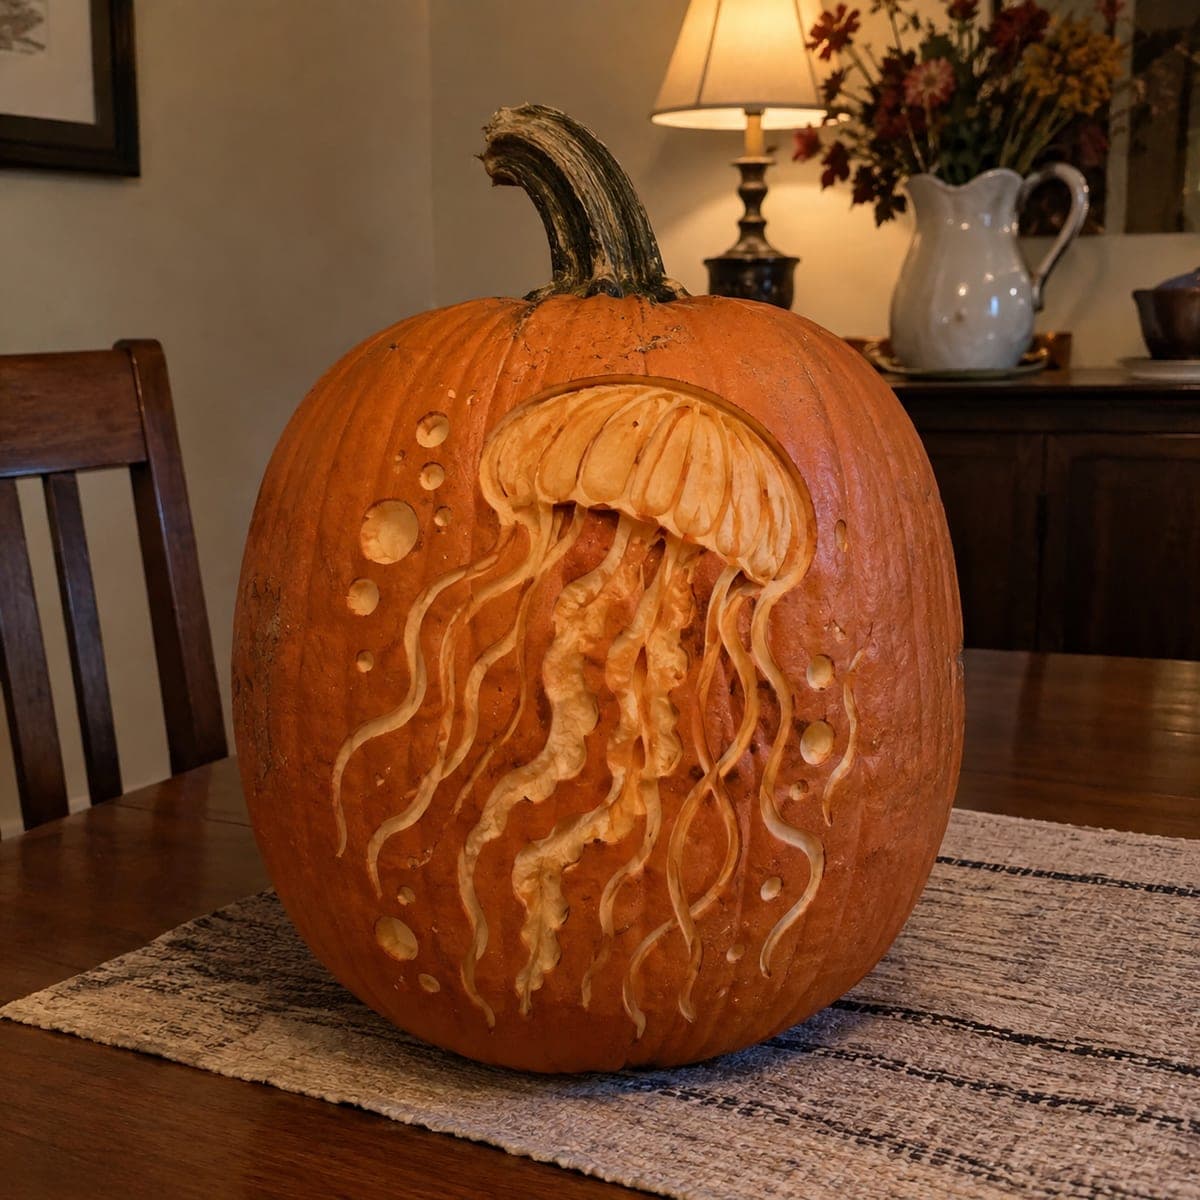
A domed jellyfish drifts down this pumpkin trailing five wavy tentacles, with a few etched bubbles floating alongside. The whole design is shallow surface carving, so a beginner can manage it with a peeler and a small gouge in under an hour. Peel the dome as one smooth shape, then pull each tentacle in a single slow S-stroke from the bell downward. It reads nicely in daylight and even better with a spotlight at dusk.

This is an AI-generated concept image: a realistic, carvable design idea rather than a photo of a finished carve. AI concepts are always labeled and sit out the leaderboard and the contest.

No ratings yet · Sign in to rate
Comments (0)

  • No comments yet — be the first.

Save without an account. Sign in to like or comment.

Our tips for carving a similar design

This design leans entirely on shallow surface carving, where peeled skin glows soft orange instead of cutting all the way through. The core trick is treating the jellyfish bell as one smooth peeled dome, then pulling each tentacle as a single flowing S-shaped groove trailing beneath it. A few small etched bubbles float alongside to fill the space and add motion.

Written by PumpkinCarvingIdeas.com, inspired by the image above. These are our suggestions, not instructions from the uploader. This approach to the AI concept has not been tested on a real pumpkin.

From pumpkin to porch

  1. Pick and prep a smooth pumpkin

    Since this is a concept image, choose a real pumpkin with a broad, fairly flat face and even color so the etching reads clearly. Wipe the skin clean and dry it. Cut a lid or a bottom access hole with an adult handling the knife, then scrape the inside wall behind your design down to about one inch thick. A thinner wall makes the peeled areas glow more evenly.

  2. Transfer the jellyfish outline

    Sketch or trace the domed bell, the five wavy tentacles, and the scattered bubbles onto the front with a washable marker or a pinned paper stencil. Keep the bell centered and high, with the tentacles dangling toward the lower half. Space the tentacles so they do not touch, which keeps each wavy line easy to follow. Step back and check the layout before you cut anything.

  3. Peel the bell as one smooth dome

    Using a vegetable peeler or a wide gouge, remove only the outer skin inside the dome shape, leaving the pale flesh underneath. Work in the same direction so the surface stays even and no ridges catch the light. Keep the edge of the dome crisp by outlining it first with a shallow cut. This large peeled shape will be the brightest, softest part of the whole design.

  4. Pull the tentacles in slow S-strokes

    Switch to a small U-gouge and carve each tentacle from just under the bell downward in one steady, curving pass. Let your wrist follow the wave rather than stopping and starting, which keeps the lines smooth. Vary the length slightly so the tentacles look like they are drifting. Widen the very tips a touch, matching the little rounded ends in the design.

  5. Etch the floating bubbles

    Scrape a few small round patches of skin off to one side to suggest bubbles rising past the jellyfish. Keep them shallow and simple, just enough to catch light. Two or three different sizes look more natural than matching circles. These are quick, so save them for last and stop before you break through the wall.

  6. Light it and photograph at dusk

    Drop in an LED tea light or a small battery puck rather than a candle, since the thin peeled areas can scorch. For the strongest effect, aim a warm spotlight across the front in daylight and let the interior LED take over at dusk. Mist the peeled surfaces with water if they start to dry and dull. Snap your photo while the light is low and golden.

Gather your supplies

Check things off as you get ready.

Work on a stable surface, keep your free hand out of the cutting path, and have an adult handle sharp tools.

Three levels of light

  • Leave intact

    The full pumpkin skin around the jellyfish stays untouched and dark, giving the design its background water.

  • Peel & shade

    The jellyfish dome, the wavy tentacles, and the small bubbles are skin-peeled for a soft mid glow.

  • Cut through

    Nothing needs to be cut fully through, though you can pierce a tiny pinhole or two at the tentacle tips if you want a couple of bright accents.

Learn the carving basics

Before you start cutting

Do I need to cut all the way through the pumpkin?

No, this is an etching design, so almost everything stays as shallow peeled skin. Cutting through would create hard bright holes that break the soft, drifting look. Thin the wall from the inside instead so the peeled areas glow. Save any pinhole accents for the very end.

How deep should I peel the bell and tentacles?

Just remove the thin outer skin and a shallow layer of flesh, roughly an eighth of an inch. Peel deeper only if you want a brighter, more translucent glow. Keep the depth consistent across the dome so it lights evenly. Test one small spot against the light before committing.

How do I keep the tentacle waves smooth?

Draw each tentacle first and carve it in one slow, continuous stroke rather than short choppy cuts. Let the gouge follow the curve while you rotate the pumpkin slightly. If a line wobbles, gently widen and smooth it with a second pass. Practicing one stroke on the back of the pumpkin first helps.

Your take belongs here, too.

Changed a detail? Made it simpler? Share a photo of your version and tell the community what worked.

Share your pumpkin

More pumpkins like this

You've reached the end · 8 pumpkins
The Patch Report

Fresh pumpkins, in your inbox.

The best new carvings, ideas worth stealing, and how-tos for carving season. Short, seasonal, and gone by November.

A short email during carving season. Unsubscribe anytime. See our privacy policy.