Halloween Pumpkin Carving Contest Β· Starts October 1st Β· $500 in prizes
← Back to ideas
@ai_concepts
Sep 25, 2026
Jester Pumpkin With Diamond Cheeks and Arc CrownAI
0

Report this carving

Tell us what is wrong. Reports are private.

Jester Pumpkin With Diamond Cheeks and Arc Crown

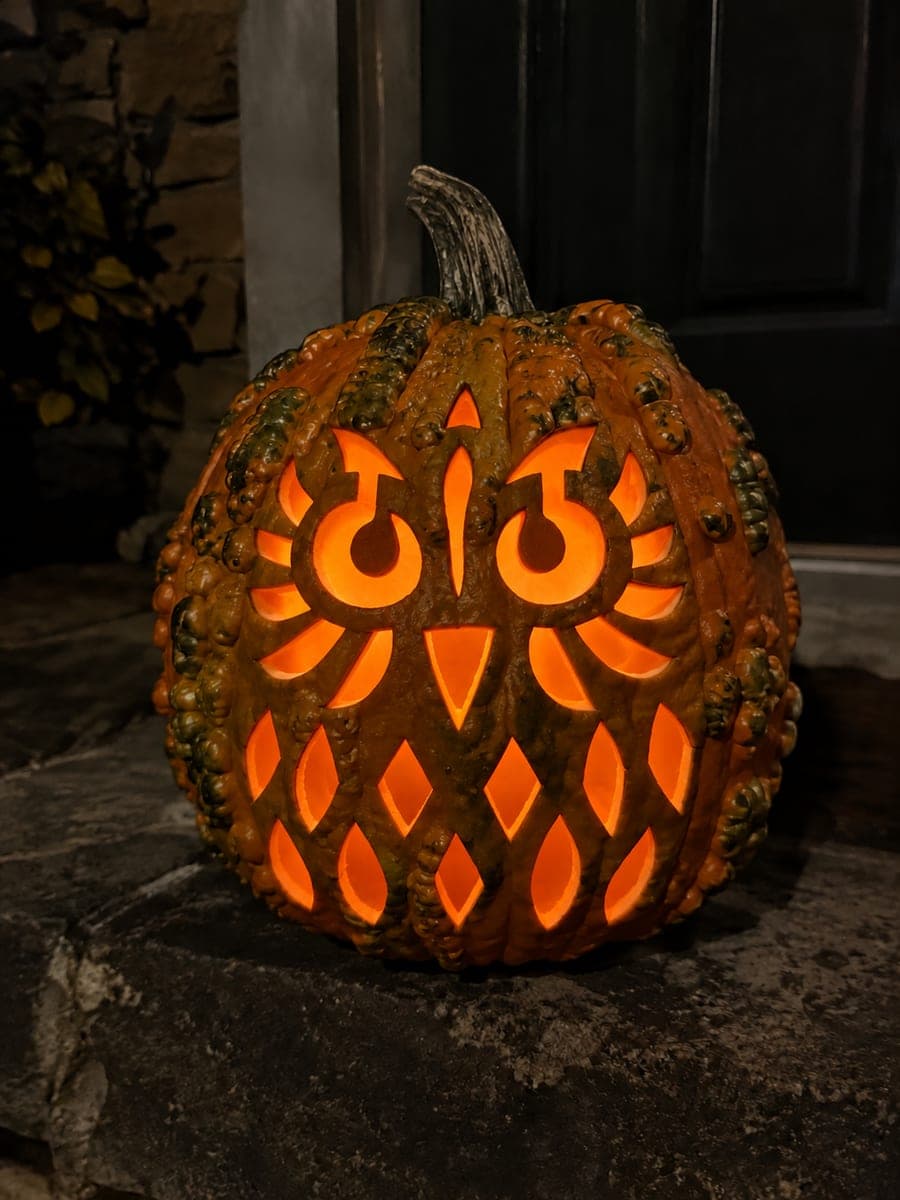
Two teardrop eye openings with broad upper-rooted pupils, a wide sideways grin with alternating rooted square and triangle teeth, separate diamond cheek holes, and an arcing crown of thirty diamond and oval holes above the face make this a show-stopping expert silly pumpkin face. Every tooth must join the upper or lower lip at its full base width to keep the grin intact under the weight of all the crown holes. Use a fine-point awl to pre-punch the thirty crown apertures before cutting so spacing stays even. The completed design glows like a stained-glass jester at night.

No ratings yet Β· Sign in to rate

Comments (0)

  • No comments yet β€” be the first.

Save without an account. Sign in to like or comment.

Our tips for carving a similar design

With thirty crown apertures plus a complex face, every tooth and every crown hole must meet its neighbor with at least 12mm of rind. Plan the crown ring as a full circle before placing any face features, then align the face within it. Teardrop pupils rooted broadly in the lower eye rim are the most vulnerable detail and must be widest at the base.

From pumpkin to porch

  1. Map the full pattern with a paper template

    Scoop to an even inch. Print or hand-draw the full pattern: crown ring of thirty alternating diamonds and ovals, two teardrop eye openings with lower-rooted pupils, diamond cheek holes, and the alternating-tooth grin. Pin the template and transfer every outline with a poking tool before removing it.

  2. Pre-punch the crown ring apertures with an awl

    Before cutting, push a fine-point awl through the center of every crown hole. This confirms spacing is even and marks the center of each shape. Adjust any marks that crowd closer than 12mm to their neighbor.

  3. Cut the crown ring from outermost to innermost

    Saw each diamond or oval from the outermost row inward. Complete all thirty holes before touching the face. Working outer-to-inner keeps maximum rind strength under the face while you are handling the pumpkin on this long cutting stage.

  4. Carve the teardrop eyes with lower-rooted pupils

    Cut the teardrop eye opening perimeter, leaving the pupil tab rooted at the lower rim. The lower root placement is opposite to most pupil designs and requires that the tab broadens from the root upward. Keep the narrowest point of the neck at least half the pupil width.

  5. Cut the diamond cheek holes and alternating-tooth grin

    Saw both diamond cheek holes, then cut the wide grin with alternating square and triangle teeth. Each tooth must join the upper or lower lip at its full base; no tooth should taper to a thin tip at its root. Alternating shapes are easier to plan if you cut all squares first, then return for the triangles.

  6. Light and display

    Insert a strong LED spotlight. The thirty crown apertures will glow like a stained-glass ring around the laughing face. Display at chest height or above so the crown arc is fully visible from the front.

Written with AI to match this design

Gather your supplies

Check things off as you get ready.

Work on a stable surface, keep your free hand out of the cutting path, and have an adult handle sharp tools.

Three levels of light

  • Leave intact

    The 12mm rind network between all crown holes, tooth roots, pupil tab roots, and all structural bridges stay solid and dark

  • Peel & shade

    None, all glow comes from through-cuts

  • Cut through

    Thirty crown apertures, both teardrop eye openings, both diamond cheeks, the grin perimeter, and all alternating tooth gaps are cut through

Learn the carving basics

Before you start cutting

How do I prevent the crown ring from sagging or cracking under the pumpkin's own weight?

The 12mm continuous rind network is the answer. Measure every bridge with a ruler before cutting and never accept less than 10mm even when it means shrinking an aperture. Once the ring is cut, handle the pumpkin from the bottom, not by grabbing the carved area.

What order should I cut the alternating teeth?

Cut all the square teeth first, then return for the triangular ones. This lets you check the overall grin curvature after the squares are done before committing to the angled triangle cuts. Each tooth base should span the full root width at the lip.

How long will a carving this detailed last before it starts to collapse?

Expert carvings with many fine cuts dehydrate faster than simple ones. Apply petroleum jelly to every cut edge immediately after carving, store it indoors except when on display, and keep it out of direct sunlight. Expect three to four days of prime condition.

Your take belongs here, too.

Changed a detail? Made it simpler? Share a photo of your version and tell the community what worked.

Share your pumpkin

More pumpkins like this

You've reached the end Β· 8 pumpkins
The Patch Report

Fresh pumpkins, in your inbox.

The best new carvings, ideas worth stealing, and how-tos for carving season. Short, seasonal, and gone by November.

A short email during carving season. Unsubscribe anytime. See our privacy policy.