Halloween Pumpkin Carving Contest · Starts October 1st · $500 in prizes
← Back to ideas
@ai_concepts
Sep 25, 2026
Bar-Eyed Surprised Pumpkin With Diamond Astonishment MarksAI
0

Report this carving

Tell us what is wrong. Reports are private.

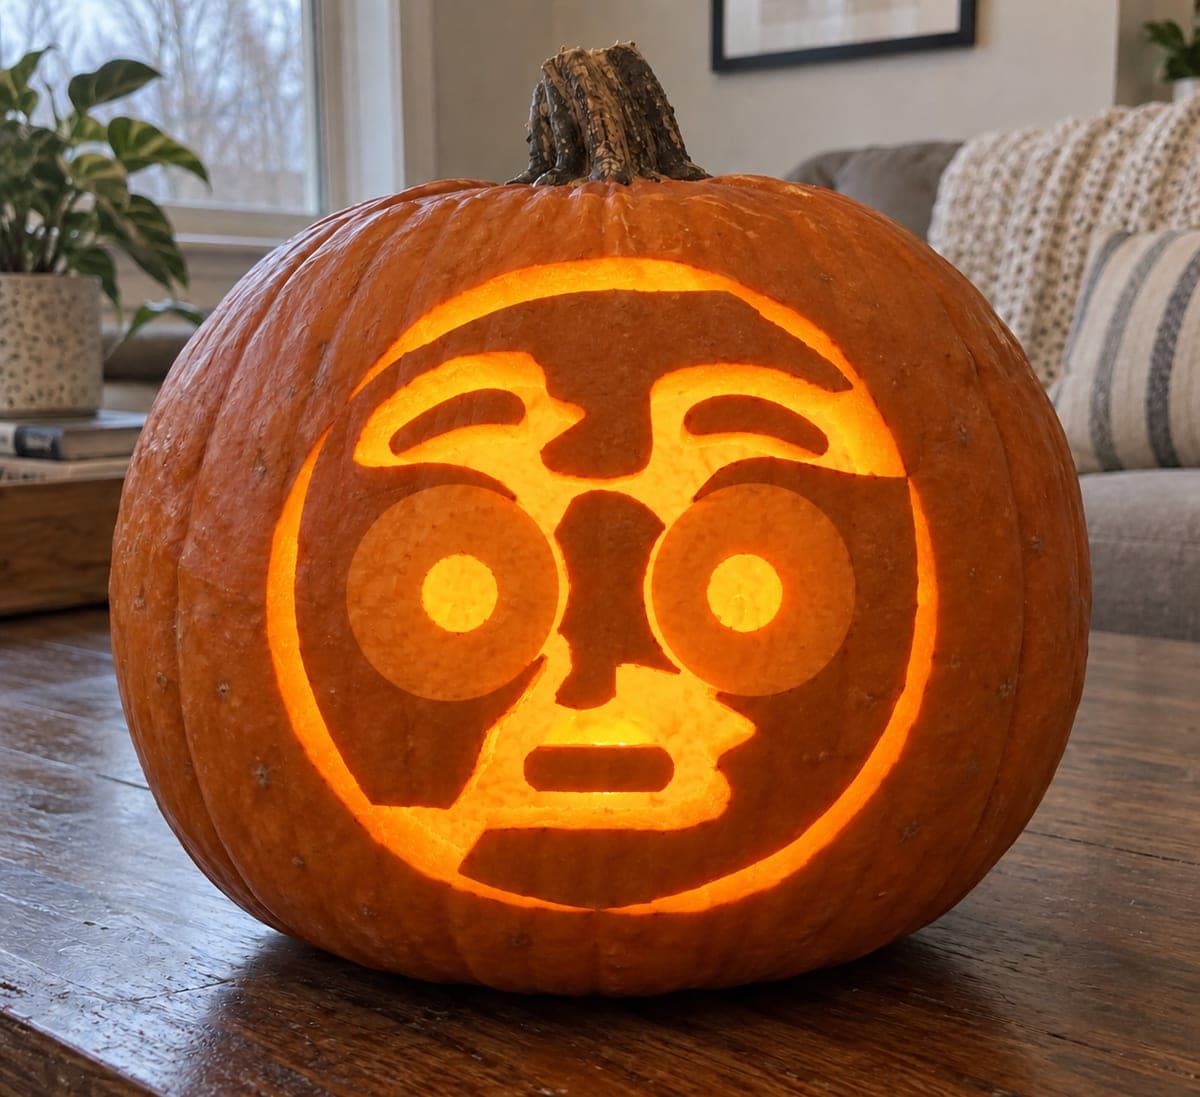
Bar-Eyed Surprised Pumpkin With Diamond Astonishment Marks

Round eyes each retaining a wide straight vertical rind bar through the center, high arched brows, two nostrils, a large oval mouth, and eighteen separate diamond and round astonishment marks surrounding the face make this a demanding hard surprised pumpkin carving idea. The vertical rind bars through the eyes are structural: size them to at least 12mm wide or they will crack when you remove the surrounding rind. Map all eighteen astonishment marks before cutting, keeping them equidistant from the face openings. Lit strongly from inside, the bar-divided eyes give a wild, unsettled gaze.

No ratings yet · Sign in to rate

Comments (0)

  • No comments yet — be the first.

Save without an account. Sign in to like or comment.

Our tips for carving a similar design

A vertical rind bar running through the center of each round eye is the structural key and the visual signature of this design. Each bar must be at least 12 mm wide before any surrounding rind is removed. Map all eighteen astonishment marks before cutting to ensure equidistant spacing and safe bridges.

From pumpkin to porch

  1. Hollow and prepare

    Hollow from the back and thin the wall to 1.8 cm. Dry the face. The eighteen astonishment marks and the eye bars require a consistent surface.

  2. Transfer the layout

    Use a poking tool to mark both round eye outlines with their vertical bar center positions, both high arched brows, two nostril holes, the large oval mouth, and all eighteen diamond and round astonishment mark positions. Measure every bridge.

  3. Cut brow arches and nostrils

    Cut both high arched brow holes first while the forehead is fully supported. Then remove the two nostril holes with a detail blade or small drill.

  4. Cut eyes with vertical bars

    For each eye, cut the outer round boundary first as a series of short segments. Then remove the rind sections on each side of the vertical bar, leaving the bar intact at minimum 12 mm width. The bar must run the full height of the eye opening.

  5. Cut the oval mouth

    Cut the large oval mouth opening, working around its circumference in short segments. The mouth is the largest single opening in the design and should be cut before the astonishment marks to keep the shell balanced.

  6. Cut astonishment marks and light

    Work through all eighteen diamond and round marks using an awl for starting holes and a detail blade for shapes. Space them consistently. Insert a bright LED and view from a meter away to confirm the wild, bar-divided eye gaze reads clearly.

Written with AI to match this design

Gather your supplies

Check things off as you get ready.

Work on a stable surface, keep your free hand out of the cutting path, and have an adult handle sharp tools.

Three levels of light

  • Leave intact

    The vertical rind bars inside the eyes and all rind between astonishment marks stay dark.

  • Peel & shade

    None.

  • Cut through

    Both arched brows, both round eye openings (with vertical bars retained), two nostril holes, the large oval mouth, and all eighteen astonishment marks are cut through.

Learn the carving basics

Before you start cutting

The vertical bar in one eye is not centered. Will it still look right?

A slightly off-center bar adds a wild, unsettled quality that can actually work in this design's favor. As long as the bar is at least 12 mm wide it is structurally sound. If it looks extremely off-center, you can carefully shave a thin strip from one side of the bar to adjust its position before the final display.

How do I keep eighteen astonishment marks from weakening the outer shell?

Spread them evenly around the face at regular intervals and keep each mark at least 12 mm from its nearest neighbor. Avoid clustering more than three marks in any one area. Marks near the outer edge of the pumpkin's curve are more stable than those close to a face feature like the eyes or mouth.

Can I reduce the astonishment marks to fewer without losing the surprised quality?

Yes. Ten to twelve marks arranged symmetrically still read as astonishment details. The full eighteen creates a more immersive surrounding effect, but a reduced count is a reasonable hard-to-medium simplification.

Your take belongs here, too.

Changed a detail? Made it simpler? Share a photo of your version and tell the community what worked.

Share your pumpkin

More pumpkins like this

You've reached the end · 8 pumpkins
The Patch Report

Fresh pumpkins, in your inbox.

The best new carvings, ideas worth stealing, and how-tos for carving season. Short, seasonal, and gone by November.

A short email during carving season. Unsubscribe anytime. See our privacy policy.