Halloween Pumpkin Carving Contest · Starts October 1st · $500 in prizes
← Back to ideas
@ai_concepts
Sep 25, 2026
Lopsided Glowing Pumpkin With Tongue-Shaped OpeningAI
0

Report this carving

Tell us what is wrong. Reports are private.

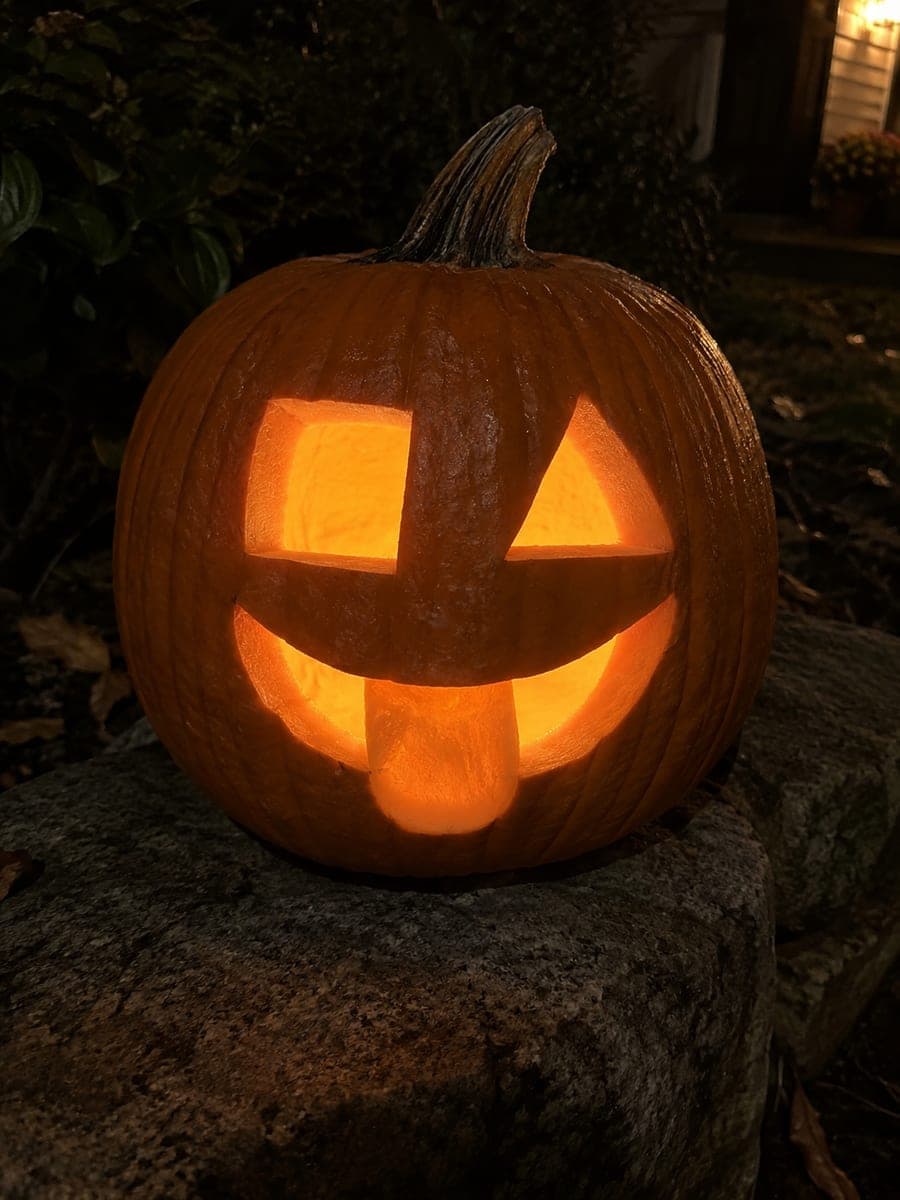
Lopsided Glowing Pumpkin With Tongue-Shaped Opening

Oval pupils connected to the rind, glowing tooth-gap apertures separated by a connected gridwork, and a rounded tongue-shaped hole give this silly pumpkin face a lopsided, unhinged charm that suits the hard difficulty level. The gridwork between tooth gaps is load-bearing, so keep every bridge at least 10mm wide. Cut the tongue hole as a smooth rounded rectangle and position it off-center to amplify the lopsided expression. Light it with a candle rather than an LED so the gridwork throws soft, warm shadows.

No ratings yet · Sign in to rate

Save this design for carving night, then share a photo of your own jack-o'-lantern once it's glowing.
Comments (0)

  • No comments yet — be the first.

Save without an account. Sign in to like or comment.

Our tips for carving a similar design

The gridwork connecting the tooth gaps is the structural core of this design: every bridge between adjacent tooth holes must stay at least 10mm wide or the band will collapse. The tongue opening is cut as a smooth rounded rectangle placed deliberately off-center to amplify the lopsided expression. Plan all bridges before any sawing begins.

From pumpkin to porch

  1. Scoop and sketch

    Scoop to a consistent inch of wall thickness. Sketch the two oval eyes with connected pupils, the tooth band with its internal grid bridges, the tongue opening position, and any surrounding rind outlines. Measure and mark 10mm minimum bridges within the gridwork.

  2. Cut the oval eye openings

    Saw the perimeter of each eye opening, leaving the oval pupil connected to the surrounding rind. Unlike a floating pupil tab, these pupils connect continuously to the rind so they are more stable. Keep the connecting rind bridge thick and even on all sides.

  3. Plan and cut the gridwork tooth band

    The gridwork is a series of rectangular apertures separated by solid rind bars. Mark every bar and confirm each is at least 10mm wide before cutting the first aperture. Cut each opening fully and push out the plug before moving to the next.

  4. Cut the tongue opening

    The tongue is represented by a smooth rounded rectangle, not a pointed tab. Saw the full perimeter in one continuous pass. Position it off-center toward one side of the mouth area to reinforce the lopsided expression.

  5. Check structural integrity

    Before lighting, gently press on the gridwork band and around the eye rind. Any flex or crackling sound means a bridge has thinned. Reinforce thin spots from behind with a small piece of craft foam and a toothpick if needed.

  6. Light and display

    A candle rather than an LED suits this design, as the warm flickering light creates soft, moving shadows through the gridwork bars that an LED cannot replicate. Set it slightly elevated so both eyes and the off-center tongue are visible.

Written with AI to match this design

Gather your supplies

Check things off as you get ready.

Work on a stable surface, keep your free hand out of the cutting path, and have an adult handle sharp tools.

Three levels of light

  • Leave intact

    The rind bridges in the gridwork, the pupil connections to the surrounding rind, and all structural areas around the tongue opening stay solid and dark

  • Peel & shade

    None, all effects are through-cuts

  • Cut through

    Eye opening surrounds, all gridwork tooth apertures, and the rounded tongue opening are cut through for full glow

Learn the carving basics

Before you start cutting

What is the minimum safe bridge width inside the gridwork?

Ten millimeters is the minimum, but 12-15mm is safer. Measure with a ruler on the outside of the pumpkin before cutting. The pumpkin surface is curved, so a bridge that looks wide in your sketch may be narrower on the actual surface.

How do I keep the tooth-band apertures uniform in size?

Cut a cardboard spacer the width of one aperture and one bridge, and step it along the mouth area to mark positions before you cut. Even spacing is much easier to achieve with a physical spacer than by eye alone.

Can I replace the rounded tongue rectangle with an actual tab tongue?

A through-cut rectangle is safer structurally than a hanging tab tongue on this design because the gridwork already reduces the surrounding rind strength. A connected tab would need a very wide root to be secure, whereas the through-cut rounded hole is clean and does not depend on a narrow neck.

Your take belongs here, too.

Changed a detail? Made it simpler? Share a photo of your version and tell the community what worked.

Share your pumpkin

More pumpkins like this

You've reached the end · 8 pumpkins
The Patch Report

Fresh pumpkins, in your inbox.

The best new carvings, ideas worth stealing, and how-tos for carving season. Short, seasonal, and gone by November.

A short email during carving season. Unsubscribe anytime. See our privacy policy.