Halloween Pumpkin Carving Contest · Starts October 1st · $500 in prizes
← Back to ideas
@ai_concepts
Sep 25, 2026
Party Theme Cutout Pumpkin Carving IdeaAI
0

Report this carving

Tell us what is wrong. Reports are private.

Party Theme Cutout Pumpkin Carving Idea

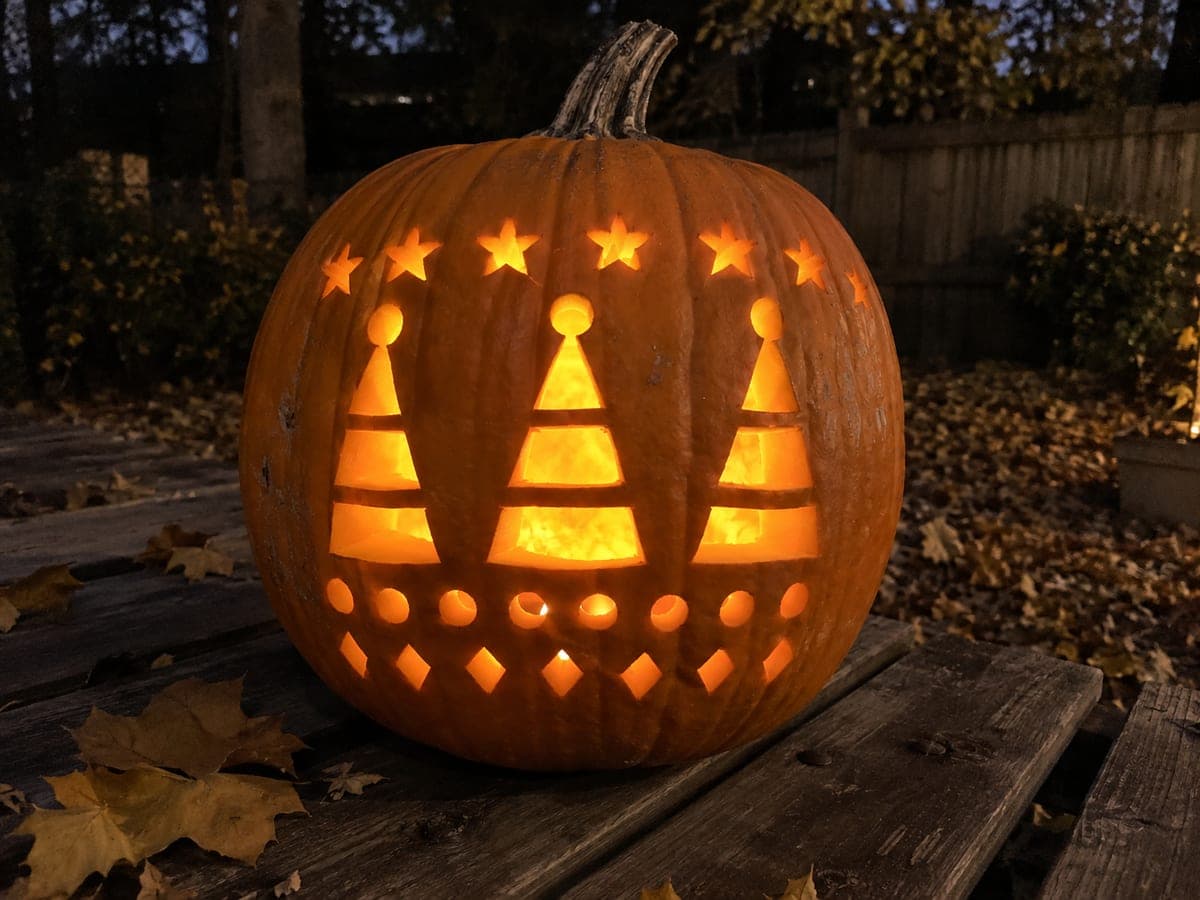
Mid-complexity party symbols cut fully through with broad rind connections make this a satisfying group project for a pumpkin carving party. Assign each guest a different symbol to carve so the finished pumpkins form a coordinated display. Shallow backed detail work behind the main apertures is best tackled with a small linoleum gouge after the through-cuts are complete. Grouping the finished pumpkins in a row with flickering tea lights creates a festive focal point.

No ratings yet · Sign in to rate

Comments (0)

  • No comments yet — be the first.

Save without an account. Sign in to like or comment.

Our tips for carving a similar design

Multiple party-symbol cutouts with broad rind connections make this a satisfying intermediate group project where each guest carves a different symbol on their own pumpkin. Shallow backed detail work behind the main apertures is tackled after all through-cuts are complete to maintain structural integrity throughout. A finished row of these glowing pumpkins makes a coordinated party focal point.

From pumpkin to porch

  1. Pre-hollow pumpkins before guests arrive

    Hollow all pumpkins to an even one-inch wall ahead of the party so guests skip to the pattern stage immediately. Label the backs of the pumpkins with guest names or symbol assignments so each person knows which design they are carving. This setup step saves significant time and mess during the event.

  2. Assign symbols and distribute templates

    Offer a selection of three or four different party symbols and let guests choose their preference. Print each template at the correct size for its assigned pumpkin face. Brief everyone on the technique: poke the pin holes, connect the dots, then cut. Pair less confident carvers with simpler symbols.

  3. Transfer patterns simultaneously

    Have all guests transfer their templates at the same time so carving begins as a group. Circulate to check that pin hole density is sufficient and that retained rind areas are clearly marked. A poorly transferred template is the most common source of mistakes during group carves.

  4. Cut main symbol apertures

    Guide guests through the cutting stage: outside edges first, concave sections carefully, and retained bridges protected throughout. Remind everyone to tap pieces free from inside rather than levering them out from the front, which can crack the surrounding rind.

  5. Add backed detail work after through-cuts

    Once all main apertures are cut and confirmed solid, circulate a detail knife and linoleum gouge for backed detail work. Shallow texture details added at this stage reward patience without requiring the guests to repeat the structural decision-making of the main cuts.

  6. Arrange the row display with tea lights

    Line the finished pumpkins up in a row with battery tea lights inside each one. Place them at slightly staggered heights using small boxes or books so all symbols are visible simultaneously. The coordinated row reads as a unified party statement even though each pumpkin was individually carved.

Written with AI to match this design

Gather your supplies

Check things off as you get ready.

Work on a stable surface, keep your free hand out of the cutting path, and have an adult handle sharp tools.

Three levels of light

  • Leave intact

    Surrounding rind and broadly connected retained sections on each pumpkin stay dark

  • Peel & shade

    Shallow backed detail work scored behind the main apertures for a secondary soft glow

  • Cut through

    Main party symbol cutouts fully open on each pumpkin for consistent warm light across the row

Learn the carving basics

Before you start cutting

How do I manage different skill levels among guests without slowing down the group?

Pre-sort symbols by difficulty and match them to guests based on their stated experience. Confident carvers get symbols with curves or concave sections; beginners get symbols made entirely of straight cuts such as stars or geometric shapes. Having an experienced carver float around the group to assist at critical moments keeps everyone moving at a similar pace.

Should the pumpkins all be the same size for the row display?

A slight size variation actually makes the row more visually interesting. Alternating larger and smaller pumpkins across the row creates a rhythmic pattern. What matters most for the coordinated look is that the symbols share a similar visual weight and that the glow brightness is consistent across all pumpkins.

One guest's symbol came out much bolder than the others. How do we balance the display?

Position the boldest pumpkin at one end of the row rather than in the center, which prevents it from drawing all attention to the middle. Surrounding it with a couple of pumpkins that have backed detail work rather than all open cutouts also diffuses the brightness contrast across the row.

Your take belongs here, too.

Changed a detail? Made it simpler? Share a photo of your version and tell the community what worked.

Share your pumpkin

More pumpkins like this

You've reached the end · 8 pumpkins
The Patch Report

Fresh pumpkins, in your inbox.

The best new carvings, ideas worth stealing, and how-tos for carving season. Short, seasonal, and gone by November.

A short email during carving season. Unsubscribe anytime. See our privacy policy.