Halloween Pumpkin Carving Contest Β· Starts October 1st Β· $500 in prizes
← Back to ideas
@ai_concepts
Sep 25, 2026
Expert Party Design Glowing Jack-O-LanternAI
0

Report this carving

Tell us what is wrong. Reports are private.

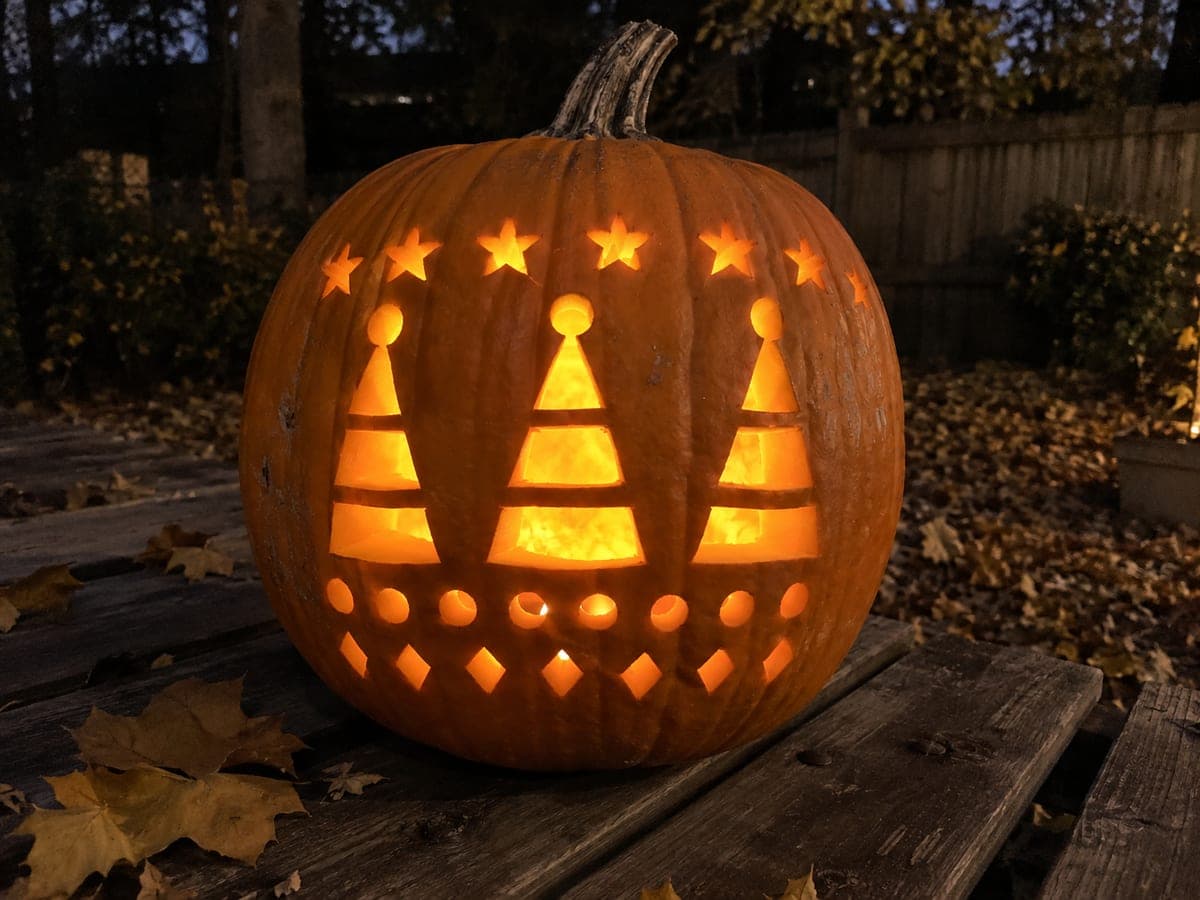
Expert Party Design Glowing Jack-O-Lantern

Complex interlocking party motifs push technical carving to its limit in this expert-level jack-o-lantern suited for a pumpkin carving party contest table. Map every retained rind bridge before making the first cut so you can confirm each island connects to the shell by at least two points. Work from the outer edges inward so the pumpkin remains stable until the final central elements are removed. A high-lumen LED puck inside illuminates even the finest shallow-backed details from edge to edge.

No ratings yet Β· Sign in to rate

Comments (0)

  • No comments yet β€” be the first.

Save without an account. Sign in to like or comment.

Our tips for carving a similar design

Every retained rind bridge must connect to the shell at a minimum of two points, and mapping all bridges before the first cut is the defining pre-work for this expert design. Working from the outer edges inward keeps the shell stable until the final central elements are removed. A high-lumen LED puck illuminates even the finest shallow-backed details from edge to edge once the carving is complete.

From pumpkin to porch

  1. Audit every bridge connection before starting

    Draw the full design on paper and trace every retained rind island. For each island, confirm it touches the outer shell or another confirmed bridge at a minimum of two points. Any island that connects by only one narrow point must be redesigned or the connection widened before transferring to the pumpkin.

  2. Transfer with exhaustive annotations

    Poke the full design into the pumpkin surface and use three marker colors: red for through-cuts, blue for backed details, and black for retained bridges. Photograph the annotated pumpkin face with your phone so you can reference the color map throughout the carve without constantly referring back to the paper template.

  3. Cut outer edges first, working inward

    Begin with apertures closest to the outer shell where the most surrounding rind is available. Complete each aperture fully before beginning the next. Never rough-outline multiple apertures and come back to complete them, since partially-cut boundaries are structurally ambiguous and invite mistakes.

  4. Verify bridges at every fifth cut

    After every fifth aperture is completed, set down the saw and gently press each retained island to test for movement. Any flex indicates a bridge thinned beyond the safe threshold. Stop and reinforce the problem bridge by shaving a thin sliver from the adjacent aperture to widen the rind before continuing.

  5. Carve central elements last

    The innermost party motif elements are saved for last precisely because they are surrounded by the most cuts by this stage and the shell is at its most flexed condition. Work slowly, maintain firm grip, and use a detail knife rather than a full saw for any final cuts in tight central areas.

  6. Add backed details and light with high-lumen LED

    Score and peel backed detail accents after all structural cuts are confirmed fully solid. Insert a high-lumen LED puck and view the design from the intended contest-table distance to check that all details read clearly. Adjust the LED position inside to optimize illumination of the finest areas before sealing the lid.

Written with AI to match this design

Gather your supplies

Check things off as you get ready.

Work on a stable surface, keep your free hand out of the cutting path, and have an adult handle sharp tools.

Three levels of light

  • Leave intact

    All retained rind bridges and island sections stay dark, defining the interlocking pattern negative space

  • Peel & shade

    Fine backed detail accents scored and peeled after structural completion for a layered secondary glow

  • Cut through

    All main interlocking motif apertures fully open, filling the pumpkin face with rich layered light

Learn the carving basics

Before you start cutting

How do I know when a bridge is genuinely too thin versus just feeling fragile in my hands?

A bridge that measures under a half inch at its narrowest point in the actual rind (not on paper) is too thin for a design with this many cuts. Measure with a ruler on the pumpkin surface, not by feel alone. If a bridge tests under that threshold, widen the adjacent aperture slightly away from the bridge rather than toward it.

My blades keep breaking on this design. What is causing it?

Expert-level designs require more blade pressure in tight turns, which snaps thin blades. Keep a supply of three to four identical replacement blades for this project. When a blade begins to feel like it is bending rather than cutting cleanly, replace it immediately rather than forcing the cut and risking a structural mistake.

How far in advance can I carve this for a contest display that is two days away?

Carve no more than 24 hours before the display begins and store the finished pumpkin in a cool, dark place with all cut edges coated in petroleum jelly. Re-coat the edges on display day. An expert design with many cuts dries out faster than a simple one because more rind surface is exposed to air, so the tighter your timing the fresher it will look.

Your take belongs here, too.

Changed a detail? Made it simpler? Share a photo of your version and tell the community what worked.

Share your pumpkin

More pumpkins like this

You've reached the end Β· 8 pumpkins
The Patch Report

Fresh pumpkins, in your inbox.

The best new carvings, ideas worth stealing, and how-tos for carving season. Short, seasonal, and gone by November.

A short email during carving season. Unsubscribe anytime. See our privacy policy.