@veiledvine
Sep 7, 2026
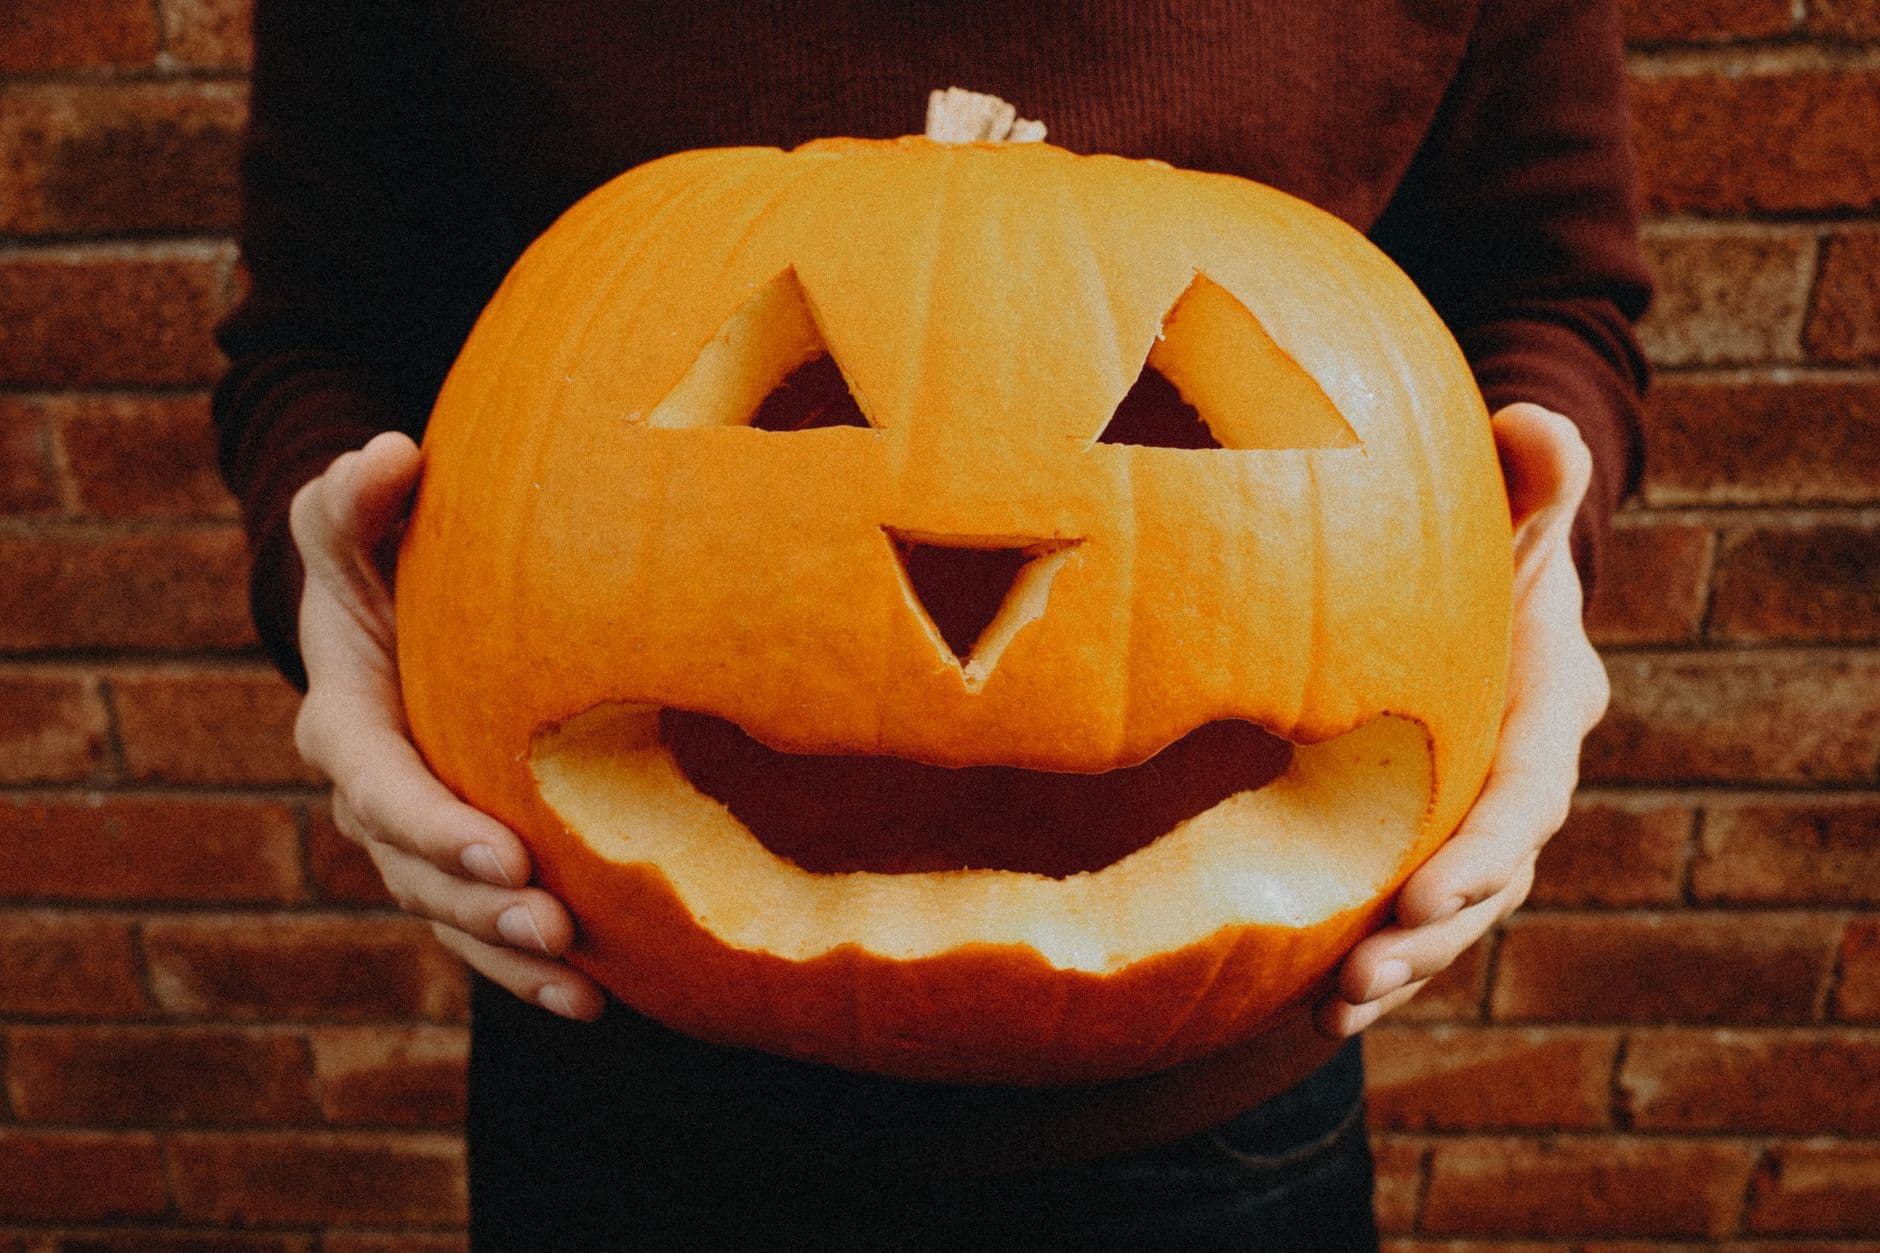
The whole charm here comes from a big open smile paired with simple triangle eyes and nose. The trick is carving the mouth as a wide grin with a partly peeled lip so the bottom edge glows softer than the fully cut opening. Keep everything symmetrical and cut the large mouth last so the face stays sturdy while you work.
Written by PumpkinCarvingIdeas.com, inspired by @veiledvine's photo above. These are our suggestions, not instructions from the uploader, and this approach hasn't been tested on their exact carve.
Pick a round, evenly colored pumpkin and wipe it clean. Cut a lid from the top at an angle so it rests without falling in, then scoop out the seeds and pulp. Scrape the front wall down to about one inch thick so your tools glide through easily. A thinner wall makes the smile much simpler to carve cleanly.
Sketch or trace two triangle eyes, a small triangle nose, and a wide curved mouth onto the front. Space the eyes evenly on either side of the natural center line and keep the nose small and low. Draw the mouth as a long grin that curves up at the corners. Step back and check the layout is balanced before you cut anything.
Start with the small shapes since they are the easiest and least risky. Use a poking saw or a serrated carving tool and cut with slow, steady strokes. Angle the blade slightly outward so the pieces push free from inside. Gently press each cutout in and out to release it without tearing the edges.
Before cutting the mouth all the way through, use a lino cutter or the edge of a spoon to peel just the skin along the lower lip of the smile. Removing the orange skin down to the pale flesh makes that strip glow dim when lit. This is what gives the grin its layered, cartoon look. Take your time and keep the peeled band even.
Now cut the wide smile fully through, saving this biggest opening for the end so the face holds its shape. Work from the middle outward toward each corner, following your curved line. Ease the large piece out carefully to avoid cracking the lower rim. Tidy any rough edges with light passes of your tool.
Drop in a battery LED tea light or a small puck light and set the lid back on. Flameless light is safest and shows off the peeled lip glow without scorching the flesh. Photograph it at dusk against a plain wall so the warm face pops. Mist the cut edges with water and refrigerate overnight to help it last.
Check things off as you get ready.
Work on a stable surface, keep your free hand out of the cutting path, and have an adult handle sharp tools.
The broad orange face and cheeks stay untouched and dark for contrast.
The skinned lower lip strip of the smile glows a soft dim orange.
The triangle eyes, nose, and wide open mouth blaze brightest.
Keep the front wall around one inch thick and cut the mouth last, after the eyes and nose are done. Work from the center of the smile outward to each corner so the rim stays supported as long as possible. If the pumpkin feels soft or thin, leave a little more flesh along the bottom edge.
Peeling just the skin off the lower lip exposes the pale flesh, which glows dim when the pumpkin is lit. It creates a layered look between the dark skin and the bright open mouth. Use a spoon edge or lino cutter and remove only the surface, not the full wall.
Close is good enough, and slight quirks actually add to the friendly, silly personality. Draw a faint center line first and place each eye the same distance from it. Cut slowly and you can always widen a triangle a touch to even them up.
Changed a detail? Made it simpler? Share a photo of your version and tell the community what worked.
The best new carvings, ideas worth stealing, and how-tos for carving season. Short, seasonal, and gone by November.





Comments (0)