Halloween Pumpkin Carving Contest · Starts October 1st · $500 in prizes
← Back to ideas
@ai_concepts
Sep 14, 2026
Little Seated Kitten PumpkinAI
0

Little Seated Kitten Pumpkin

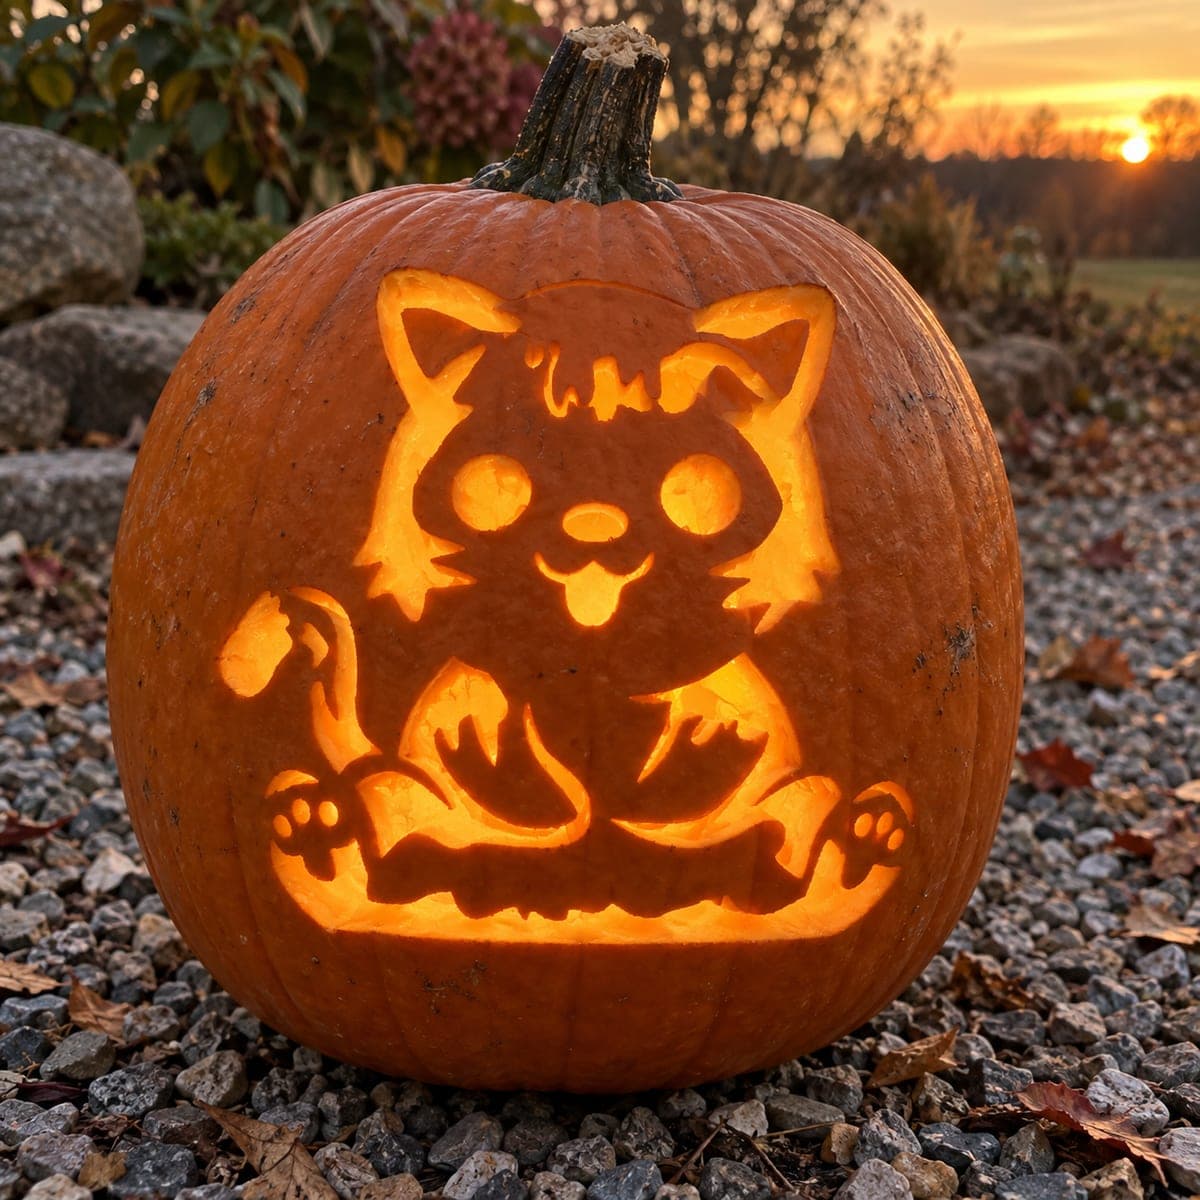
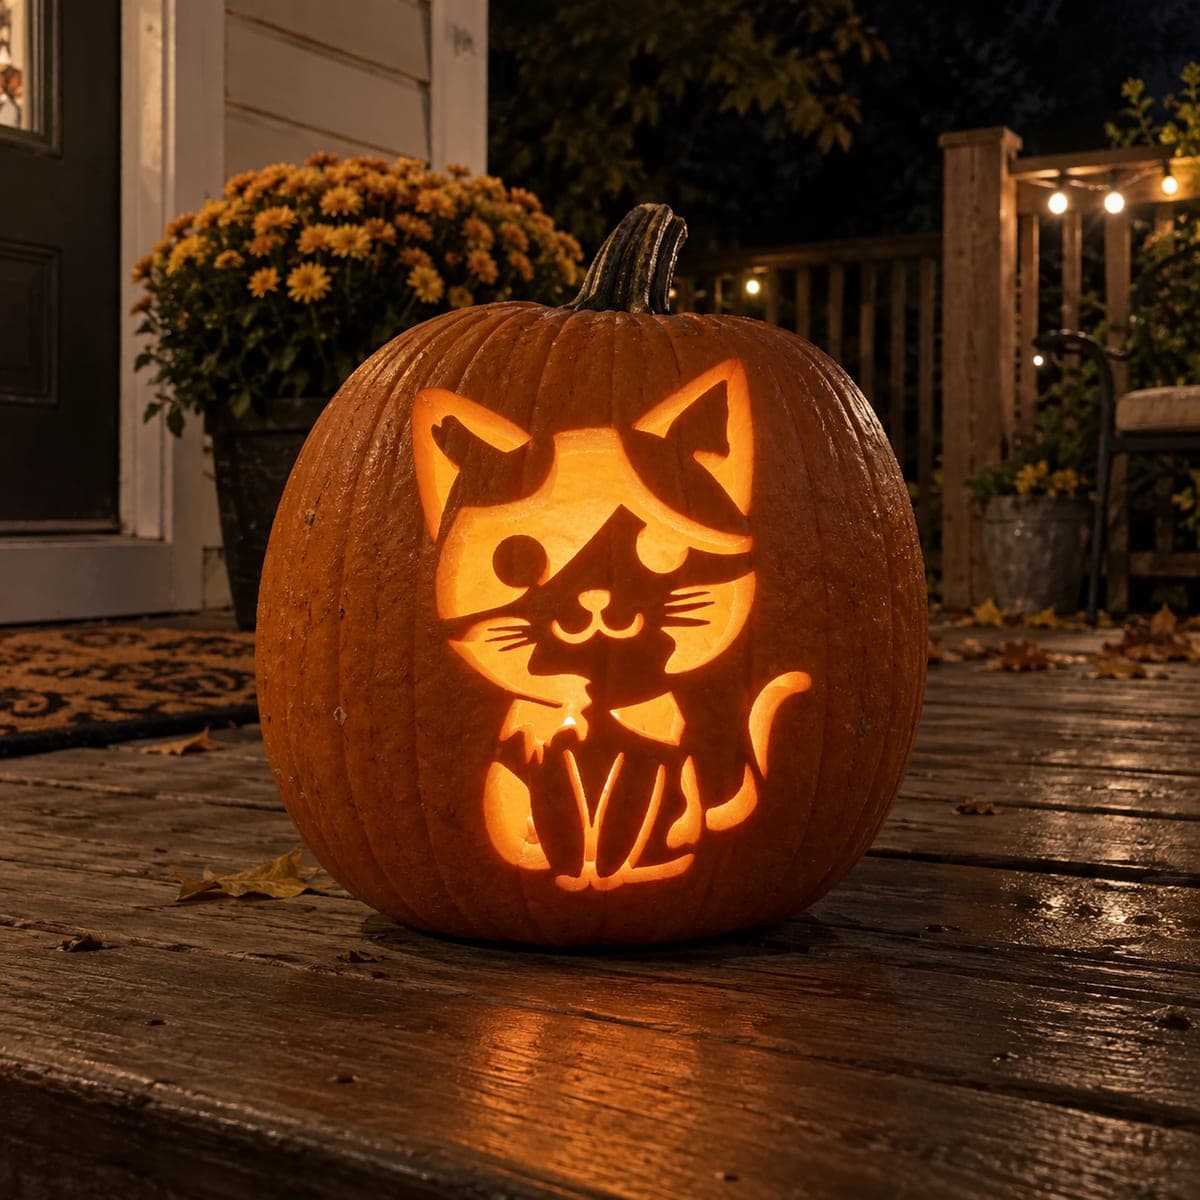
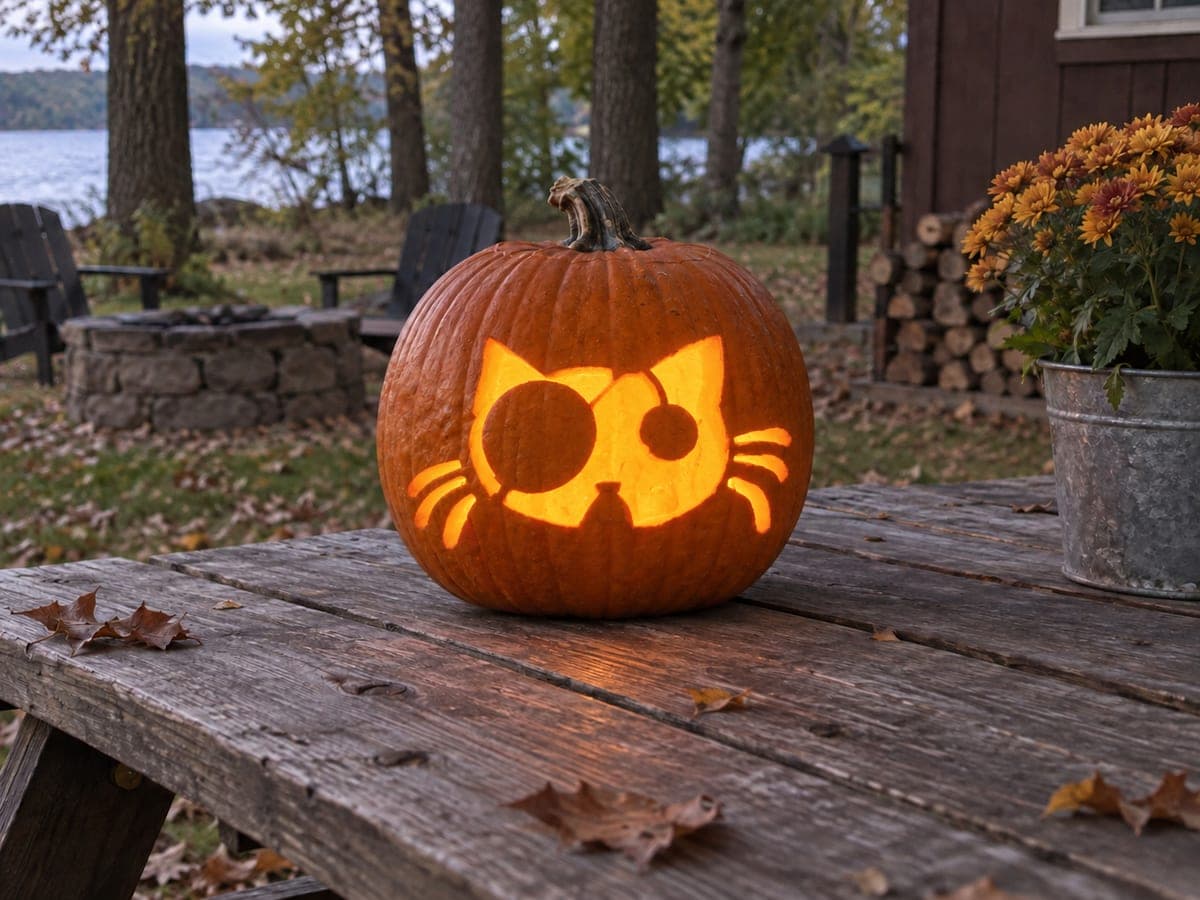
A small seated kitten with round cheeks, short forward-pointing whiskers, big circular eyes, and an upright tail is rendered in clean simple cutouts that would suit a beginner carver. The eyes, mouth, and the gap between the tail and body are pierced through, keeping the overall silhouette easy to follow. Transfer the design with a pin tool and cut the eye circles before the body outline, so the surrounding rind is still firm when you need the most control. This easy cute kitten pumpkin carving idea looks cheerful lit from inside with a standard votive candle.

This is an AI-generated concept image: a realistic, carvable design idea rather than a photo of a finished carve. AI concepts are always labeled and sit out the leaderboard and the contest.
No ratings yet · Sign in to rate

Comments (0)

  • No comments yet — be the first.

Save without an account. Sign in to like or comment.

Our tips for carving a similar design

The core trick here is a bold outline silhouette with only a few pierced openings, so the kitten reads clearly without any fussy detail work. You cut the small circular eyes and mouth first while the rind is firm, then open the body outline and the gap between the tail and back last. Keep the whiskers and the thin curve of the tail attached to the surrounding skin so nothing snaps.

Written by PumpkinCarvingIdeas.com, inspired by the image above. These are our suggestions, not instructions from the uploader. This approach to the AI concept has not been tested on a real pumpkin.

From pumpkin to porch

  1. Pick a smooth, tall pumpkin and clean it out

    Choose a pumpkin with a fairly flat, smooth front panel so the kitten sits without warping across the ribs. Cut a lid from the bottom or the back rather than the top, which keeps the stem intact and makes lighting easier later. Scrape the inside wall behind the design down to about one inch thick with a sturdy scoop. A thinner wall is much easier to pierce cleanly.

  2. Transfer the kitten with a pin tool

    Tape your stencil flat against the front, snipping the edges so it hugs the curve. Use a pin tool or a pushpin to poke closely spaced dots along every line, including the eyes, mouth, whiskers, tail, and body outline. Peel the paper and connect the dots lightly with a washable marker so the full kitten is easy to follow. Double check that the whiskers stay as narrow strips linked to solid skin on both ends.

  3. Cut the eyes and mouth first

    Start with the two round eyes and the small mouth while the surrounding rind is still firm and gives you the most control. Use a fine detail saw and let the blade do the work with gentle back and forth strokes. Push the cut pieces inward or outward with a fingertip once they are free. Working small to large keeps the panel from flexing before you finish.

  4. Open the body outline

    Now saw along the outer silhouette of the seated kitten, taking your time around the ears and the curve of the back. Make relief cuts at tight corners so waste pieces drop out without tearing. Save the largest opening, the gap between the tail and the body, for last so the front panel stays strong as long as possible. Support the pumpkin with your free hand well away from the blade.

  5. Peel the whiskers and cheeks for a soft glow

    For the short forward whiskers and the round cheek areas, skip cutting all the way through and instead shave off just the top skin with a loop tool. This peeled surface glows a dim orange and adds depth without weakening the thin lines. Keep the peels shallow and even so the light spreads smoothly. Wipe away shavings to see the effect before you decide it is done.

  6. Light it and take your photo

    Set a battery LED tea light or a small puck light inside rather than a flame, since the many openings can pull a candle around. Position the light low and slightly forward so it fills the eyes and mouth evenly. Trim any ragged edges from the inside with a paring knife for crisper lines. Photograph it at dusk on a dark porch step to let the warm glow stand out.

Gather your supplies

Check things off as you get ready.

Work on a stable surface, keep your free hand out of the cutting path, and have an adult handle sharp tools.

Three levels of light

  • Leave intact

    The main body, face, ears, and tail keep their natural skin and stay dark, forming the kitten's shape.

  • Peel & shade

    The round cheeks and short whiskers get a shallow skin peel for a soft dim orange glow.

  • Cut through

    The two round eyes, the mouth, the body outline, and the gap between tail and body are cut through for the brightest light.

Learn the carving basics

Before you start cutting

Do I really need to cut the eyes before the outline?

Yes, and it makes a real difference on this design. When you pierce the small eye circles first, the surrounding rind is still firm and gives you steady control for clean curves. If you open the big body outline first, the panel flexes and the delicate eye cuts get much harder.

How do I keep the whiskers from breaking off?

Treat the whiskers as peeled areas rather than full cutouts, or leave them as narrow strips attached to solid skin at both ends. Either way they stay supported and will not snap. Cutting them all the way through as free floating lines is what usually causes breakage.

This is a concept image, so how would a real one hold up?

The pictured pumpkin is an AI concept, but a design like this carves well in real life because the openings are compact and the silhouette is one connected shape. Keep the wall around one inch thick and save the tail gap for last so the front stays strong. Use an LED light rather than a flame for safety around the multiple cutouts.

Your take belongs here, too.

Changed a detail? Made it simpler? Share a photo of your version and tell the community what worked.

Share your pumpkin

More pumpkins like this

You've reached the end · 8 pumpkins
The Patch Report

Fresh pumpkins, in your inbox.

The best new carvings, ideas worth stealing, and how-tos for carving season. Short, seasonal, and gone by November.

A short email during carving season. Unsubscribe anytime. See our privacy policy.