Halloween Pumpkin Carving Contest · Starts October 1st · $500 in prizes
← Back to ideas
@ai_concepts
Sep 14, 2026
Solid Seated Cat PumpkinAI
0

Solid Seated Cat Pumpkin

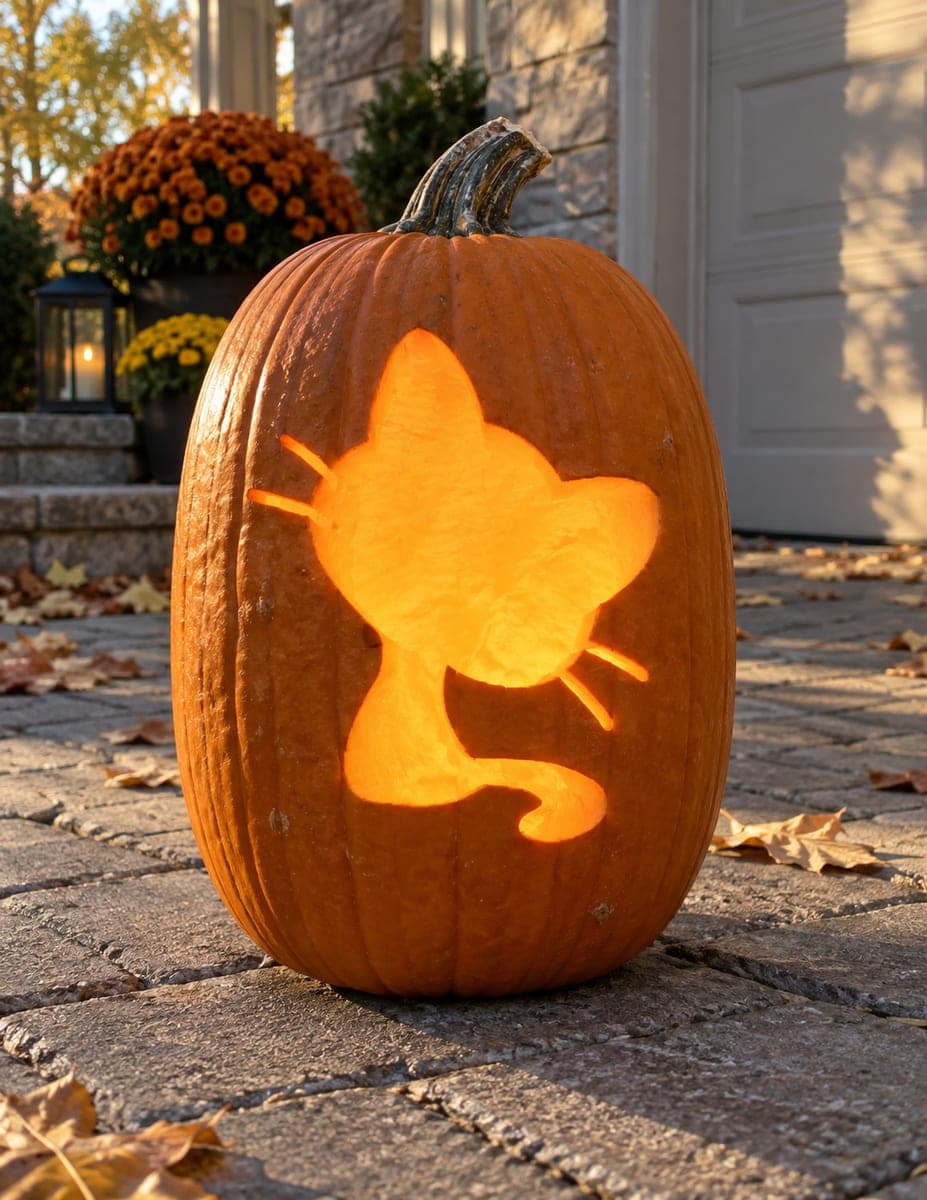
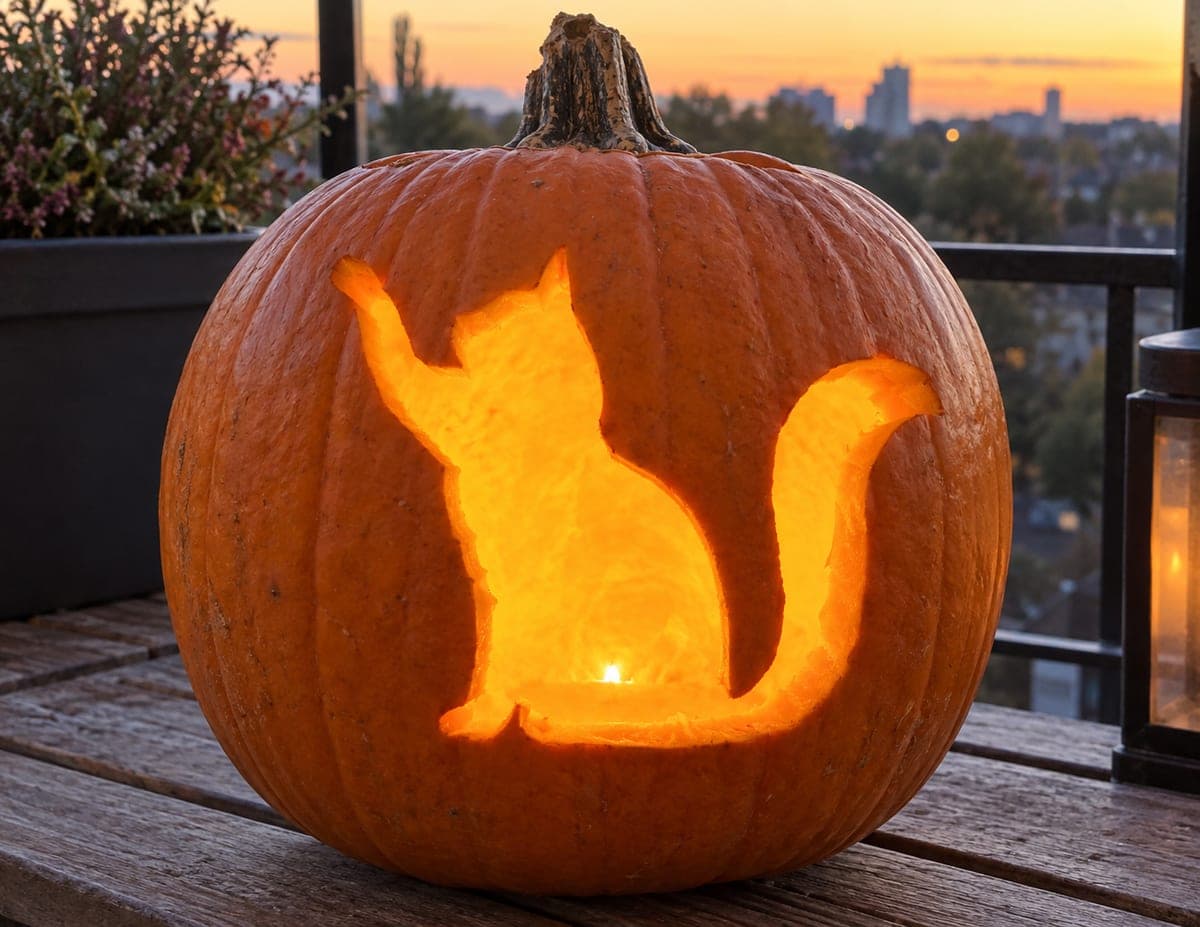
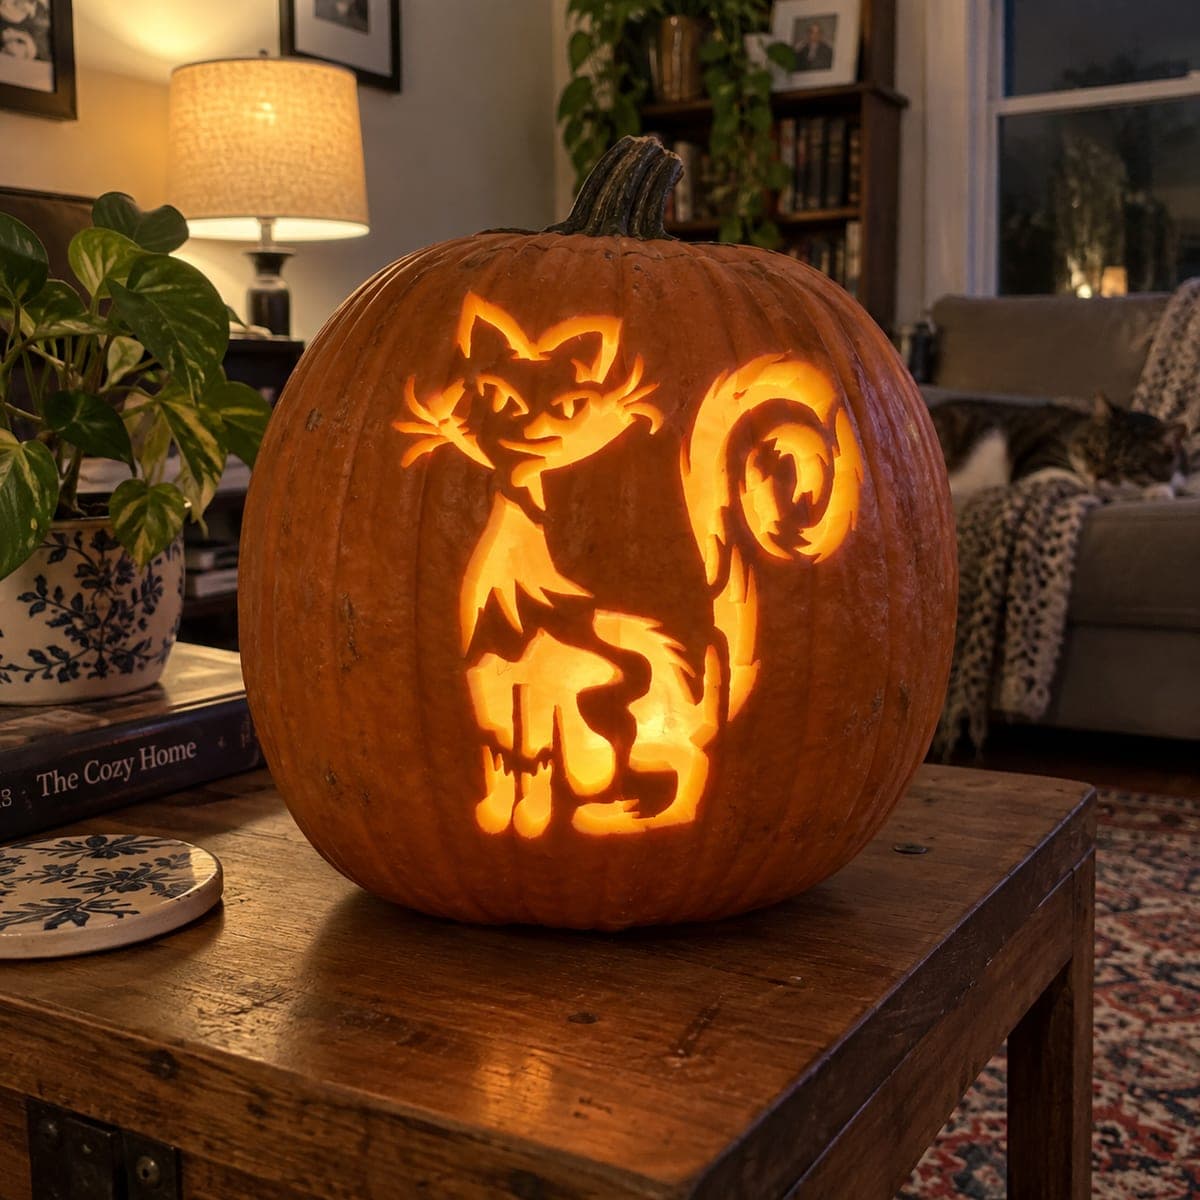
A seated cat silhouette with one front paw raised and a long sweeping tail curling upward to the right is cut completely through the pumpkin wall, the whole figure glowing as a solid amber shape against the dark exterior. This cute cat pumpkin carving idea creates an instantly recognizable Halloween jack-o-lantern from a simple single-piece cutout. The tail extends to the far right and is the thinnest point of the design, so cut it last and make the base where it meets the body at least a half inch wide to prevent cracking.

This is an AI-generated concept image: a realistic, carvable design idea rather than a photo of a finished carve. AI concepts are always labeled and sit out the leaderboard and the contest.

No ratings yet · Sign in to rate
Comments (0)

  • No comments yet — be the first.

Save without an account. Sign in to like or comment.

Our tips for carving a similar design

The whole trick here is one continuous silhouette cut clean through the pumpkin wall, so the entire cat glows as a solid amber shape. There is no interior detail to fuss over, which makes it forgiving, but the sweeping tail is thin, so the plan is to carve the fat body first and save that delicate tail tip for last.

Written by PumpkinCarvingIdeas.com, inspired by the image above. These are our suggestions, not instructions from the uploader. This approach to the AI concept has not been tested on a real pumpkin.

From pumpkin to porch

  1. Pick a pumpkin and open the back

    Choose a pumpkin with a smooth, flat-ish front panel wide enough for the seated cat plus the long tail sweeping to the right. Cut a lid in the back rather than the top so the front face stays clean. Angle your cut inward so the lid rests without falling in. An adult should handle all knife work.

  2. Scoop and thin the wall

    Scrape out the seeds and pulp, then thin the front wall to about one inch where the design will sit. A consistent wall carves more evenly and lets light spread. Keep a flashlight handy to check thickness by holding it inside. Save some scooped flesh in case you want to test light before you commit.

  3. Transfer the silhouette

    Tape your seated cat stencil to the front, centered so the raised front paw sits high and the tail has room to curl up to the right. Poke the outline with a pin or transfer tool, spacing dots close together on the curved tail so the shape stays clear. Peel the paper and connect the dots with a pencil. Double check that the tail base where it meets the body is drawn at least a half inch wide.

  4. Carve the body first

    Start with the large, stable areas: the head, back, and seated haunches. Use a small saw blade and take slow, steady strokes, letting the blade do the work rather than forcing it. Push each freed piece gently outward. Working the bulk of the body first keeps the pumpkin sturdy while you handle the trickier parts.

  5. Cut the ears and tail last

    Move to the pointed ears, then finally the long tail. These are the thinnest, most fragile cuts, so go slowly and support the pumpkin with your free hand. Keep the tail tip attached to solid rind and avoid over thinning its base. If the tail feels weak, leave a tiny uncut bridge partway up to brace it, then trim it neatly once everything else is done.

  6. Light it and photograph

    Drop a battery LED tealight or a small puck light inside, never a flame, since the thin tail dries and scorches easily. Set it on a porch rail or table at dusk to catch that warm glow against the dark skin. Rotate the pumpkin until the cat reads cleanly, then snap your photo. A dab of petroleum jelly on the cut edges slows drying if you want it to last a few extra days.

Gather your supplies

Check things off as you get ready.

Work on a stable surface, keep your free hand out of the cutting path, and have an adult handle sharp tools.

Three levels of light

  • Leave intact

    The entire outer skin around the cat stays untouched and dark, so the figure pops.

  • Peel & shade

    Optional: shave a thin halo just outside the silhouette for a soft glow rim, though the classic look skips this.

  • Cut through

    The full cat body, ears, raised paw, and sweeping tail are cut all the way through for the brightest amber shape.

Learn the carving basics

Before you start cutting

How do I keep the long tail from snapping?

Keep the tail base where it joins the body at least a half inch wide, and carve it last after the body is done. Support the pumpkin with your free hand as you cut and avoid over thinning the tip. If it feels wobbly, leave a small uncut bridge partway up, then trim it away at the very end.

This is a concept image, so can a real pumpkin actually hold this shape?

Yes, as long as you keep the tail base and ear bases thick enough to stay attached to solid rind. The image is an AI concept, so treat it as inspiration rather than proof. Thinning the wall to about an inch and cutting the delicate parts last will get you a stable version.

Do I need to carve any detail inside the cat?

No, that is the beauty of this design. The entire cat is one solid cutout, so the glow does all the work and there are no whiskers or eyes to carve. Just focus on a clean, confident outline.

Your take belongs here, too.

Changed a detail? Made it simpler? Share a photo of your version and tell the community what worked.

Share your pumpkin

More pumpkins like this

You've reached the end · 8 pumpkins
The Patch Report

Fresh pumpkins, in your inbox.

The best new carvings, ideas worth stealing, and how-tos for carving season. Short, seasonal, and gone by November.

A short email during carving season. Unsubscribe anytime. See our privacy policy.