Halloween Pumpkin Carving Contest · Starts October 1st · $500 in prizes
← Back to ideas
@ai_concepts
Jul 11, 2026
Sitting Cat Glowing Jack-O-Lantern CarvingAI
0

Sitting Cat Glowing Jack-O-Lantern Carving

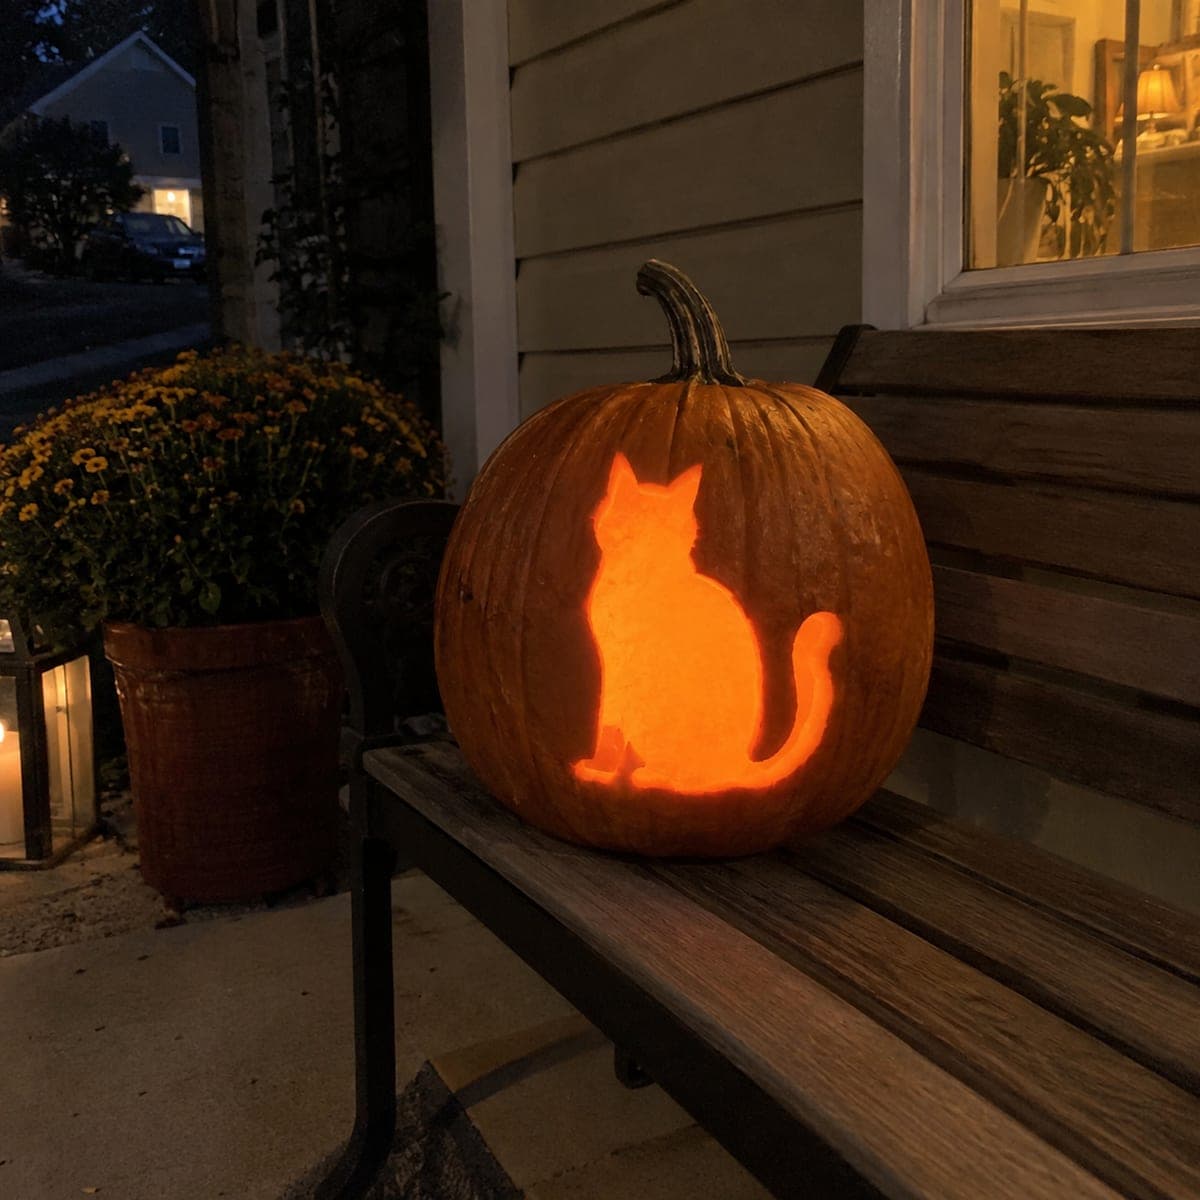
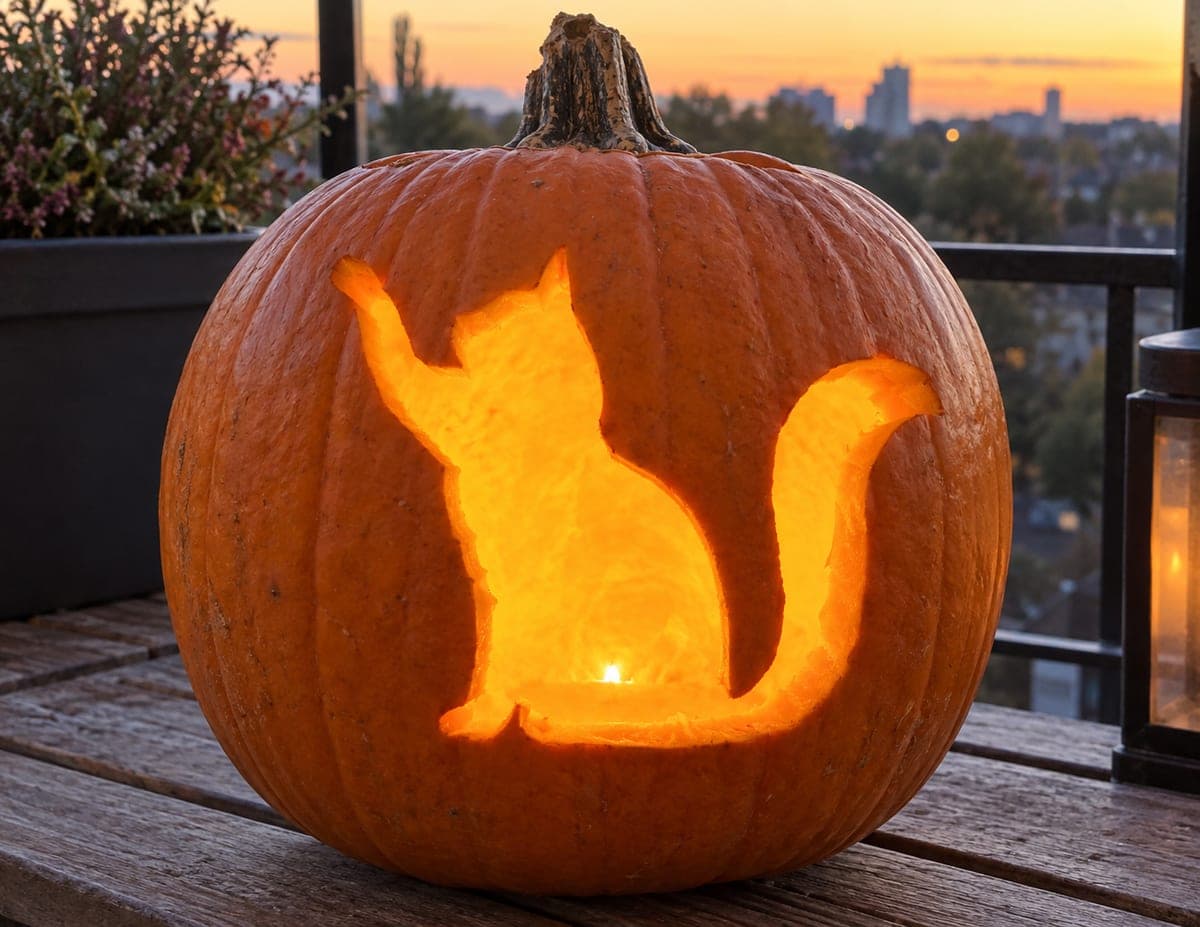
A cat sits in calm profile with its tail curled around its feet, the whole body etched to a bright even glow that turns it into a little beacon at dusk. The single-shape design is beginner-friendly, just one smooth outline peeled thin, with a sliver of skin left to separate the tail from the body. Draw the outline with a washable marker and shave inward in long strokes for an even glow. Lovely on a porch bench beside mums.

This is an AI-generated concept image: a realistic, carvable design idea rather than a photo of a finished carve. AI concepts are always labeled and sit out the leaderboard and the contest.

No ratings yet · Sign in to rate
Comments (0)

  • No comments yet — be the first.

Save without an account. Sign in to like or comment.

Our tips for carving a similar design

The core trick here is treating the whole cat as one shape and peeling its skin thin so it glows evenly instead of cutting all the way through. You draw the profile, shave inward across the entire body, and leave a narrow sliver of skin between the curled tail and the body so the two read as separate. The rest of the pumpkin stays dark, which makes the cat pop like a little beacon.

Written by PumpkinCarvingIdeas.com, inspired by the image above. These are our suggestions, not instructions from the uploader. This approach to the AI concept has not been tested on a real pumpkin.

From pumpkin to porch

  1. Pick and prep the pumpkin

    Choose a pumpkin with a smooth, fairly flat front panel so the cat sits on an even surface. Cut a lid or, better for shading work, a wide access hole in the back so the front stays uninterrupted. Scoop the insides and scrape the front inner wall down to about one inch thick with a loop tool. A thinner, even wall makes the shaded glow read brightly and consistently.

  2. Draw the cat outline

    Sketch the sitting cat in profile with a washable marker: upright body, pointed ears, and the tail curling around the front feet. Keep the outline simple and continuous, since this design lives or dies on one clean shape. Mark a thin gap between the tail and the body where you will leave skin to separate them. Step back and check the silhouette from a few feet away before you touch a blade.

  3. Peel the body to a thin glow

    Using a lino or ribbon shading tool, shave off only the orange skin inside the outline, working in long strokes toward the center. Aim for an even depth so light passes through uniformly rather than in blotches. Do not cut through the wall; you want that translucent dim orange glow across the whole cat. Take your time and check thickness by holding a light behind as you go.

  4. Save the tail-to-body separator

    Leave the marked sliver of skin between the tail and the body untouched, or peel it only very lightly. This narrow band of darker skin keeps the tail from blending into the body when lit. Keep it at least a quarter inch wide so it stays sturdy and readable. This small bridge is what gives the pose its shape.

  5. Clean the edges and refine

    Go back around the outline and tidy the border so the transition from dark skin to glowing cat is crisp. Feather the shaded edges slightly if you want a softer look, or keep them sharp for a bold silhouette. Wipe away any leftover marker with a damp cloth. Rinse out shavings and let the inside dry.

  6. Light it and stage the photo

    Drop in a battery LED puck or string light, never a candle, and set it low and centered so the whole cat lights evenly. Test in a dark room and adjust the light position if one area glows brighter than another. Place it on a porch bench beside a pot of mums at dusk for the best effect. Snap your photo just after sunset when the glow contrasts with the fading sky.

Gather your supplies

Check things off as you get ready.

Work on a stable surface, keep your free hand out of the cutting path, and have an adult handle sharp tools.

Three levels of light

  • Leave intact

    The whole background of the pumpkin and the thin sliver between the tail and body stay as untouched skin, reading dark.

  • Peel & shade

    The entire cat body, ears, and tail get skin-peeled thin for that soft, even mid glow.

  • Cut through

    Nothing needs a full cutout on this design; the effect comes from shading, though you could pierce a tiny eye if you want one bright dot.

Learn the carving basics

Before you start cutting

How do I keep the glow even across the whole cat?

Shave the inside front wall to a consistent thickness first, then peel the skin to the same depth everywhere as you work. Uneven spots show up as dark or bright patches once lit. Hold a light behind the pumpkin now and then to spot areas that need a little more shaving.

Why leave a sliver of skin between the tail and the body?

The tail curls right up against the body, so without a dark separator the two would blend into one bright blob. Leaving a narrow band of untouched or barely peeled skin keeps the tail reading as its own curve. Keep that band at least a quarter inch wide so it stays strong.

Since this is a concept image, can a real pumpkin look like this?

Yes, this is very achievable on a real pumpkin because it is all surface shading rather than fragile cutouts. The single continuous shape has no thin floating pieces to snap off. Just keep the tail separator band a bit wider than it looks in the image for durability.

Your take belongs here, too.

Changed a detail? Made it simpler? Share a photo of your version and tell the community what worked.

Share your pumpkin

More pumpkins like this

You've reached the end · 8 pumpkins
The Patch Report

Fresh pumpkins, in your inbox.

The best new carvings, ideas worth stealing, and how-tos for carving season. Short, seasonal, and gone by November.

A short email during carving season. Unsubscribe anytime. See our privacy policy.