Halloween Pumpkin Carving Contest · Starts October 1st · $500 in prizes
← Back to ideas
@ai_concepts
Sep 25, 2026
Lopsided Buck-Tooth Pumpkin Carving IdeaAI
0

Report this carving

Tell us what is wrong. Reports are private.

Lopsided Buck-Tooth Pumpkin Carving Idea

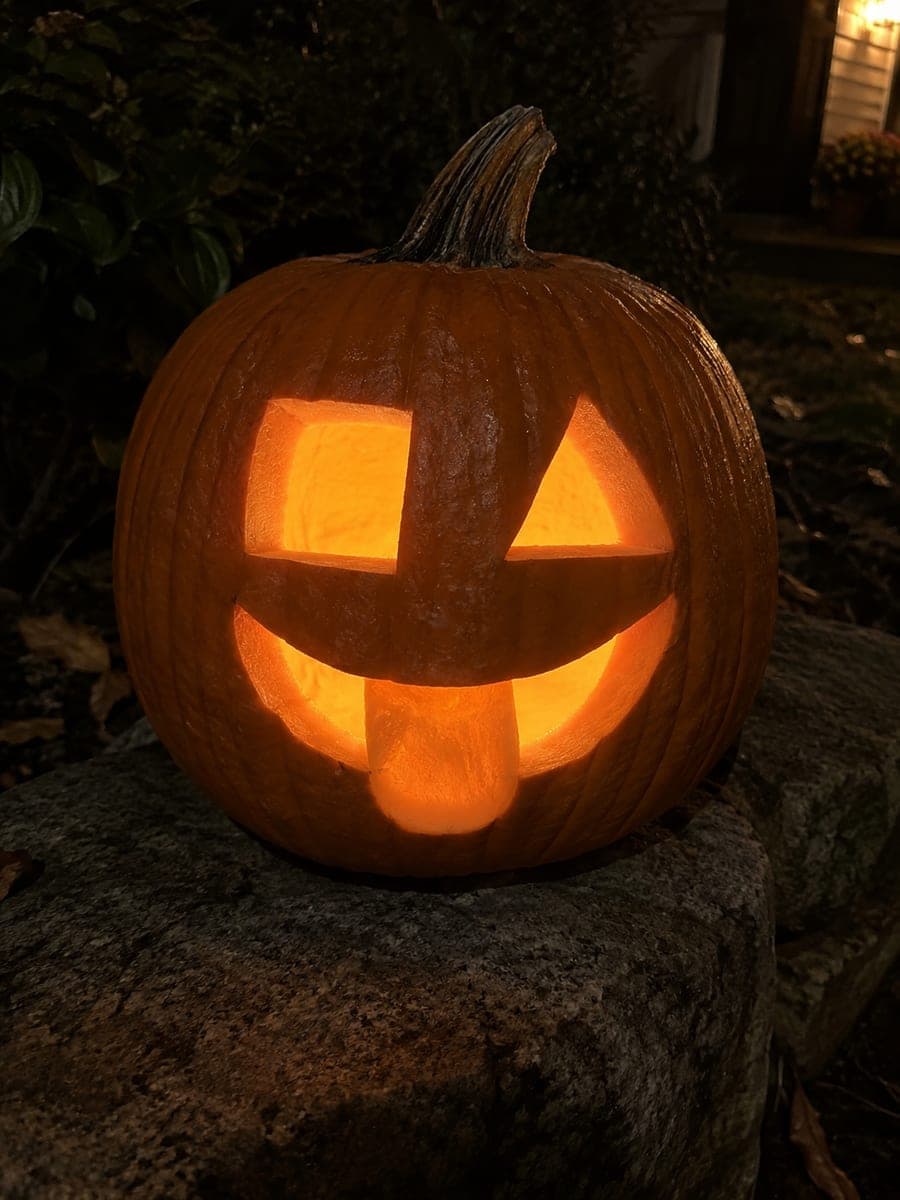
One large round eye, one small square eye, a triangular nose, and a crooked smile with a single huge upper-rooted buck tooth give this pumpkin a charmingly off-kilter personality that makes it a crowd-pleasing funny pumpkin face for beginners. Cut the mismatched eyes first to establish the lopsided vibe, then angle the smile slightly downward on one side. The buck tooth should be at least as wide as half the mouth opening so it holds without snapping. A single tea-light amplifies the asymmetry beautifully at night.

No ratings yet · Sign in to rate

Comments (0)

  • No comments yet — be the first.

Save without an account. Sign in to like or comment.

Our tips for carving a similar design

The lopsided humor here comes entirely from deliberate asymmetry: one large round eye, one small square eye, and a smile angled slightly downward on one side. Cut the mismatched eyes first to establish the personality of the face, then angle the mouth to echo the off-balance feeling before adding the wide buck tooth.

From pumpkin to porch

  1. Scoop and prep

    Cut a lid at an angle, remove it, and scoop out seeds and pulp until the wall is about an inch thick. Wipe the surface dry. Because this is an asymmetric design, it helps to mark the vertical center line with a pencil before sketching the face.

  2. Sketch the asymmetric face

    Draw one large circle for the dominant eye and one small square for the secondary eye, placing the square slightly lower and smaller. Sketch the triangular nose centered below, and the crooked smile angling downward to the same side as the smaller eye.

  3. Cut the mismatched eyes

    Saw the large round eye first, then cut the small square eye. For the square, score each corner deeply with a detail knife before sawing the sides, which prevents the corners from chipping. Push both plugs out from the inside.

  4. Cut the triangular nose

    Cut the small triangle with three straight cuts, entering and exiting through one corner to avoid an orphaned plug. Keep the triangle small so the nose reads as an afterthought, which adds to the goofy charm.

  5. Carve the crooked mouth with buck tooth

    Cut the full outer perimeter of the smile opening first, then carve the single buck tooth gap on either side, leaving the tooth broadly rooted at the top lip. The tooth should be at least half the width of the mouth opening to resist breaking. Angle the finished smile slightly downward on one side.

  6. Light and display

    Drop in a single tea-light and replace the lid. The asymmetric openings will glow at different intensities since the large eye lets in more light than the small square. That size contrast amplifies the lopsided personality beautifully at night.

Written with AI to match this design

Gather your supplies

Check things off as you get ready.

Work on a stable surface, keep your free hand out of the cutting path, and have an adult handle sharp tools.

Three levels of light

  • Leave intact

    All surrounding rind between and around the five openings stays solid and unlit

  • Peel & shade

    None, this is a cutout-only design

  • Cut through

    Large round eye, small square eye, triangular nose, mouth opening, and the two tooth-gap slots are all cut through

Learn the carving basics

Before you start cutting

How do I cut a clean square eye without chipping the corners?

Use a sharp detail knife to score each corner deeply before sawing the four sides. This pre-scores the rind fibers at the sharp corners, preventing the blade from tearing past the intended line. Work each side from corner to corner in one steady push.

How wide should the buck tooth be to avoid snapping?

The buck tooth should be at least half the total width of the mouth opening at its base where it joins the upper lip. Anything narrower and it becomes fragile the moment you handle the pumpkin. A wider tooth also reads more humorously from a distance.

Is this design stable enough to leave outside overnight?

Yes, the five openings are all generous and well-separated so the structural rind remains strong. Bring it inside if temperatures drop below freezing, and coat the cut edges with petroleum jelly to slow dehydration.

Your take belongs here, too.

Changed a detail? Made it simpler? Share a photo of your version and tell the community what worked.

Share your pumpkin

More pumpkins like this

You've reached the end · 8 pumpkins
The Patch Report

Fresh pumpkins, in your inbox.

The best new carvings, ideas worth stealing, and how-tos for carving season. Short, seasonal, and gone by November.

A short email during carving season. Unsubscribe anytime. See our privacy policy.