Halloween Pumpkin Carving Contest · Starts October 1st · $500 in prizes
← Back to ideas
@ai_concepts
Aug 30, 2026
Masked Ninja Eyes Pumpkin CarvingAI
0

Masked Ninja Eyes Pumpkin Carving

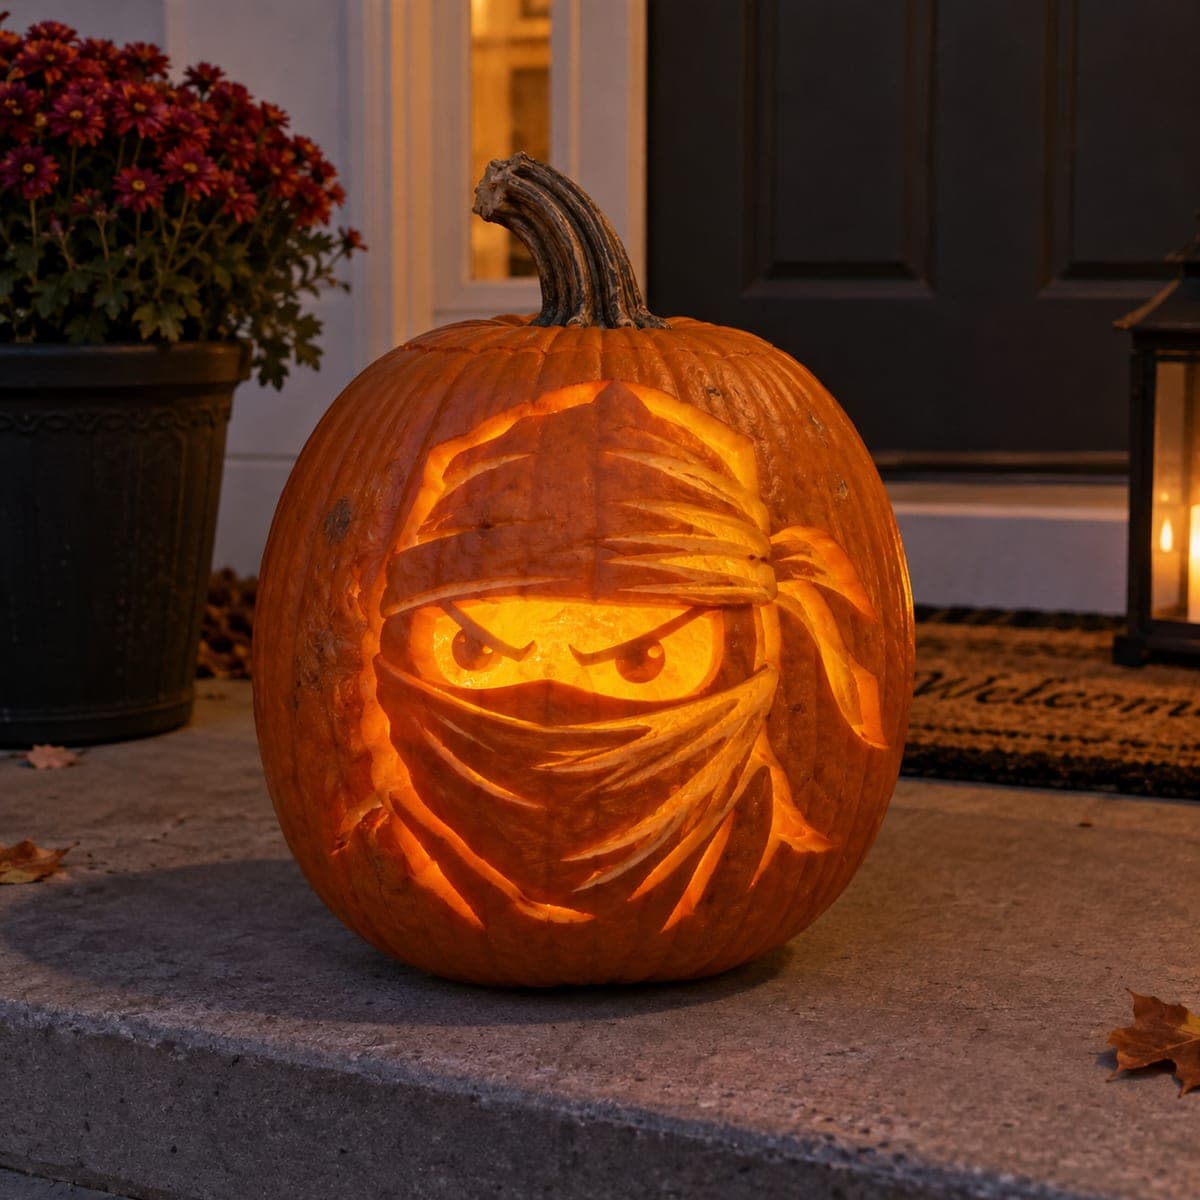
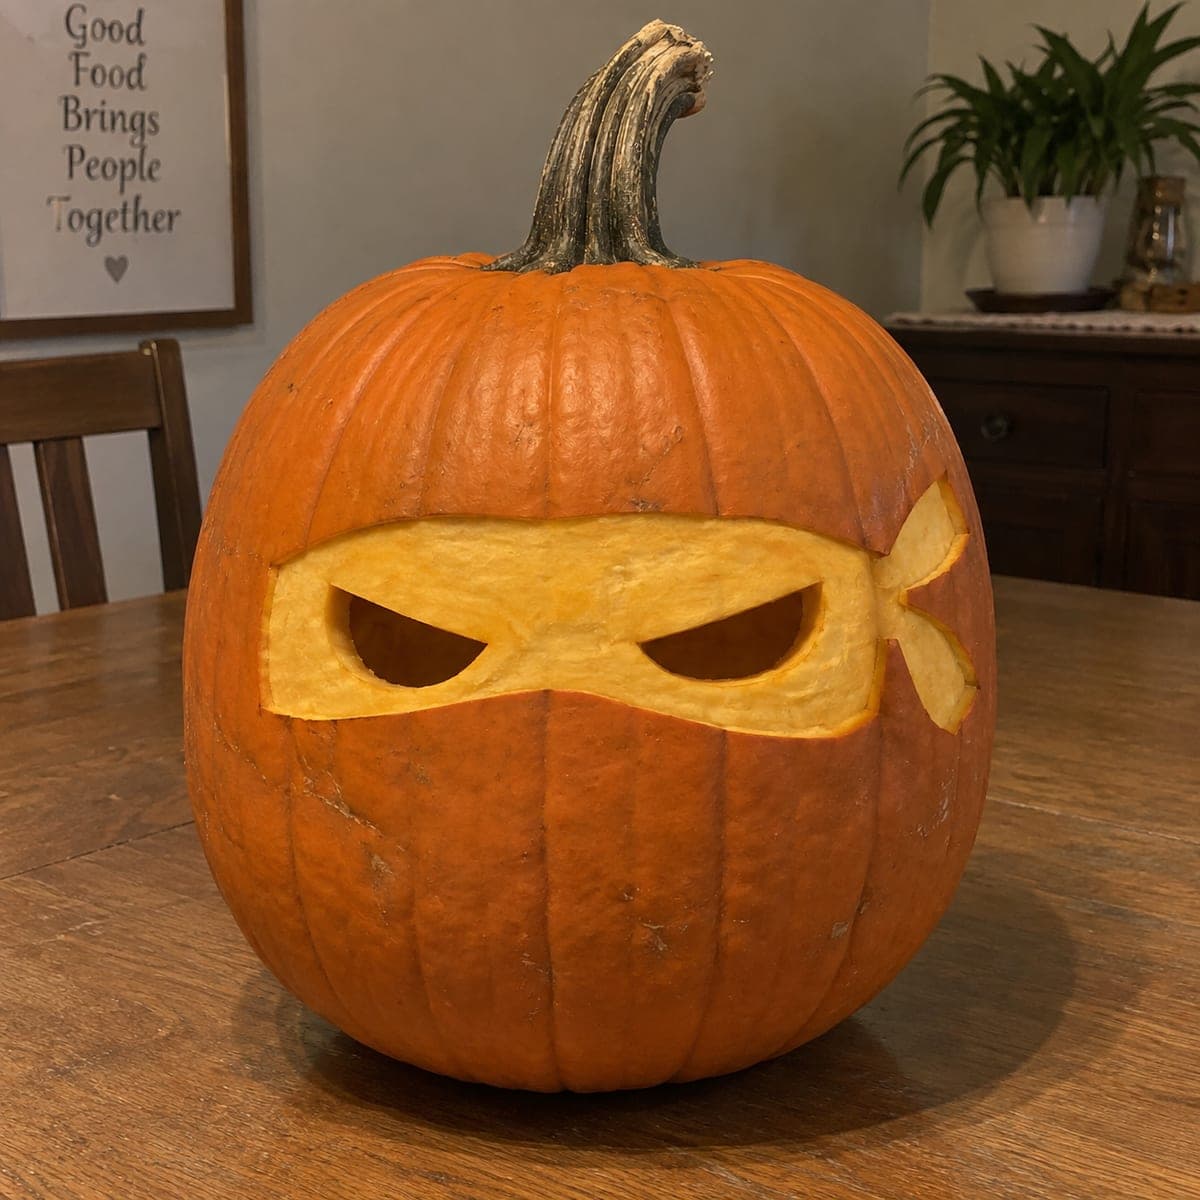
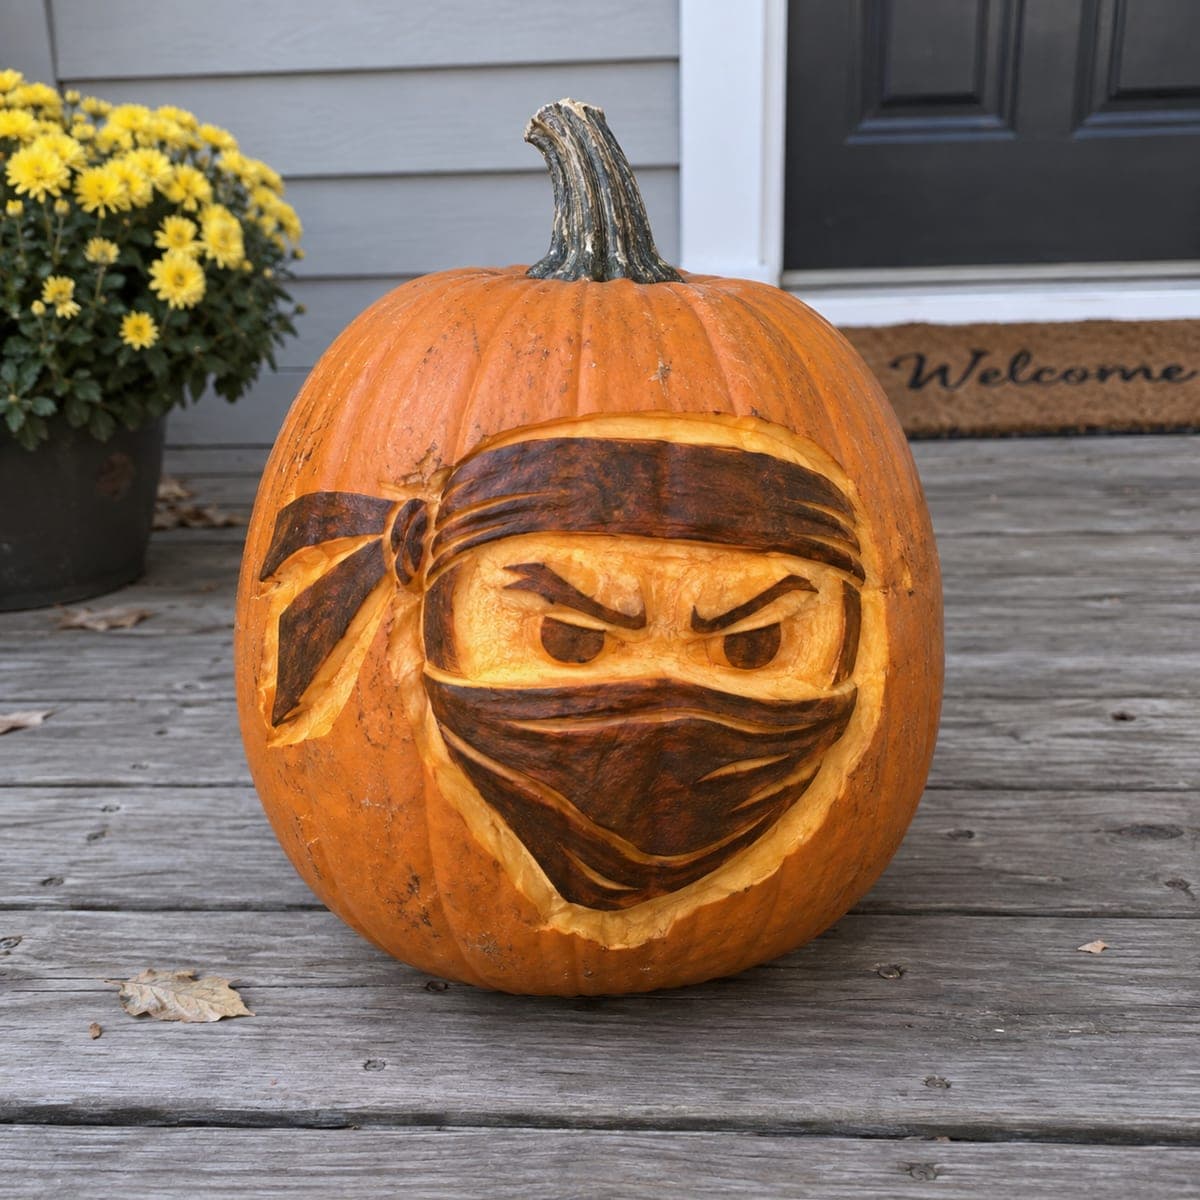
A ninja mask wraps around this pumpkin, with a peeled headband strip, angled cutout eyes, and a knotted tail trailing off to the side. It is a clever minimal design, two pierced eye shapes plus a shaved band, so a first-time carver can finish it in under an hour. Cut the narrow eye slits with a fine saw and angle the cuts outward so more light escapes. Line up three in different band colors of paint for a turtle-team porch display.

This is an AI-generated concept image: a realistic, carvable design idea rather than a photo of a finished carve. AI concepts are always labeled and sit out the leaderboard and the contest.

No ratings yet · Sign in to rate
Comments (0)

  • No comments yet — be the first.

Save without an account. Sign in to like or comment.

Our tips for carving a similar design

The whole illusion here rests on one trick: a wide horizontal band shaved down to the pale flesh so it reads as fabric, with only two angled eye slits pierced all the way through. Since this is a concept image, you would recreate the look by mapping the band across the pumpkin's widest curve, then keeping the eyes small and the headband knot as a shallow shaved shape rather than a fragile cutout. Plan the band first, shade it, then make the eyes your only real openings.

Written by PumpkinCarvingIdeas.com, inspired by the image above. These are our suggestions, not instructions from the uploader. This approach to the AI concept has not been tested on a real pumpkin.

From pumpkin to porch

  1. Pick and prep the pumpkin

    Choose a round, evenly shaped pumpkin so the headband band wraps cleanly across the widest part. Wipe the surface and cut a lid from the bottom or back, not the top, so the stem stays intact for that upright ninja look. Scrape the inside wall behind the eye area down to about one inch thick so it is easy to pierce later. Dry the inside with paper towel before you start marking.

  2. Map the headband band

    Draw a horizontal band straight across the middle of the face, tilting it very slightly for attitude. Keep the top and bottom edges of the band roughly parallel so it looks like wrapped cloth. Mark the two angled eye shapes inside the band, pointing the inner corners down toward the nose and the outer corners up. Sketch the small knotted tail and its two ribbon loops off to one side.

  3. Shade the band to the flesh

    Using a shaving or scraping tool, remove only the orange skin across the whole band, leaving the pale flesh exposed. Work in even, shallow passes so the band glows a uniform dim orange when lit. Do the same light shave on the knot and ribbon loops so they stand out against the dark skin. Take your time here since this shading is what sells the fabric look.

  4. Cut the eye slits

    With a fine detail saw, pierce the two eye shapes all the way through. Angle each cut outward, beveling the blade so the opening is wider on the inside than the outside, which lets more light escape and brightens the eyes. Keep the slits narrow and clean, and leave the small bridge of flesh between the inner corners intact so the band stays strong. Cut slowly and let the saw do the work.

  5. Add the knot detail

    For the knotted tail, keep it as shaded flesh with a few shallow scored lines rather than deep cuts, so the thin loops do not snap off. If you want a touch more glow, you can lightly thin the flesh behind the loops without piercing through. This keeps the fragile shapes attached and structurally safe. Step back and check the knot balances the eyes on the opposite side.

  6. Light it and photograph

    Drop in a battery LED puck, warm white or amber, and set it low so light rakes up through the eye slits. Test in a dark room and rotate the light until both eyes read evenly. Wipe the shaded band with a little petroleum jelly to slow drying and keep the pale color fresh. For a turtle-team porch, line up three and paint each headband a different color.

Gather your supplies

Check things off as you get ready.

Work on a stable surface, keep your free hand out of the cutting path, and have an adult handle sharp tools.

Three levels of light

  • Leave intact

    The full lower face, cheeks, and top of the pumpkin stay as untouched skin and read dark, framing the mask.

  • Peel & shade

    The wide headband strip and the knotted tail with its ribbon loops are shaved to flesh for a soft dim orange glow.

  • Cut through

    Only the two angled eye slits are pierced all the way through for the brightest light.

Learn the carving basics

Before you start cutting

How narrow can I make the eye slits and still get good light?

Keep them narrow but bevel the cut so the opening flares wider on the inside. That angled wall catches and throws more light without making the slits look big. A low LED sitting under the eyes will brighten them further, so you do not need to widen the cuts.

Will the knotted tail loops break off?

They can if you cut them all the way through, since thin loops are fragile. Keep the knot and ribbons as shaded flesh with light scoring instead of full cutouts. That gives you the shape safely and still catches a little glow if you thin the wall behind it.

How do I keep the headband band looking even?

Shave it in shallow, overlapping passes and aim for one consistent flesh depth across the whole strip. Uneven depth shows up as blotchy dark spots when it is lit. Check it under your LED before you finish, and touch up any patches that still look dark.

Your take belongs here, too.

Changed a detail? Made it simpler? Share a photo of your version and tell the community what worked.

Share your pumpkin

More pumpkins like this

You've reached the end · 8 pumpkins
The Patch Report

Fresh pumpkins, in your inbox.

The best new carvings, ideas worth stealing, and how-tos for carving season. Short, seasonal, and gone by November.

A short email during carving season. Unsubscribe anytime. See our privacy policy.