Halloween Pumpkin Carving Contest · Starts October 1st · $500 in prizes
← Back to ideas
@ai_concepts
Aug 8, 2026
Ninja Mask Pumpkin Carving With Fierce EyesAI
0

Ninja Mask Pumpkin Carving With Fierce Eyes

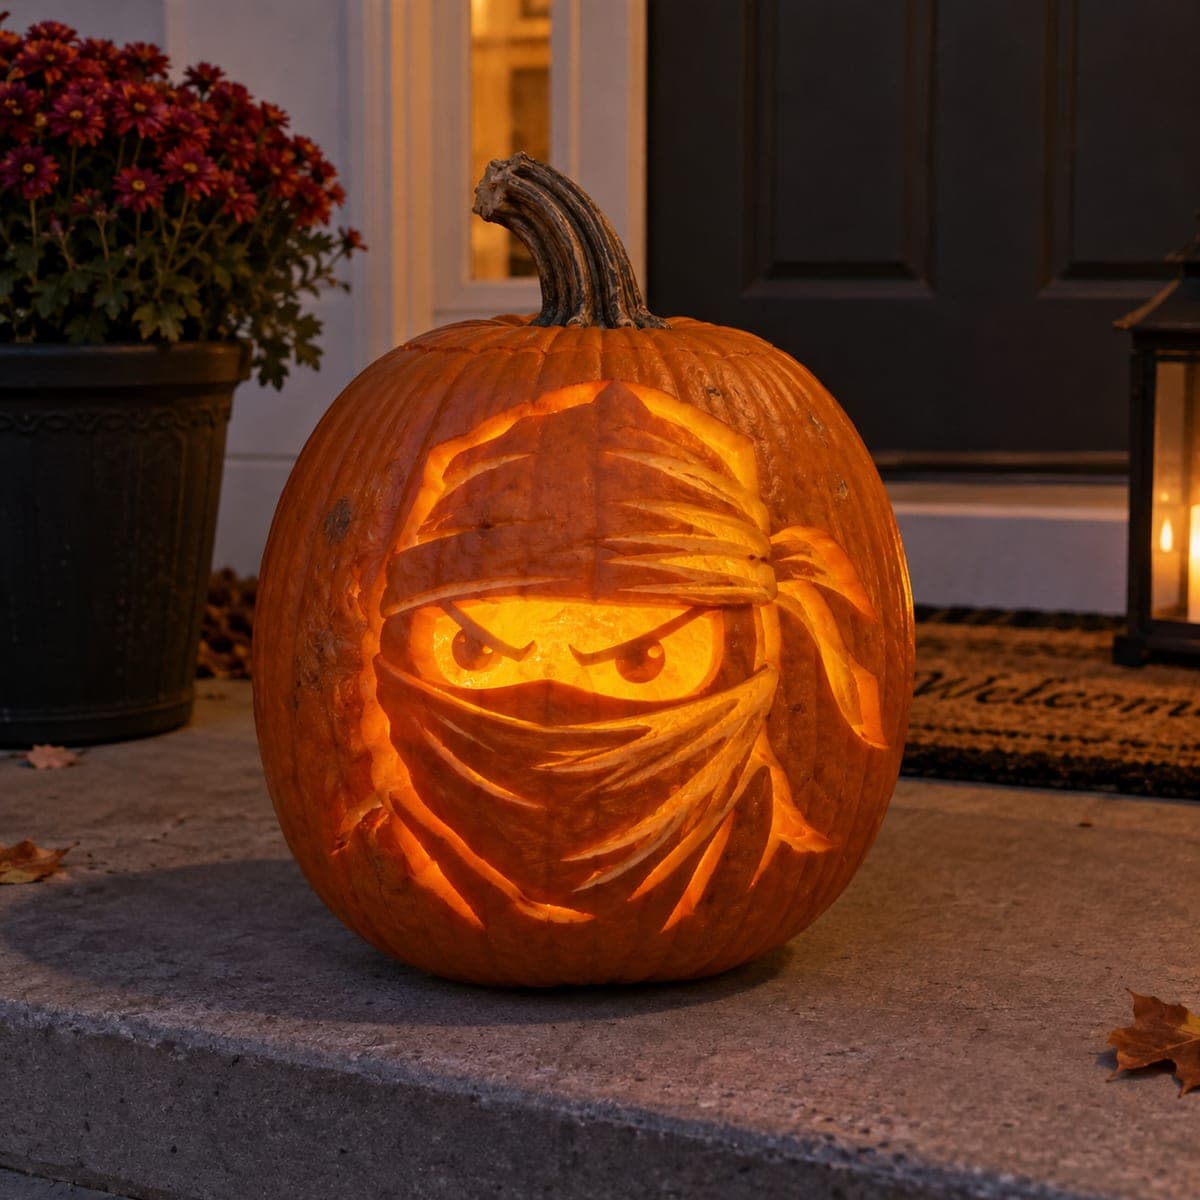
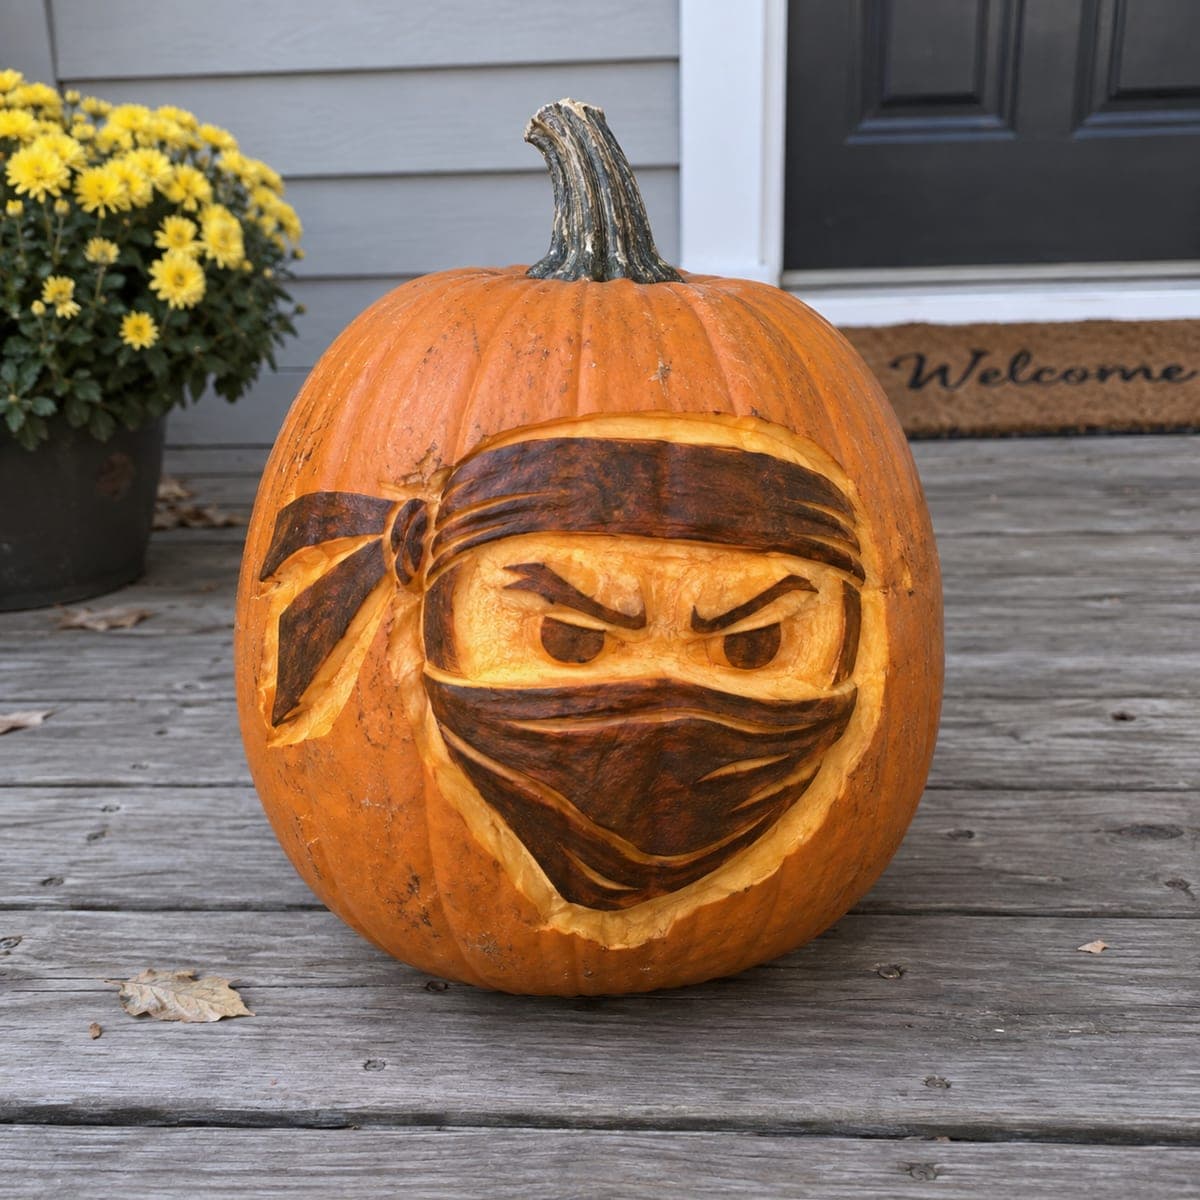
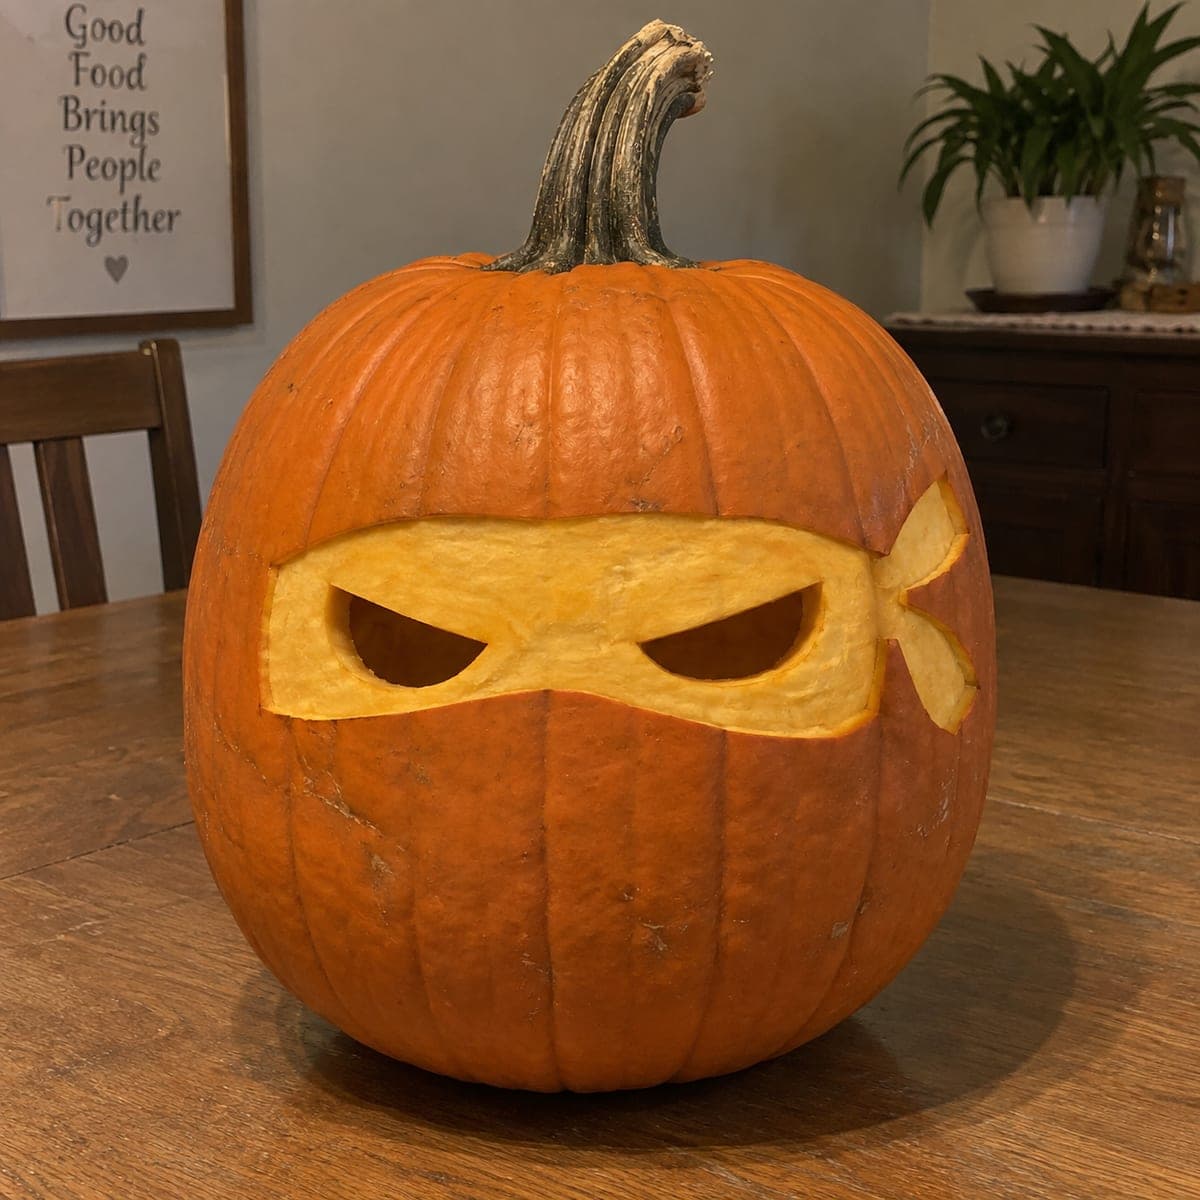
A masked ninja glares from this pumpkin, its headband, knotted tails, and face wrap carved in relief and darkened so the fierce eyes pop from the pale carved skin. The two-tone look comes from staining the peeled areas of the mask with strong tea or diluted brown acrylic after carving. Kids who love ninja cartoons will claim this one instantly. Carve the eye whites deepest so they catch the most light at dusk.

This is an AI-generated concept image: a realistic, carvable design idea rather than a photo of a finished carve. AI concepts are always labeled and sit out the leaderboard and the contest.

No ratings yet · Sign in to rate
Comments (0)

  • No comments yet — be the first.

Save without an account. Sign in to like or comment.

Our tips for carving a similar design

The core trick here is a two-tone relief look, where the headband, knotted tails, and face wrap are peeled and darkened while the eyes stay pale and cut deep to catch light. You keep most of the pumpkin skin intact and only cut fully through the narrow eye slits, so the design reads as a shaded portrait rather than a see-through lantern. A light stain from strong tea or diluted brown acrylic gives the mask its shadowed depth.

Written by PumpkinCarvingIdeas.com, inspired by the image above. These are our suggestions, not instructions from the uploader. This approach to the AI concept has not been tested on a real pumpkin.

From pumpkin to porch

  1. Prep and transfer the design

    Pick a large, smooth pumpkin with a flat-ish face and wipe it clean. Cut a lid or, better, a wide access hole in the back so the front stays uninterrupted. Scrape the inner wall behind the face down to about one inch thick with a scoop so peeled areas glow evenly. Tape your ninja stencil over the face and poke through the outlines with a pin or transfer tool.

  2. Outline the mask shapes

    Using a small detail saw or a sharp craft knife, score along the outer edges of the headband, the two knotted tails on the left, and the face wrap. Do not cut through the pumpkin here, just make shallow guide lines. Keep the narrow bridges between the headband, tails, and wrap intact so nothing sags. Work slowly around the tight curves of the knot.

  3. Peel the fabric areas for shading

    Switch to a ribbon or gouge tool and shave the skin off the headband, tails, and mask, leaving the pale flesh exposed. Vary the depth slightly to suggest folds in the cloth, going a touch deeper along fold lines. Leave the eyes and the strip of skin around the whole design untouched for now. Take your time, thin passes give you more control than deep gouges.

  4. Carve the fierce eyes

    The angry eyebrows and the strip between the brows and mask stay dark, so leave that skin in place. Peel the eye whites down deepest of all so they read brightest, then cut fully through only the thin eye slits and pupils for sharp points of light. Keep a slim bridge of flesh at the inner brow so the two eyes stay separated and structurally sound. Cut these full openings last, after all the shading is done.

  5. Stain the mask for the two-tone look

    Once carving is finished, brush strong cooled tea or brown acrylic thinned with water onto the peeled headband, tails, and face wrap. Let it soak into the porous flesh and wipe back the highlights with a paper towel for a worn cloth effect. Keep the stain off the pale eye whites so they stay light. Let it dry fully before lighting.

  6. Light it and photograph

    Drop a battery LED puck or string inside, never a candle, since the thin eye cuts and stained flesh do best with cool light. Set it on a porch step at dusk so the deep eye whites and cut slits glow strongest against the dark mask. Snap your photo while there is still a little blue in the sky for the best contrast. Refrigerate it overnight between showings to slow shrinking.

Gather your supplies

Check things off as you get ready.

Work on a stable surface, keep your free hand out of the cutting path, and have an adult handle sharp tools.

Three levels of light

  • Leave intact

    The angry eyebrows and the dark strip framing the eyes stay full skin so they read almost black.

  • Peel & shade

    The headband, knotted tails, and face wrap are peeled and stained for a dim, cloth-like glow.

  • Cut through

    Only the narrow eye slits and pupils are cut through for the sharpest bright points.

Learn the carving basics

Before you start cutting

How do I keep the headband knot from falling apart?

The knot and its two tails are held on by thin bridges of skin, so score their outlines shallow first and never cut fully through them. Only the eye slits get cut all the way. If a spot feels weak, leave a little extra flesh there rather than thinning it to nothing.

What if I do not want to stain the mask?

You can skip the stain and still get contrast by peeling the mask areas deeper, which naturally reads darker in shadow than the untouched skin. The tea or acrylic just deepens the effect and makes the pale eyes pop harder. Test any stain on the back of the pumpkin first to check the shade.

How deep should the eye whites be?

Peel the eye whites deepest of everything so the wall there is thinnest and glows brightest. Then cut fully through only the slim slits and pupils for crisp light. Keeping the whites thin but not open gives you that fierce, focused stare at dusk.

Your take belongs here, too.

Changed a detail? Made it simpler? Share a photo of your version and tell the community what worked.

Share your pumpkin

More pumpkins like this

You've reached the end · 8 pumpkins
The Patch Report

Fresh pumpkins, in your inbox.

The best new carvings, ideas worth stealing, and how-tos for carving season. Short, seasonal, and gone by November.

A short email during carving season. Unsubscribe anytime. See our privacy policy.