Halloween Pumpkin Carving Contest · Starts October 1st · $500 in prizes
← Back to ideas
@ai_concepts
Jul 27, 2026
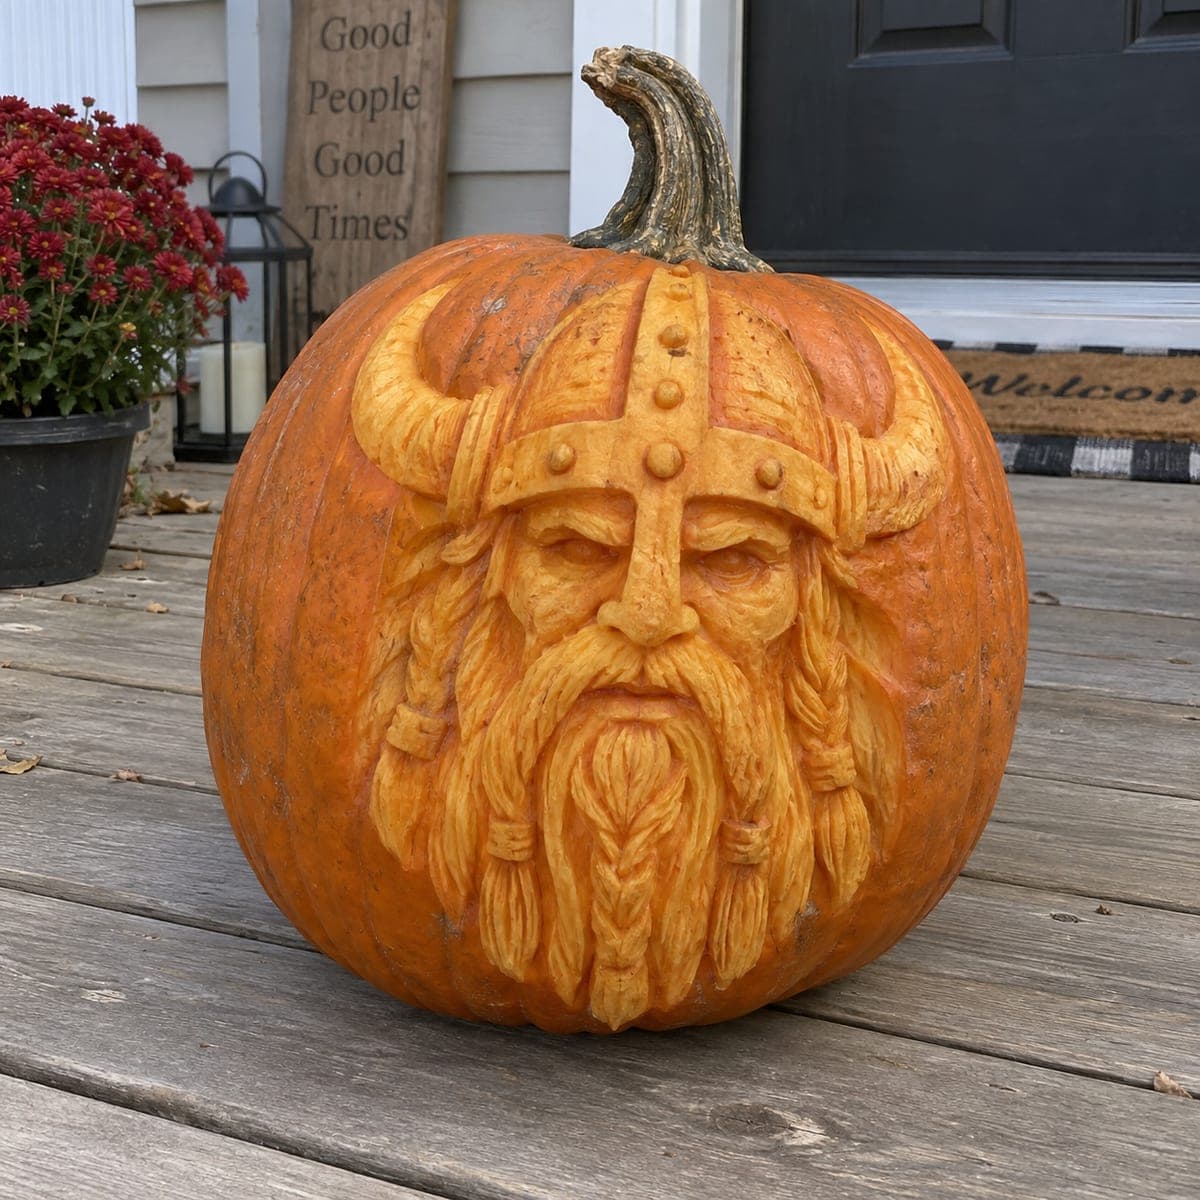
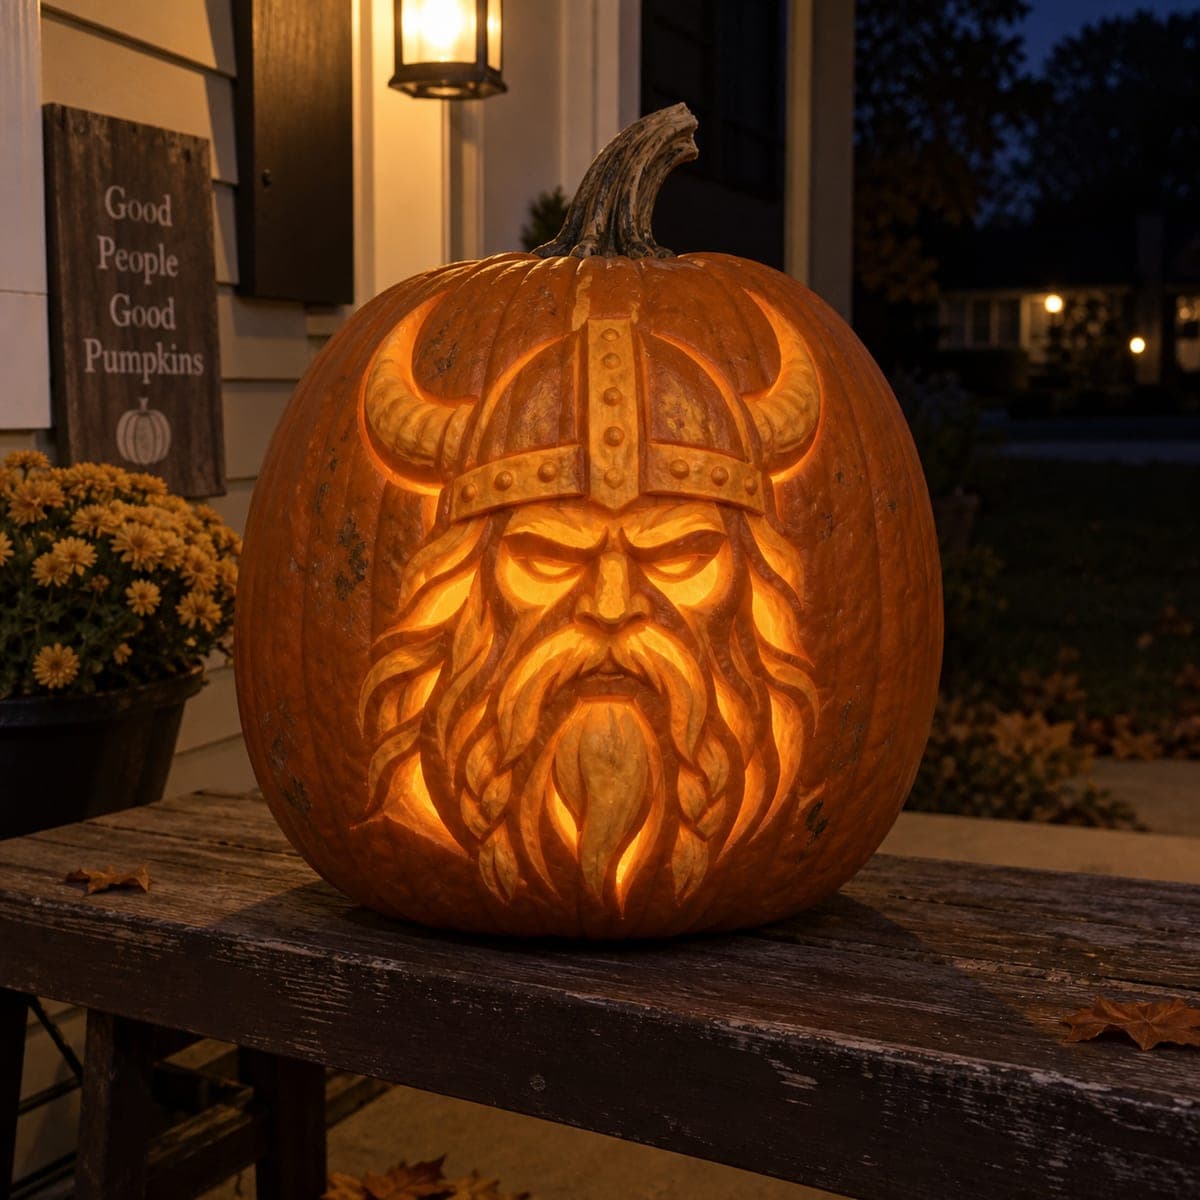
Viking Warrior Shaded Relief Carved PumpkinAI
0

Viking Warrior Shaded Relief Carved Pumpkin

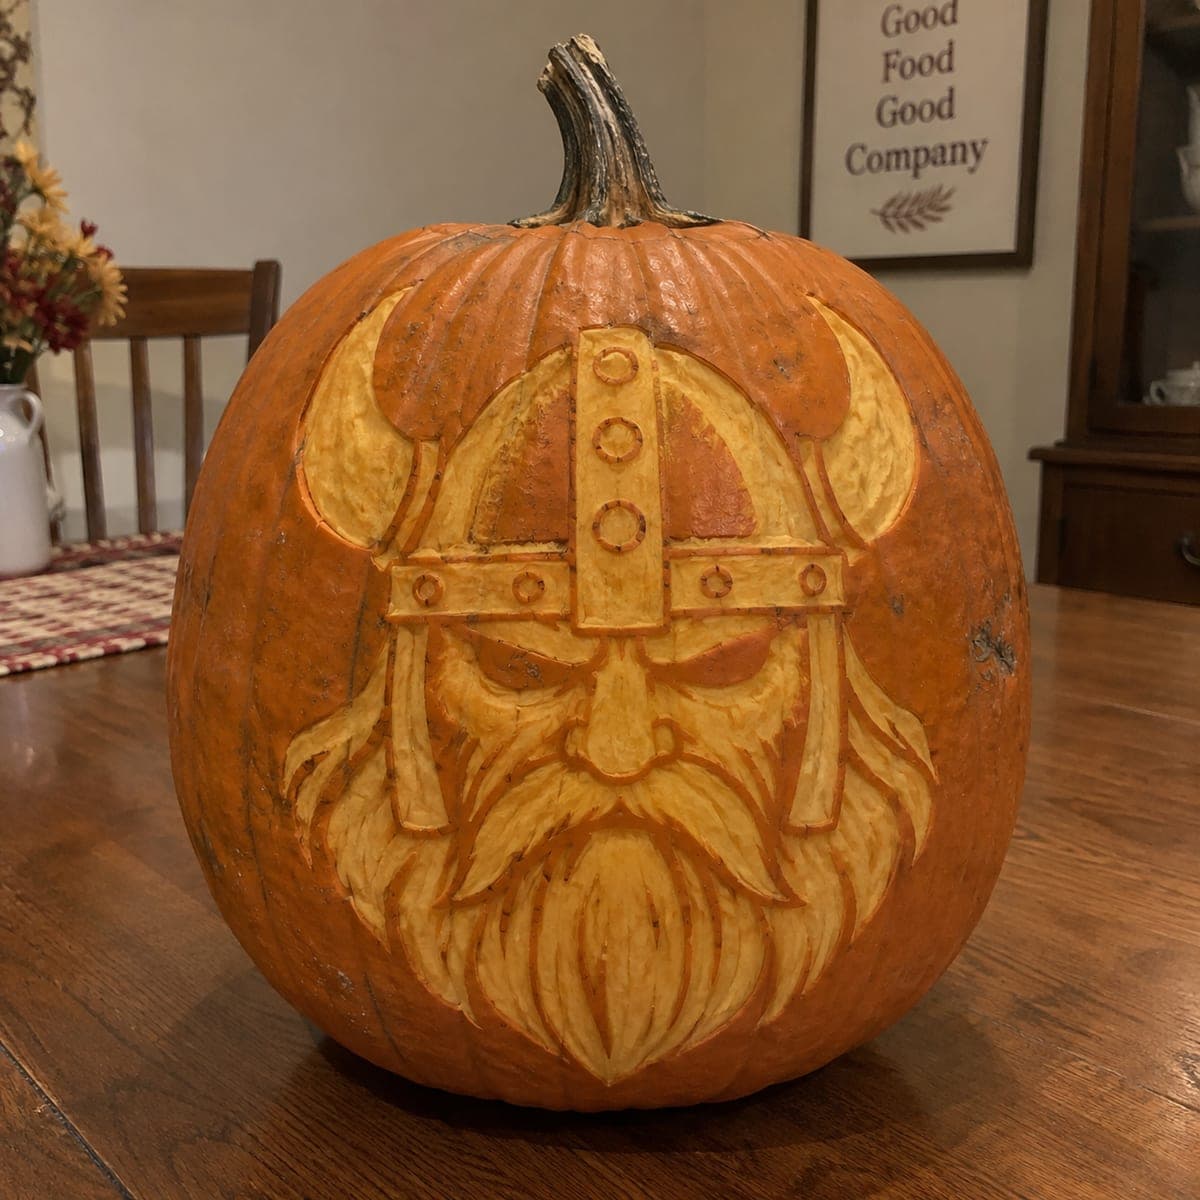
A fierce Viking warrior wearing a horned helmet and full beard is carved in bold shaded relief on a pumpkin, the helmet rivets and face details etched at multiple depths to create depth and drama. The design is clearly readable from a few feet away, making it a strong indoor centerpiece. Carve the helmet outlines first using deeper cuts, then shade the beard and face with lighter, directional strokes. A distinctive Viking pumpkin carving idea that suits any history buff or Norse mythology fan.

This is an AI-generated concept image: a realistic, carvable design idea rather than a photo of a finished carve. AI concepts are always labeled and sit out the leaderboard and the contest.

No ratings yet · Sign in to rate
Comments (0)

  • No comments yet — be the first.

Save without an account. Sign in to like or comment.

Our tips for carving a similar design

The core trick here is shaded relief carving, where you scrape the pumpkin skin to different depths so the light reads as a whole portrait instead of a few open holes. You keep the outer skin dark for outlines, peel broad areas to a dim glow for the beard and face, and reserve any true cutouts for tiny accent spots. Plan the helmet first with your deepest, cleanest lines, then work down into the softer directional shading of the beard.

Written by PumpkinCarvingIdeas.com, inspired by the image above. These are our suggestions, not instructions from the uploader. This approach to the AI concept has not been tested on a real pumpkin.

From pumpkin to porch

  1. Transfer the warrior and plan your depths

    Since this is an AI concept, no real pumpkin exists, so start by picking a large, smooth, evenly round pumpkin that gives you a flat working face. Tape your stencil on and poke through the outlines with a pin or transfer tool, marking the helmet band, horns, eyes, and the flow lines of the beard. Before cutting, decide which zones stay as dark skin, which get peeled to a glow, and which few spots go all the way through. A quick pencil shading map on paper keeps you from over cutting later.

  2. Cut the helmet outlines with deeper strokes

    Use a small detail saw or a sharp loop tool to define the helmet band, the vertical nose guard, and the horn edges first. Keep these lines crisp and slightly deeper than the rest so the helmet frames the face with strong contrast. Do not carve all the way through here, just cut a firm channel that catches shadow. Leave the raised metal of the helmet as thicker material so it stays sturdy.

  3. Peel the broad face and beard fields

    With a ribbon or loop tool, scrape away the outer skin across the cheeks, forehead, and the bulk of the beard to expose the lighter flesh beneath. Work in long, directional strokes that follow the flow of the beard and mustache so the grain of your scraping reads as hair. Vary your pressure to leave some areas thicker and darker, which builds the mid tones. Keep the eyes and brow ridge slightly higher so the glare stands out.

  4. Add the fine hair and rivet detail

    Switch to a fine detail tool to etch the individual strands in the beard, the eyebrow hairs, and the braided side pieces. Carve the small helmet rivet circles as shallow rings rather than punching holes, so they hold their shape. Deepen the lines between beard locks to separate them and give the face its dramatic depth. Take breaks to step back a few feet and check that the portrait still reads clearly.

  5. Make the few true cutouts last

    If you want any bright spark, cut fully through only the smallest accents, such as a thin gap under the helmet brim or a couple of rivet centers. Do this last, once the surrounding relief is finished, so the wall stays strong while you work. Support the skin with a fingertip nearby as you push through to avoid cracking a bridge. Keep these openings tiny so the shaded relief remains the star.

  6. Light it and photograph

    Drop a battery LED puck inside rather than a candle, since the glow needs to leak evenly through the peeled areas without a hot flickering point. Warm white light suits the amber tones of the beard and face best. Set the pumpkin on a dark table indoors, dim the room, and shoot slightly off to one side to catch the shadow in the helmet lines. Scoop and dry the inside well beforehand so moisture does not fog your lens or soften the relief.

Gather your supplies

Check things off as you get ready.

Work on a stable surface, keep your free hand out of the cutting path, and have an adult handle sharp tools.

Three levels of light

  • Leave intact

    The helmet band, nose guard, horn edges, and outline shadows stay as untouched dark skin.

  • Peel & shade

    The cheeks, forehead, and the full sweep of the beard and mustache get peeled to a soft orange glow.

  • Cut through

    Only tiny accents, like a couple of rivet centers or a thin gap under the brim, go fully through for the brightest sparks.

Learn the carving basics

Before you start cutting

Do I need to cut all the way through for this to glow?

No, this design lives on shaded relief, not open holes. Most of the light comes from peeling the skin to different depths so the flesh glows dimly. A strong interior LED makes those peeled zones read clearly even with only a few true cutouts.

How do I keep the beard from looking like a blob?

Carve it in long directional strokes that follow the natural flow of each lock, and deepen the lines between locks so they separate. Vary your scraping pressure to leave darker and lighter bands. Stepping back a few feet often is the best way to catch areas that have merged together.

The horns and helmet edges feel fragile, how do I protect them?

Keep them as raised, thicker material rather than thin cutout shapes. Since they are defined by deeper channel cuts and not open gaps, they stay structurally sound. Save any true openings for last so the surrounding wall supports your tools while you work.

Your take belongs here, too.

Changed a detail? Made it simpler? Share a photo of your version and tell the community what worked.

Share your pumpkin

More pumpkins like this

You've reached the end · 8 pumpkins
The Patch Report

Fresh pumpkins, in your inbox.

The best new carvings, ideas worth stealing, and how-tos for carving season. Short, seasonal, and gone by November.

A short email during carving season. Unsubscribe anytime. See our privacy policy.