Halloween Pumpkin Carving Contest · Starts October 1st · $500 in prizes
← Back to ideas
@ai_concepts
Aug 8, 2026
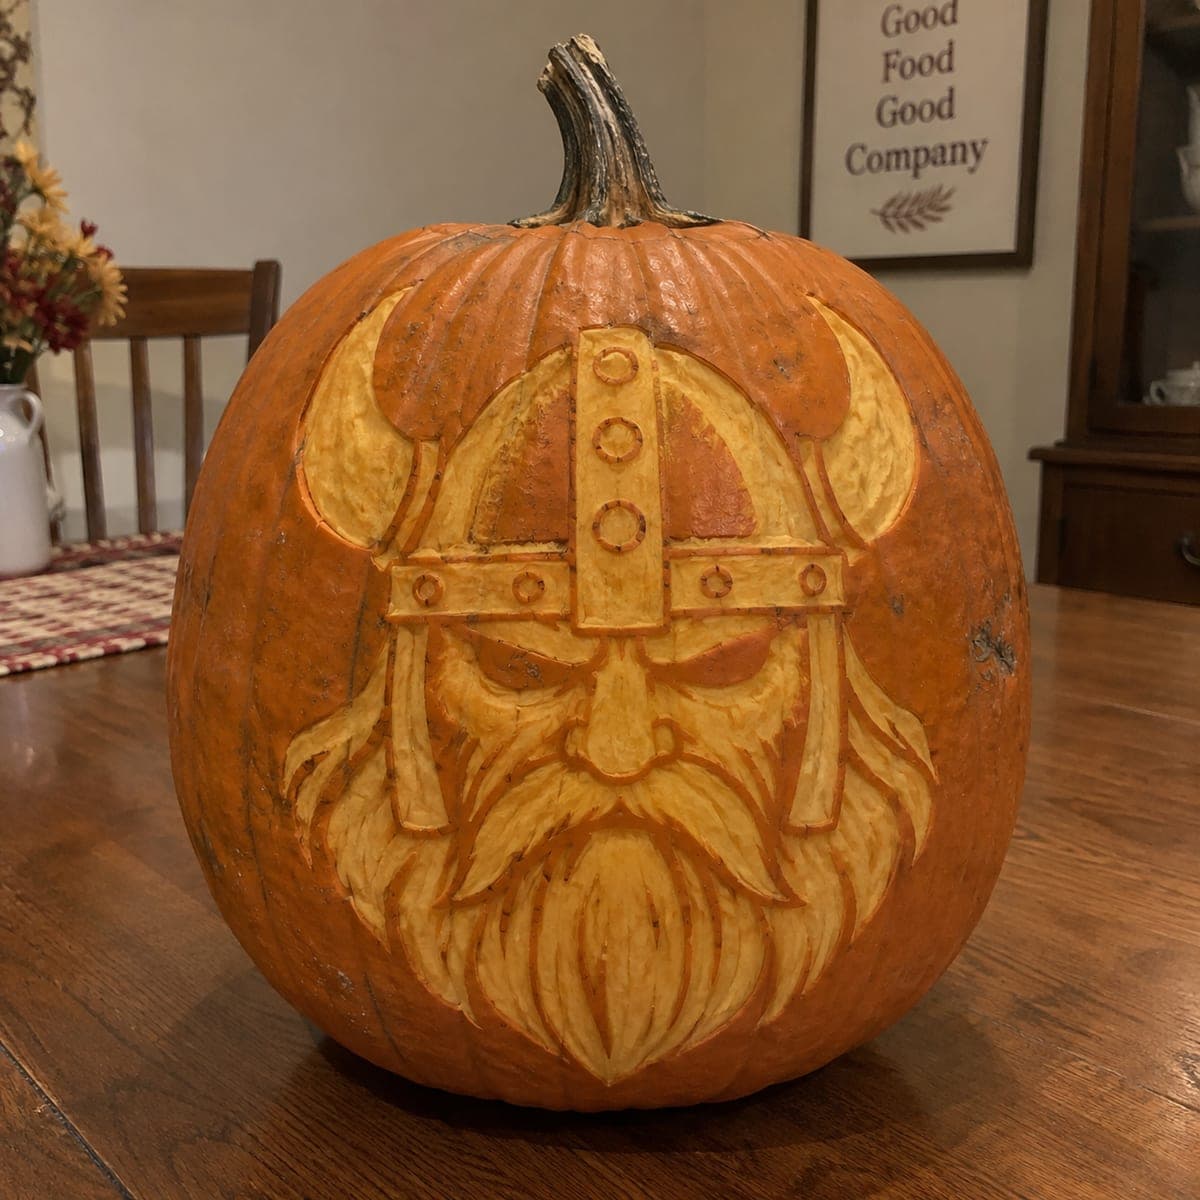
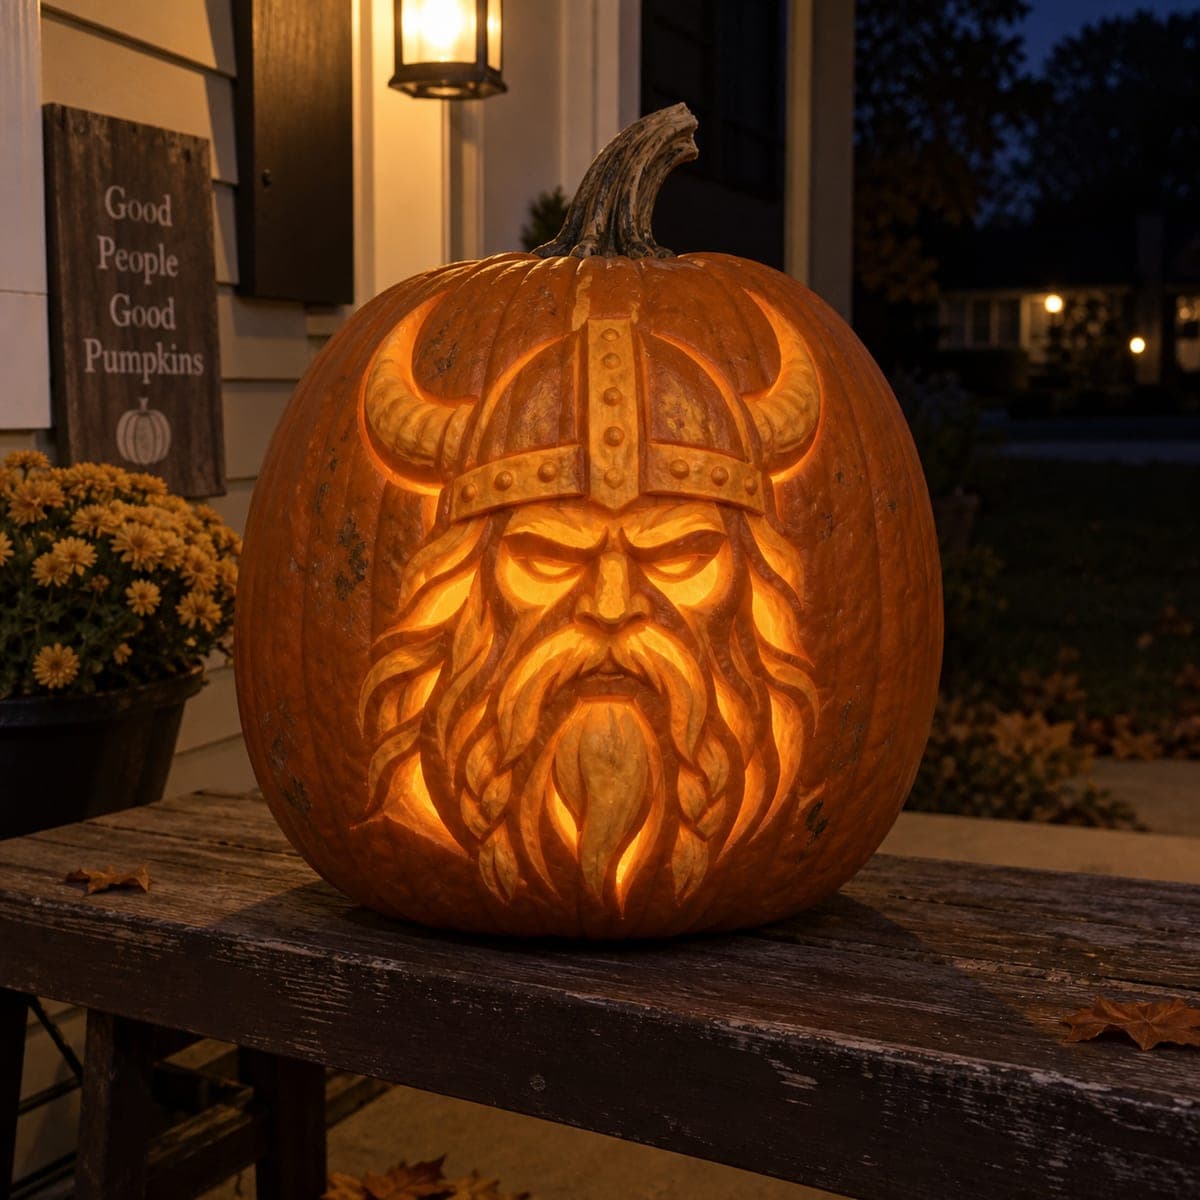
Bearded Viking Warrior Face Carved PumpkinAI
0

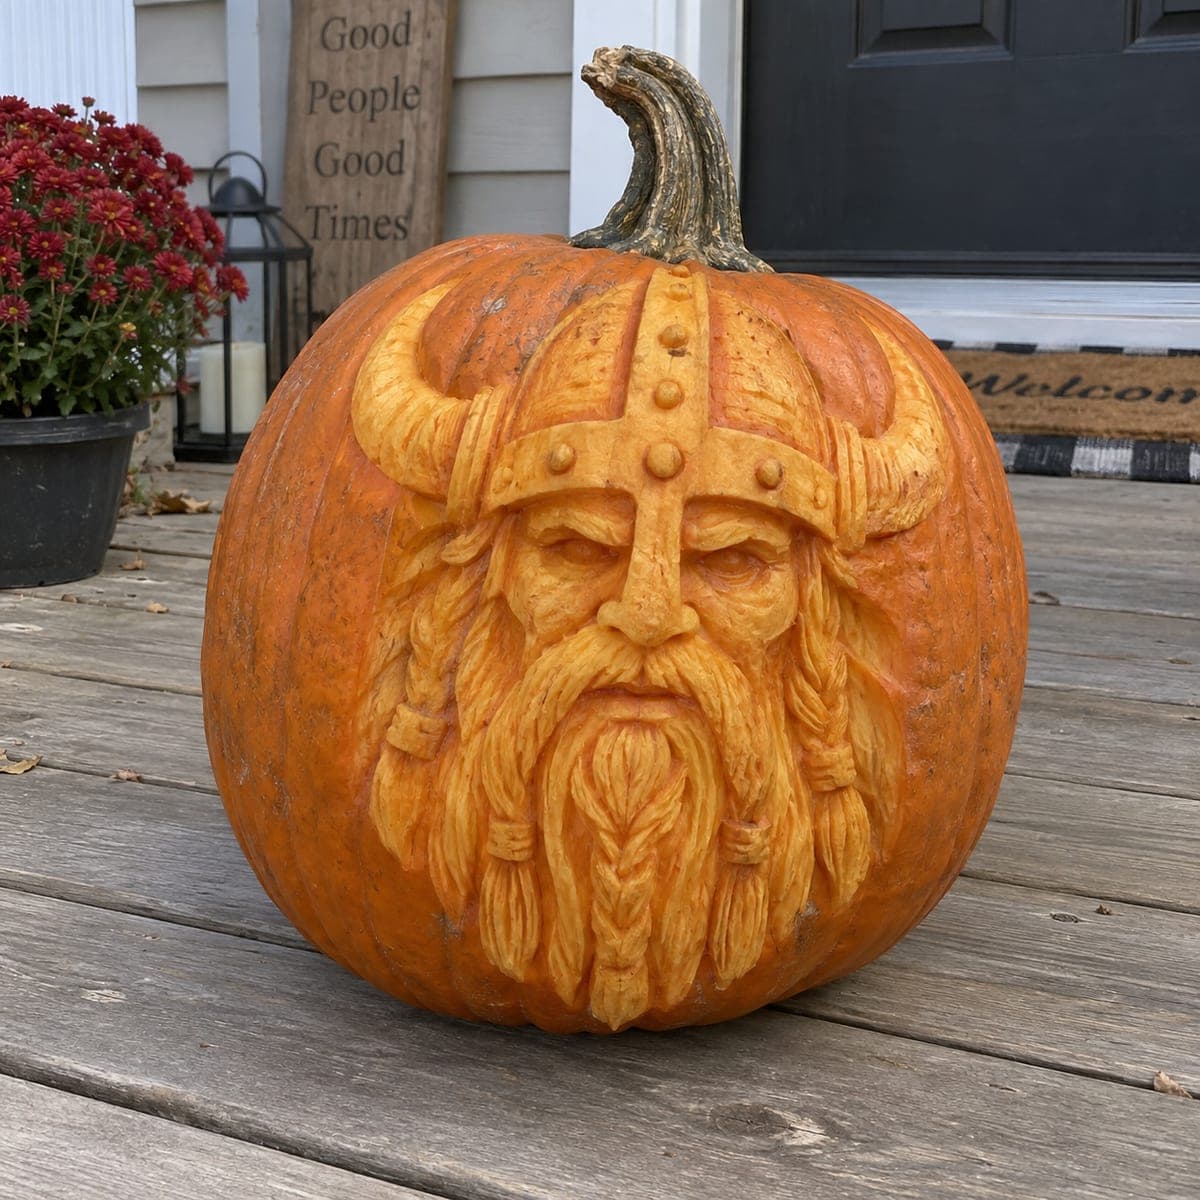
Bearded Viking Warrior Face Carved Pumpkin

A stern Viking stares out from this pumpkin under a riveted horned helmet, his braided beard and mustache sculpted in deep three-dimensional relief. The entire face is carved from the surface, so it displays in full daylight with no interior light needed. Block out the helmet and brow first to anchor the proportions, then work the beard in long scooping strokes, and mist it with water to keep detail crisp.

This is an AI-generated concept image: a realistic, carvable design idea rather than a photo of a finished carve. AI concepts are always labeled and sit out the leaderboard and the contest.

No ratings yet · Sign in to rate
Comments (0)

  • No comments yet — be the first.

Save without an account. Sign in to like or comment.

Our tips for carving a similar design

This is a full relief sculpture, so almost nothing gets cut all the way through. The whole face is shaped by removing skin at different depths to catch daylight, with the helmet, brow, and braided beard built up in layered relief. Plan it as a carving that reads by shadow rather than by an inner light.

Written by PumpkinCarvingIdeas.com, inspired by the image above. These are our suggestions, not instructions from the uploader. This approach to the AI concept has not been tested on a real pumpkin.

From pumpkin to porch

  1. Pick a big, thick-walled pumpkin and prep it

    Since this design lives entirely in the flesh, choose a large pumpkin with a smooth, deep front face and a wall at least an inch and a half thick. There is no need to gut it fully, but do scrape out a small access door in the back if you want to insert an LED for a faint evening glow. Wipe the front clean and let it dry. Have an adult handle all the sharp cutting.

  2. Transfer and block out the helmet and brow

    Tape your Viking pattern to the front and poke or trace the main outlines: the horned helmet rim, the nose guard, and the heavy brow. Use a small loop tool to shave a shallow trench around the helmet so it stands proud of the face. Blocking these anchor shapes first locks in your proportions before you commit to detail. Keep the horns connected to the pumpkin skin at their base so they stay strong.

  3. Rough the face planes

    Scoop away skin to sink the eye sockets, cheeks, and the sides of the nose. Work in broad passes and step back often to check that the face reads from a few feet away. Leave the nose, cheekbones, and brow ridge higher than the surrounding flesh so light rakes across them. Save the finest detail for later so you do not undercut yourself early.

  4. Sculpt the braided beard and mustache

    Switch to long scooping strokes to carve the flowing mustache and the two side braids. Cut deep channels between locks of hair, then round each strand so it looks three dimensional. Add the woven crossover marks on the braids and the small bands near the ends. Mist the surface with water as you go to keep the thin ridges from drying and crumbling.

  5. Add helmet rivets and shading depth

    Carve the raised dome rivets and the band studs by cutting small circles and shaving the flesh around them down. Deepen the shadows in the eye sockets and under the mustache for contrast. If you want subtle glow, peel a thin layer of skin off the recessed areas only. Clean stray shavings out of every groove with a dry brush.

  6. Seal, light lightly, and photograph

    Coat all cut surfaces with a thin layer of petroleum jelly or a spray of lemon water to slow browning. Because this piece shows in full daylight, set it on the porch where side light shows off the relief. If you added a back door, drop in a warm LED for a faint evening effect, never a candle. Snap your photo within a day or two while the detail is crisp.

Gather your supplies

Check things off as you get ready.

Work on a stable surface, keep your free hand out of the cutting path, and have an adult handle sharp tools.

Three levels of light

  • Leave intact

    The high, untouched planes of the nose, cheekbones, brow ridge, and horn tips stay dark and give the face its solid form.

  • Peel & shade

    Thin-peeled recesses in the beard channels and helmet band glow a soft orange if you add an interior LED.

  • Cut through

    Keep true cutouts minimal, limited to a small hidden back access door, so the relief stays strong.

Learn the carving basics

Before you start cutting

Do I need to hollow it out and add a light?

Not for the main effect. This Viking is a surface sculpture that reads by shadow in daylight, so you can leave the interior mostly intact. If you want a faint evening glow, cut a small door in the back and set in an LED, but that is optional.

How do I keep the horns and braid tips from breaking off?

Keep them attached to the pumpkin surface rather than carving them free. The horns should sweep out but stay rooted to the flesh at their base, and the braids should sit against the pumpkin as relief. This is a concept image, so aim for shapes that a real thick wall can actually support.

My beard detail keeps drying and crumbling. What helps?

Mist the carved area with water every few minutes to keep the exposed flesh from shrinking. Work the deepest beard channels last so freshly cut ridges stay firm. When finished, seal all cuts with petroleum jelly to slow drying overnight.

Your take belongs here, too.

Changed a detail? Made it simpler? Share a photo of your version and tell the community what worked.

Share your pumpkin

More pumpkins like this

You've reached the end · 8 pumpkins
The Patch Report

Fresh pumpkins, in your inbox.

The best new carvings, ideas worth stealing, and how-tos for carving season. Short, seasonal, and gone by November.

A short email during carving season. Unsubscribe anytime. See our privacy policy.