Halloween Pumpkin Carving Contest · Starts October 1st · $500 in prizes
← Back to ideas
@ai_concepts
Sep 25, 2026
Hard 3D Monster Face Pumpkin with Recessed CheeksAI
0

Report this carving

Tell us what is wrong. Reports are private.

Hard 3D Monster Face Pumpkin with Recessed Cheeks

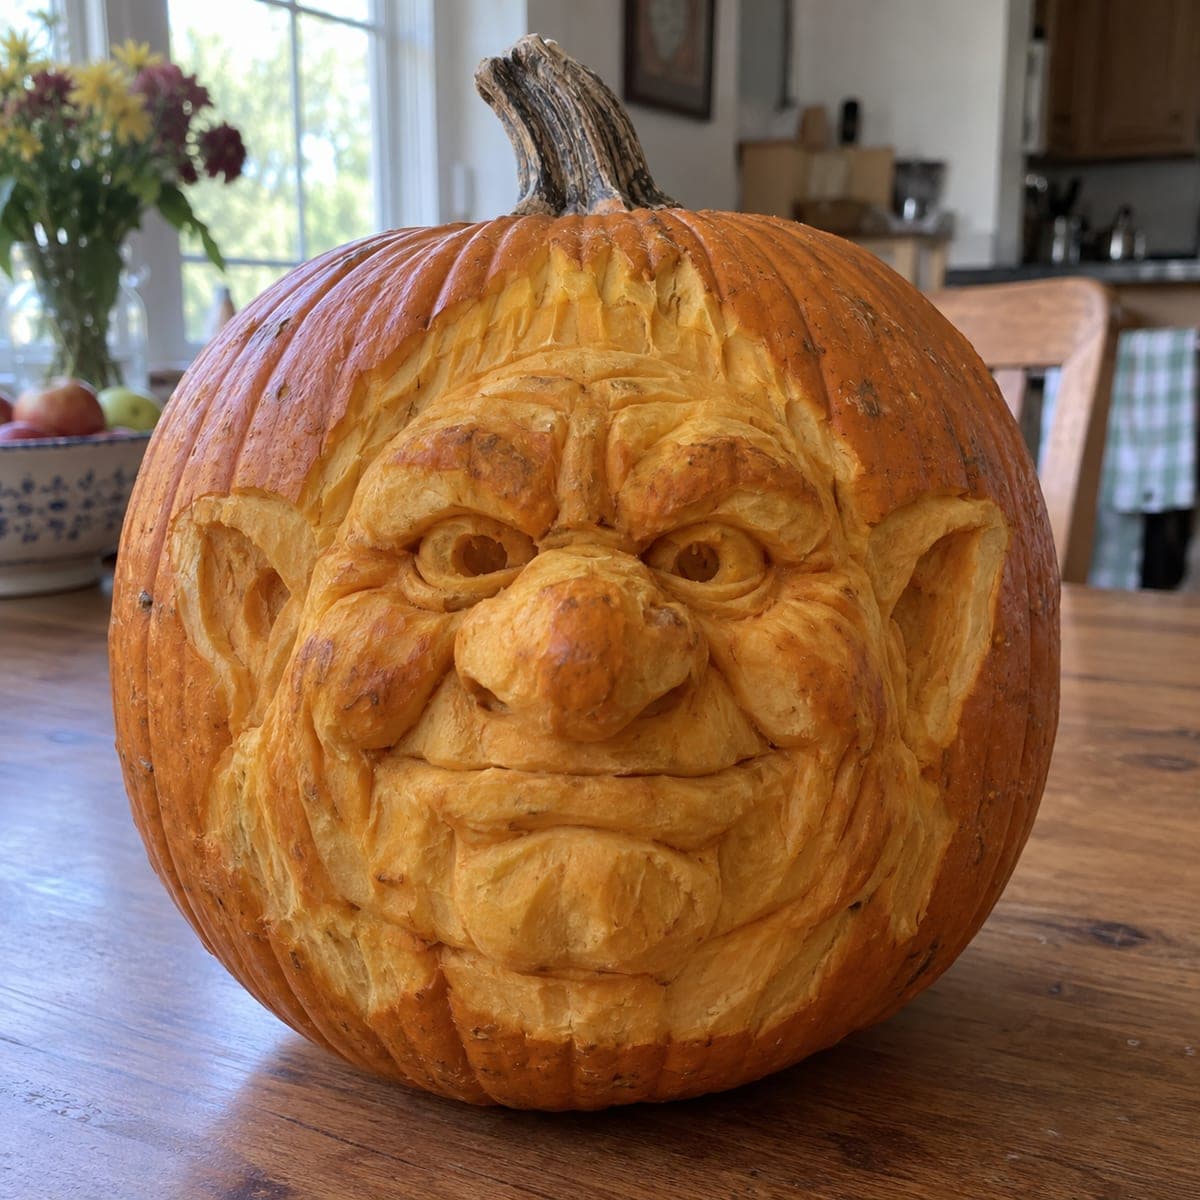
Gently recessed cheeks, raised uncut brows, deep open eye holes, a wide angular mouth with thick integral teeth, and eight teardrop forehead cutouts combine to give this hard 3D pumpkin carving its monster character. All relief work stays within 15 mm of depth to keep the shell structurally sound throughout. Work the raised brows first by shaving the skin away from the surrounding area rather than building them up. A bright flickering LED placed low inside the pumpkin throws the recessed cheeks and raised brows into strong shadow.

No ratings yet · Sign in to rate

Comments (0)

  • No comments yet — be the first.

Save without an account. Sign in to like or comment.

Our tips for carving a similar design

The design works in two zones: the relief zone, where recessed cheeks and raised brow planes are carved no deeper than 15 mm into the shell, and the through-cut zone, where the eye holes, mouth, and teardrop forehead shapes open all the way through. Working the raised brows by shaving the surrounding area down rather than building material up is the key insight that makes this achievable without sculpting clay. A flickering LED placed low and slightly toward the back throws the relief work into strong directional shadow.

From pumpkin to porch

  1. Select and hollow a large pumpkin

    Choose a pumpkin with a wall at least 35 mm thick throughout the face area; this design needs the extra depth for relief work that still leaves a structurally sound base. Hollow from the back, scooping until the wall inside the face area measures consistently 35 to 40 mm.

  2. Establish the brow planes first

    Sketch the brow ridge line across the forehead. Use a wide chisel or sturdy linoleum cutter to shave the skin and outer flesh from the areas surrounding the brow, lowering them by 10 to 12 mm so the uncut brow strip appears to stand proud. Work in thin passes and keep the surrounding cuts level.

  3. Recess the cheeks

    Using a melon baller or rounded chisel, scoop the cheek zones to about 12 to 15 mm depth, blending the edges gradually into the surrounding surface. Probe frequently and stay at least 20 mm from any intended through-cut to avoid weakening the wall where it matters most.

  4. Cut the eye holes and mouth

    With a thin pumpkin saw, cut the deep open eye holes all the way through, then the wide angular mouth opening. For the mouth teeth, cut downward from the lip line into each tooth gap so the thick roots remain firmly attached at the top. Keep all teeth wide enough that no single tooth is thinner than about 12 mm at its narrowest.

  5. Cut the eight teardrop forehead holes

    Working across the forehead in a balanced arc, cut the eight separate teardrop shapes fully through the wall. Cut from the pointed tip toward the round base of each teardrop so the narrow end stays precise. Space them evenly on both sides of the centerline.

  6. Light low and adjust

    Place a bright flickering LED low inside the pumpkin, toward the back. The low placement sends most of the light upward, catching the underside of the raised brows and the rim of the recessed cheeks in shadow. Rotate the LED slightly until the shadow contrast on the brow and cheek relief looks most dramatic.

Written with AI to match this design

Gather your supplies

Check things off as you get ready.

Work on a stable surface, keep your free hand out of the cutting path, and have an adult handle sharp tools.

Three levels of light

  • Leave intact

    Raised uncut brow planes and all surrounding intact rind

  • Peel & shade

    Recessed cheek zones glow with a soft, diffuse amber that is visibly lighter than the surrounding surface

  • Cut through

    Deep open eye holes, wide angular mouth with thick tooth gaps, and eight separate teardrop forehead cutouts

Learn the carving basics

Before you start cutting

How do I keep the raised brow from cracking when I shave the area around it?

Always cut parallel to the brow ridge rather than into it, and keep the chisel angled slightly downward away from the ridge. Take passes no deeper than 3 to 4 mm at a time, working outward from the brow toward the outer edge of the forehead. Dampen the surface with a little water if it is very dry and brittle.

My mouth teeth came out thinner than planned. Are they safe to leave?

If a tooth is under about 8 mm at its narrowest, reinforce it by leaving a small bridge of uncut flesh on one side that you can trim back slightly rather than eliminate. Teeth this thin are more fragile than is ideal but can hold for a few days; just handle the pumpkin gently once carved.

Can I add a tongue detail inside the mouth opening?

Yes. A simple rounded tab left attached to the bottom lip edge reads as a tongue when lit from inside. Score its outline before cutting the main mouth opening so you know exactly where the tab sits, and keep it at least 20 mm wide at its root so it does not break off.

Your take belongs here, too.

Changed a detail? Made it simpler? Share a photo of your version and tell the community what worked.

Share your pumpkin

More pumpkins like this

You've reached the end · 8 pumpkins
The Patch Report

Fresh pumpkins, in your inbox.

The best new carvings, ideas worth stealing, and how-tos for carving season. Short, seasonal, and gone by November.

A short email during carving season. Unsubscribe anytime. See our privacy policy.