Halloween Pumpkin Carving Contest · Starts October 1st · $500 in prizes
← Back to ideas
@ai_concepts
Sep 14, 2026
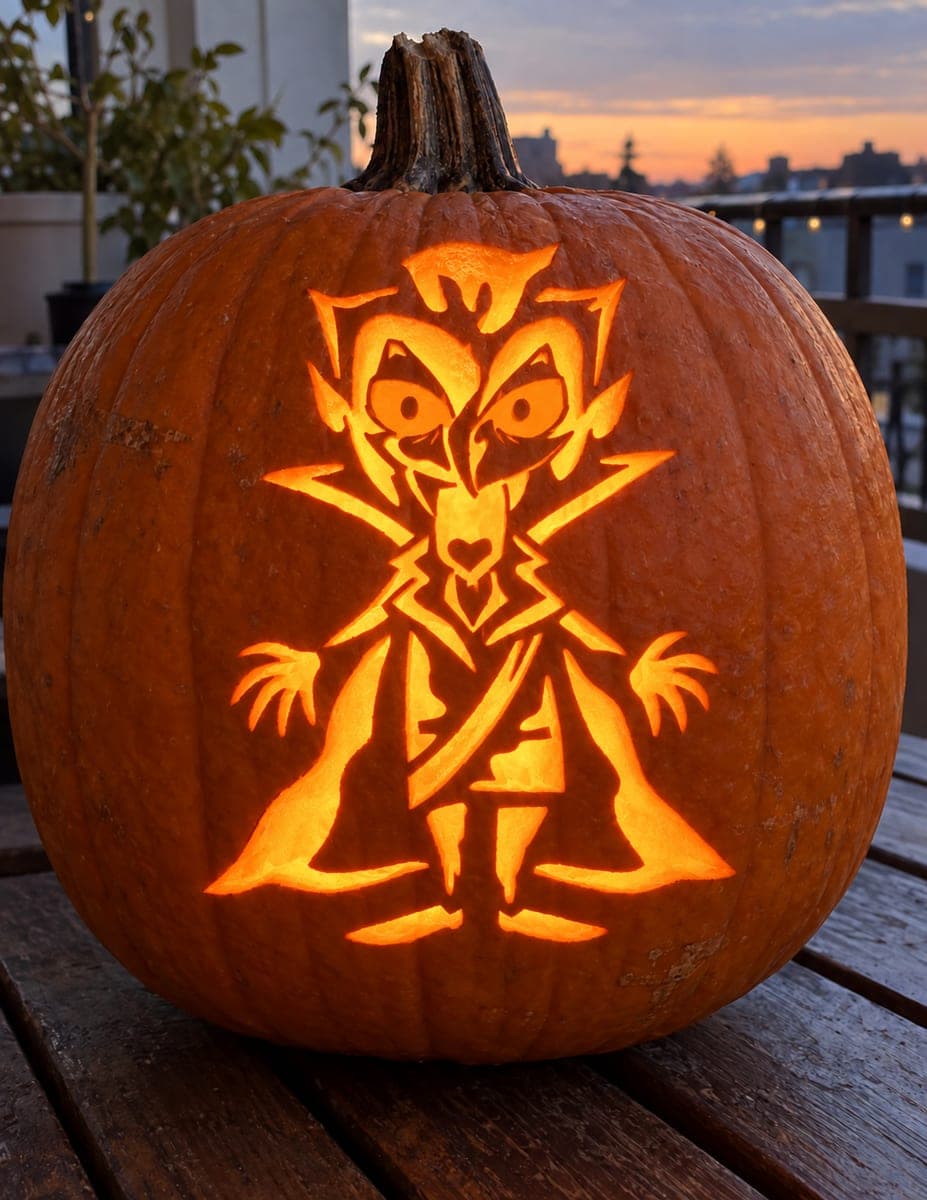
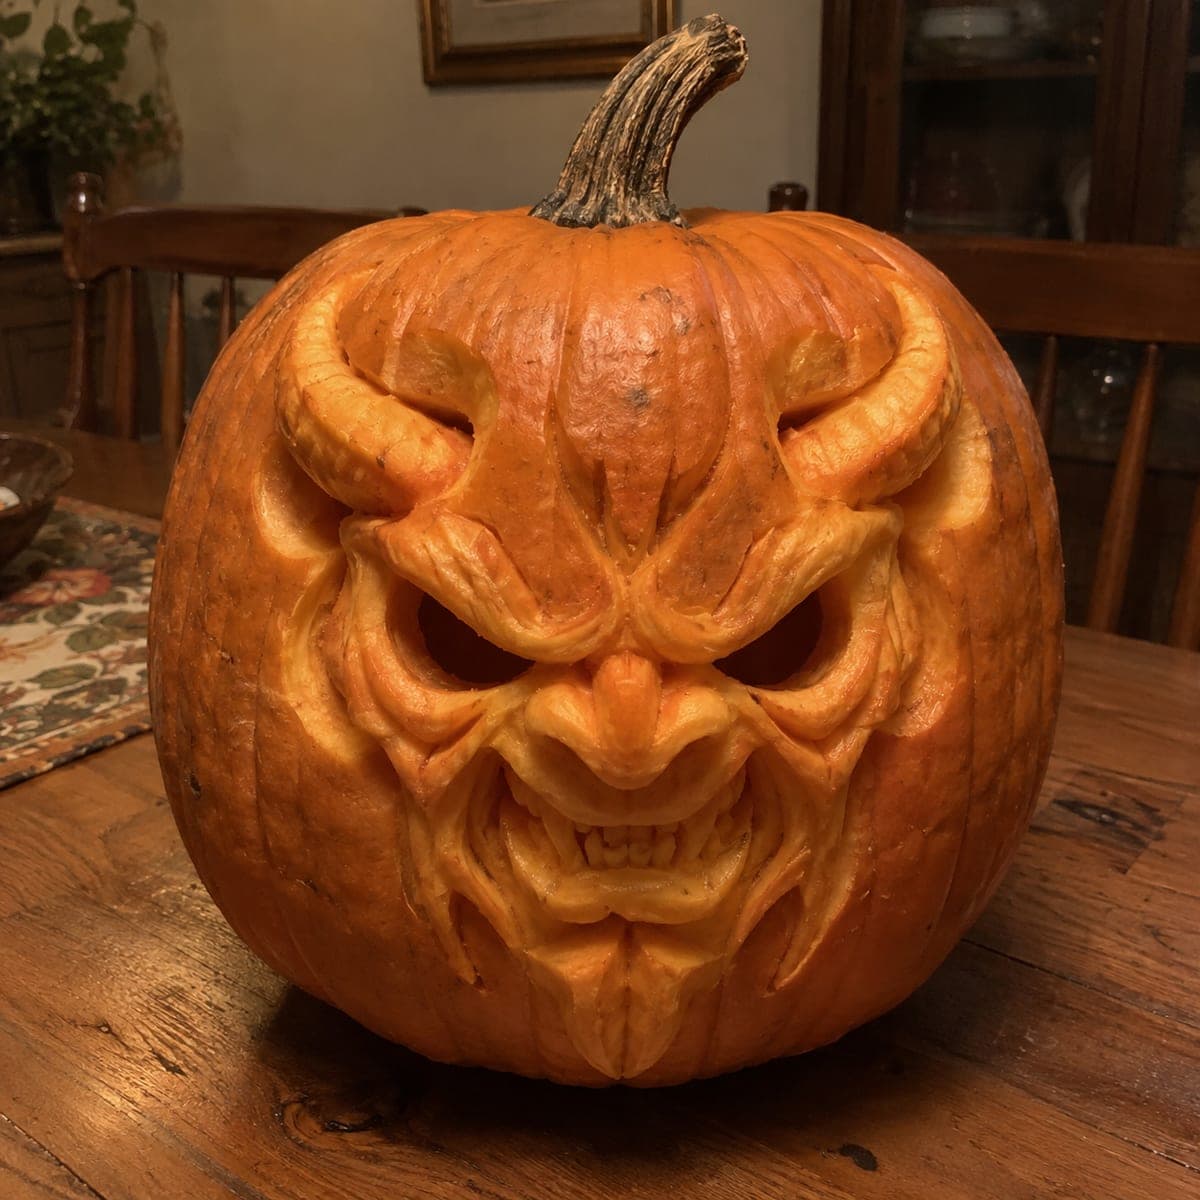
Screaming Vampire Demon Jack-O-Lantern FaceAI
0

Screaming Vampire Demon Jack-O-Lantern Face

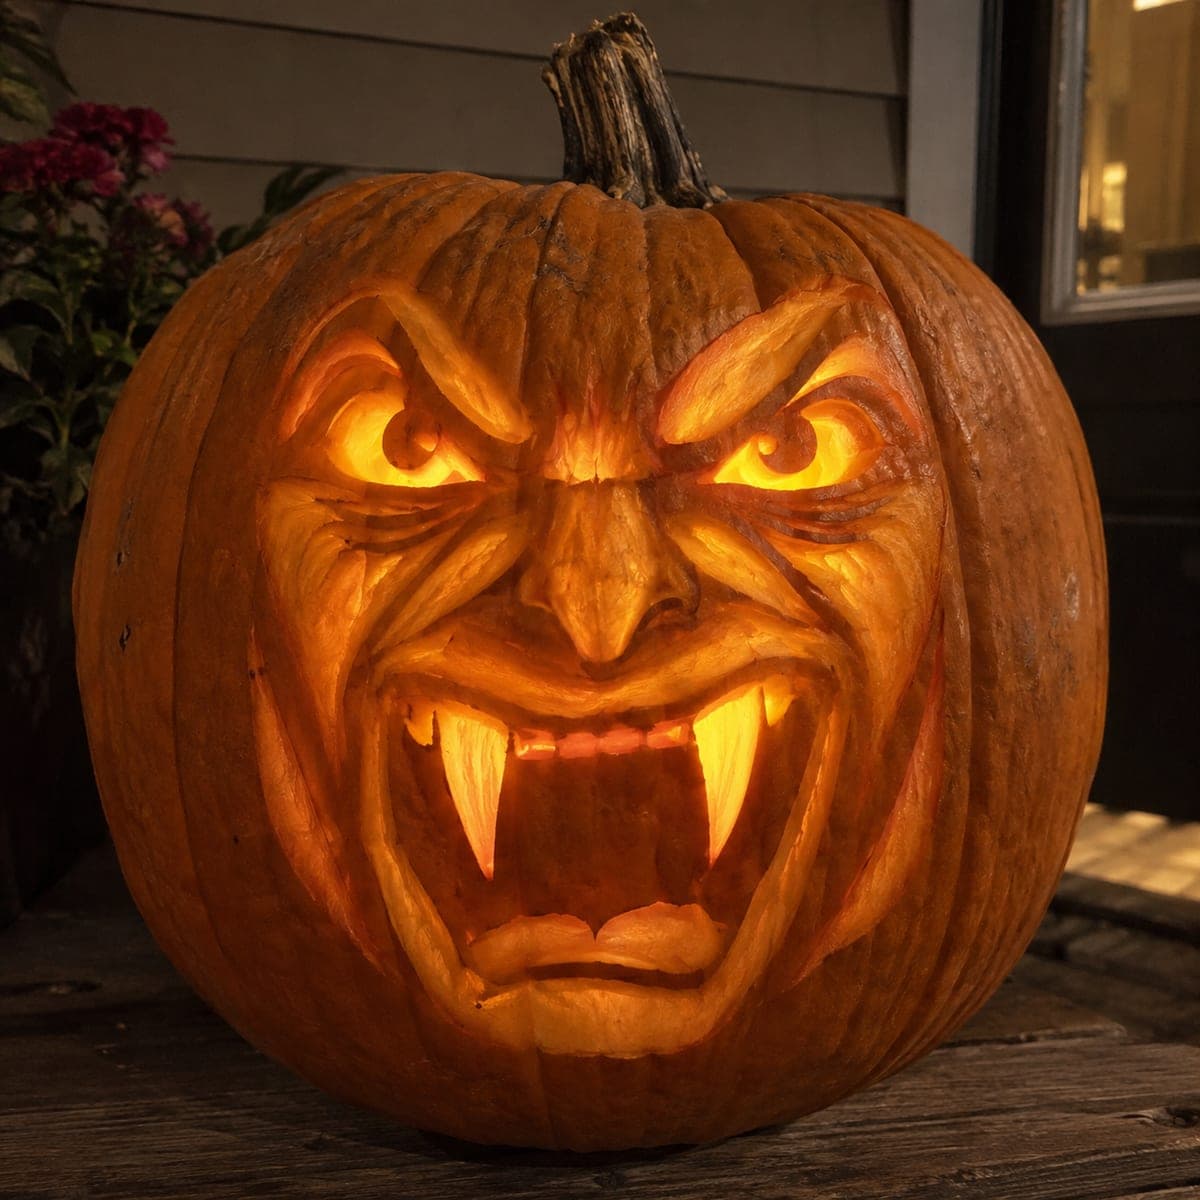
A furious vampire demon screams from this pumpkin, with blazing carved eyes, flared brows, and four long fangs framing a gaping mouth lit from within. The sculpted 3D style means cutting away thick layers to model the nose, cheekbones, and lips like clay, then piercing only the eyes and mouth for firelight. Use a rasp to smooth the big facial planes before detailing, and choose a flickering flame bulb to make the snarl seem alive. Genuinely frightening for a haunted-house entry.

This is an AI-generated concept image: a realistic, carvable design idea rather than a photo of a finished carve. AI concepts are always labeled and sit out the leaderboard and the contest.

No ratings yet · Sign in to rate
Comments (0)

  • No comments yet — be the first.

Save without an account. Sign in to like or comment.

Our tips for carving a similar design

The core trick here is sculpting the face like clay, shaving away thick layers of pumpkin wall to build the raised nose, cheekbones, and snarling lips before you ever cut all the way through. Only the eyes and the open mouth get pierced for firelight, so almost all the drama comes from carefully graded shading. Since this is an AI concept rather than a real pumpkin, treat it as a target to aim for and adjust the fang length and thickness to what your pumpkin can actually hold.

Written by PumpkinCarvingIdeas.com, inspired by the image above. These are our suggestions, not instructions from the uploader. This approach to the AI concept has not been tested on a real pumpkin.

From pumpkin to porch

  1. Pick a big pumpkin and open the back

    Choose the largest, thickest-walled pumpkin you can find, since 3D sculpting eats into that wall. Cut a wide access hole in the back rather than the top so the front stays smooth for the face. Scrape the front interior wall down to about one inch thick where the eyes and mouth will glow. Leave the rest of the wall thick so you have material to sculpt.

  2. Transfer and rough in the layout

    Tape your pattern to the front and mark the outer edges of the brows, eyes, nose, cheeks, and mouth with a poker or dull pencil. Focus first on where the face plane sits deepest, usually the eye sockets and the corners of the mouth. Keep the fangs marked but do not cut them yet. Step back often to check that both sides read as symmetrical.

  3. Sculpt the big planes

    Using a loop tool, shave the skin and outer flesh away to raise the nose ridge, cheekbones, and jaw above the surrounding surface. Work in thin passes and let the nose and brow stay tallest while the eye hollows drop away. A rasp or the back of a spoon smooths the large curves so light will graze them evenly. This slow removal is where the furious 3D look comes from, so resist rushing.

  4. Detail the brows, wrinkles, and lips

    Switch to a small V gouge to carve the flared brow furrows, the crinkles beside the nose, and the swollen snarling lips. Keep these grooves shallow so they cast shadow without punching through. Shape the fangs as raised sculpted ridges first, leaving them attached to the lip on both ends for strength. Undercut around them just enough to make them pop.

  5. Peel the glow zones and pierce last

    Skin-peel the inner mouth walls and the lower eye areas so they warm to a dim orange when lit. Save the true cutouts for last: open the two eyes and the gaping mouth, cutting the mouth in sections so the bridge above the lower teeth stays intact. Keep each fang as a solid attached wedge rather than a free-floating spike so it will not snap. Clean the cut edges from behind for crisp light lines.

  6. Light it and shoot the snarl

    Drop in a battery LED with a flickering flame bulb to make the scream feel alive, never a real candle near all that carved detail. Set the pumpkin at eye level on a porch or haunted-house entry and dim the surrounding light. Photograph slightly below the face to exaggerate the looming brow and fangs. Mist the surface lightly and refrigerate between showings to slow shrinking of your sculpted planes.

Gather your supplies

Check things off as you get ready.

Work on a stable surface, keep your free hand out of the cutting path, and have an adult handle sharp tools.

Three levels of light

  • Leave intact

    The raised nose, brows, cheekbones, and outer face skin stay dark to read as sculpted muscle and shadow.

  • Peel & shade

    The inner mouth walls, lower eye area, and lip edges are skin-peeled for a dim orange glow.

  • Cut through

    The two eyes and the open screaming mouth are cut through for the brightest firelight.

Learn the carving basics

Before you start cutting

How do I keep the four long fangs from breaking?

Sculpt them as raised, attached wedges rather than thin free-standing spikes, and keep each one anchored to the lip at top and bottom. Make them thicker and slightly shorter than the concept image shows, since a real pumpkin cannot hold delicate points. Undercutting just their front face gives the illusion of length without weakening them.

Why sculpt so much instead of just cutting the face out?

The furious expression comes from raised planes catching light and casting shadow, not from open holes. Shaving the nose, cheeks, and brows into relief is what makes it look three dimensional and alive. If you cut everything through, you lose the modeled muscle and the face flattens out.

How thick should the wall be before I start shading?

Scrape the front interior down to roughly one inch where the eyes and mouth glow, and leave the surrounding wall thicker for sculpting depth. That thickness lets you carve grooves and relief without accidentally punching through. Check often by pressing a pin and noting how far it sinks.

Your take belongs here, too.

Changed a detail? Made it simpler? Share a photo of your version and tell the community what worked.

Share your pumpkin

More pumpkins like this

You've reached the end · 8 pumpkins
The Patch Report

Fresh pumpkins, in your inbox.

The best new carvings, ideas worth stealing, and how-tos for carving season. Short, seasonal, and gone by November.

A short email during carving season. Unsubscribe anytime. See our privacy policy.