Halloween Pumpkin Carving Contest Β· Starts October 1st Β· $500 in prizes
← Back to ideas
@ai_concepts
Aug 16, 2026
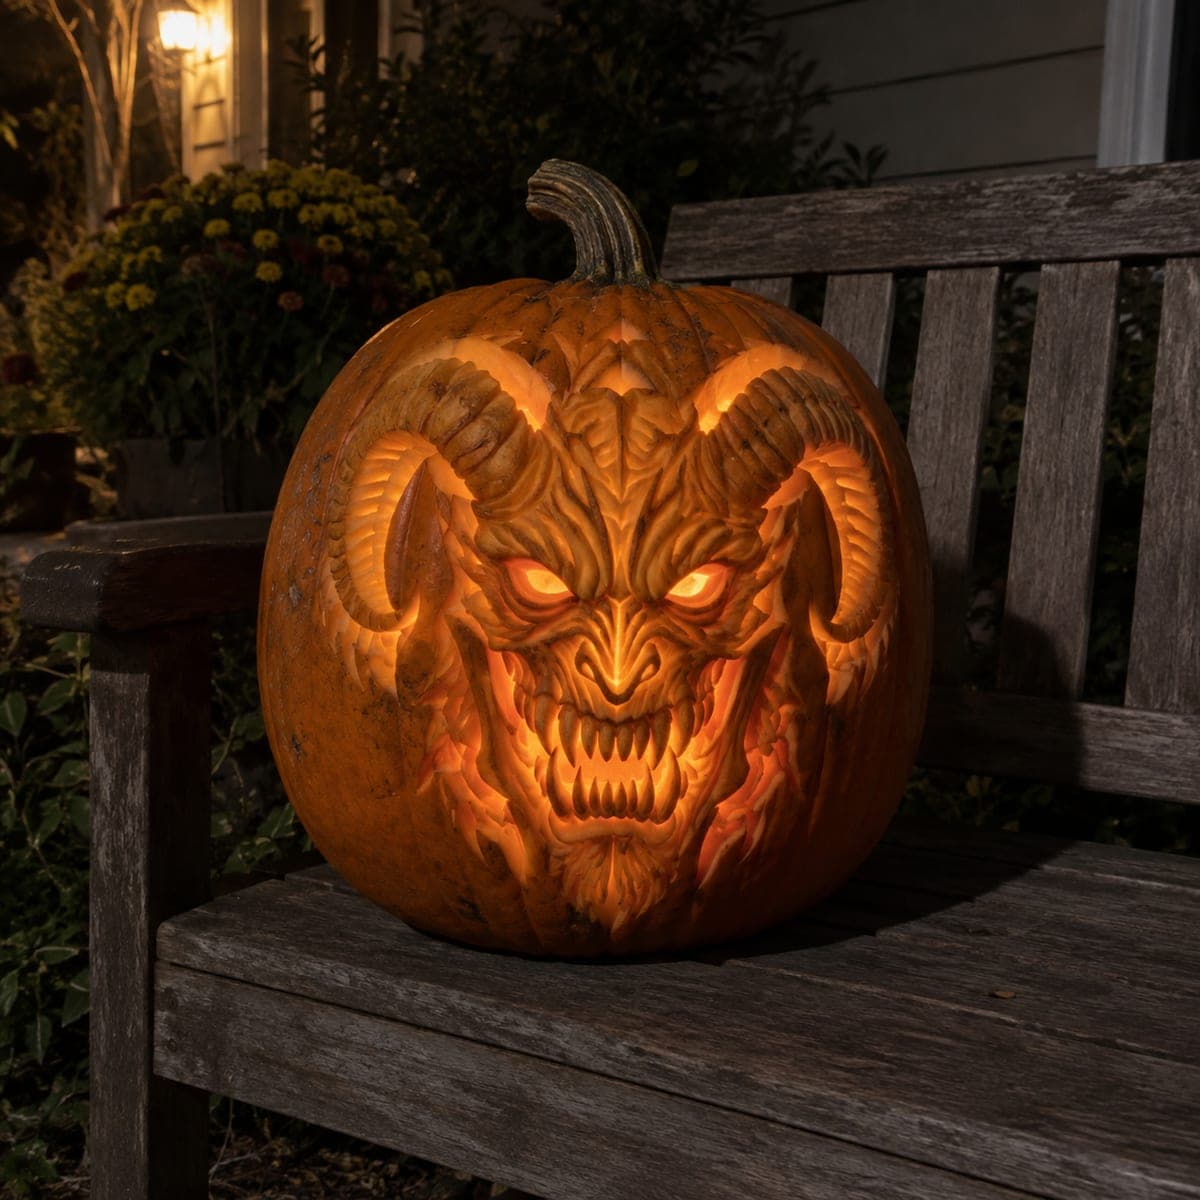
Demon Rage Face Deeply Carved Jack-O-LanternAI
0

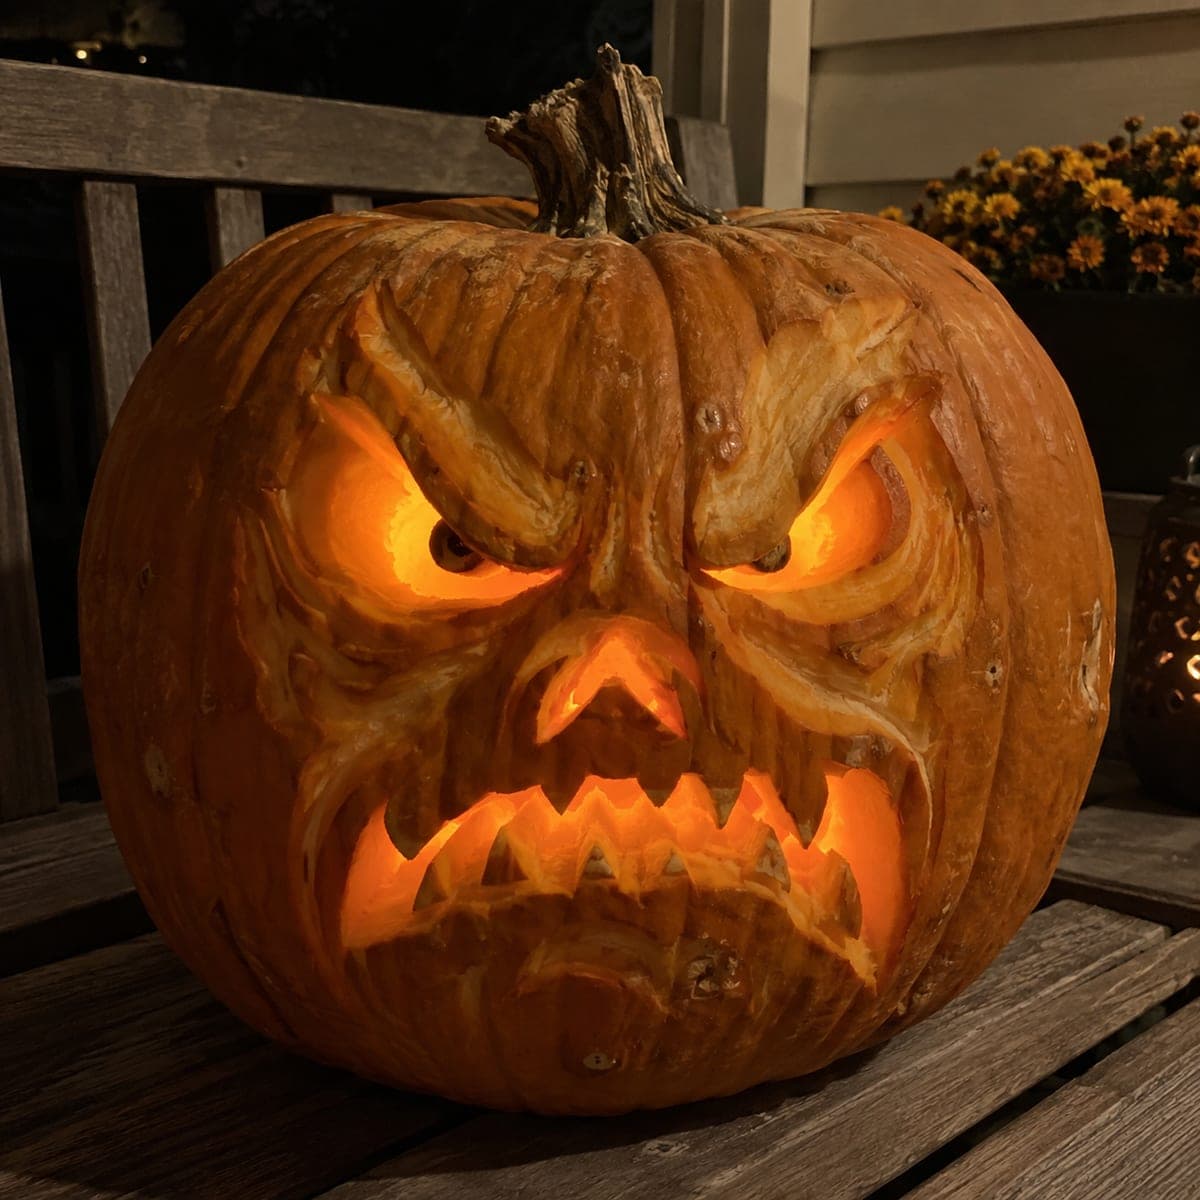
Demon Rage Face Deeply Carved Jack-O-Lantern

Sagging, wrinkled brow lines, deeply set glowing eyes, and a mouth full of jagged teeth give this carved pumpkin a furious, demonic expression that is unsettling up close and electrifying when lit from within. The design combines cutout eye and mouth shapes with extensive relief carving of the surrounding skin folds and brow creases for a sculpture-like result. Carve the eye and mouth cutouts early, then use a linoleum gouge to sculpt the brow wrinkles in overlapping strokes, following the natural ridges of the pumpkin.

This is an AI-generated concept image: a realistic, carvable design idea rather than a photo of a finished carve. AI concepts are always labeled and sit out the leaderboard and the contest.

No ratings yet Β· Sign in to rate

Comments (0)

  • No comments yet β€” be the first.

Save without an account. Sign in to like or comment.

Our tips for carving a similar design

The core trick here is depth. This design mixes clean cutouts for the eyes and mouth with layered relief carving in the brow and cheeks, so the light glows through the openings while shadow pools in the sculpted wrinkles. Plan to cut the openings first while the wall is thick, then spend most of your time shaving skin folds around them to build that sunken, angry look.

Written by PumpkinCarvingIdeas.com, inspired by the image above. These are our suggestions, not instructions from the uploader. This approach to the AI concept has not been tested on a real pumpkin.

From pumpkin to porch

  1. Prep the pumpkin and open a base

    Pick a tall, round pumpkin with a sturdy stem for that heavy brow feel. Cut a wide opening in the bottom rather than the top so you can set it down over an LED light later. Scrape the inside wall behind the face down to about one inch thick so light passes through the peeled areas. A thinner wall makes the shading glow, so take your time here with a loop scraper.

  2. Transfer the face map

    Sketch or tape on your stencil, marking three zones: the eye and mouth cutouts, the mid-tone shaded folds, and the darkest untouched ridges. Poke through the outlines with a pin or use a transfer tool so you have guide dots on the skin. Keep the angry V of the brow and the downturned mouth centered on the pumpkin's front. Step back and check the expression before any cutting starts.

  3. Cut the eyes and mouth first

    With the wall still thick, use a small saw to cut the two slanted eye openings and the jagged-tooth mouth. Leave the teeth generous and connected at top and bottom so they stay strong, since thin points snap easily. Cut slowly and let the saw do the work rather than forcing it. Save any large openings for after the delicate teeth are shaped so the face does not flex and crack.

  4. Sculpt the brow and cheek folds

    Switch to a linoleum gouge and carve the wrinkles in overlapping strokes, following the pumpkin's natural ribs. Peel the skin off the raised folds so they glow a dim orange, and leave the deepest creases untouched for shadow. Work from the brow down through the cheeks so each fold overlaps the one below like sagging skin. Keep your free hand behind the blade path and carve away from your body.

  5. Refine tones and eye sockets

    Deepen the skin around each eye so the eyes look sunken and furious. Vary how much skin you remove to create highlights and mid-tones, thinning the wall more where you want brighter glow. Clean up the tooth edges and the nose creases with a detail knife. Blow out dust and dry the cut edges with a paper towel.

  6. Light it and photograph

    Set the pumpkin over one or two bright LED pucks, never a candle, since the deep carving leaves thin spots that heat can scorch. Shoot in near darkness so the eyes and mouth blaze while the shaded folds read as soft shadow. Try the light slightly forward to push glow through the peeled wrinkles. A dab of petroleum jelly on cut edges helps it last a few extra days.

Gather your supplies

Check things off as you get ready.

Work on a stable surface, keep your free hand out of the cutting path, and have an adult handle sharp tools.

Three levels of light

  • Leave intact

    The deepest brow creases and the darkest fold lines stay as untouched skin for shadow

  • Peel & shade

    The raised wrinkles across the brow and cheeks get skin-peeled for a dim orange glow

  • Cut through

    The two slanted eyes and the jagged-tooth mouth are cut through for the brightest light

Learn the carving basics

Before you start cutting

How do I keep the jagged teeth from breaking?

Leave the teeth wider than they look and keep them connected along both the top and bottom of the mouth opening rather than as free points. Cut the mouth before you thin the surrounding skin so the wall still supports it. Work slowly with a small saw and avoid twisting the blade.

What tool gives the sculpted wrinkle look?

A linoleum gouge is the key. It scoops shallow channels that catch shadow, and overlapping strokes build the sagging fold effect. Practice a few strokes on the back of the pumpkin first to get a feel for the depth.

Why cut a hole in the bottom instead of the top?

A bottom opening lets you lower the pumpkin over an LED light and keeps the stem and brow intact for that heavy, glowering look. It also means no lid gap breaking up the top of the face. Just make the opening wide enough to reach in and scrape.

Your take belongs here, too.

Changed a detail? Made it simpler? Share a photo of your version and tell the community what worked.

Share your pumpkin

More pumpkins like this

You've reached the end Β· 8 pumpkins
The Patch Report

Fresh pumpkins, in your inbox.

The best new carvings, ideas worth stealing, and how-tos for carving season. Short, seasonal, and gone by November.

A short email during carving season. Unsubscribe anytime. See our privacy policy.