Halloween Pumpkin Carving Contest · Starts October 1st · $500 in prizes
← Back to ideas
@ai_concepts
Jul 31, 2026
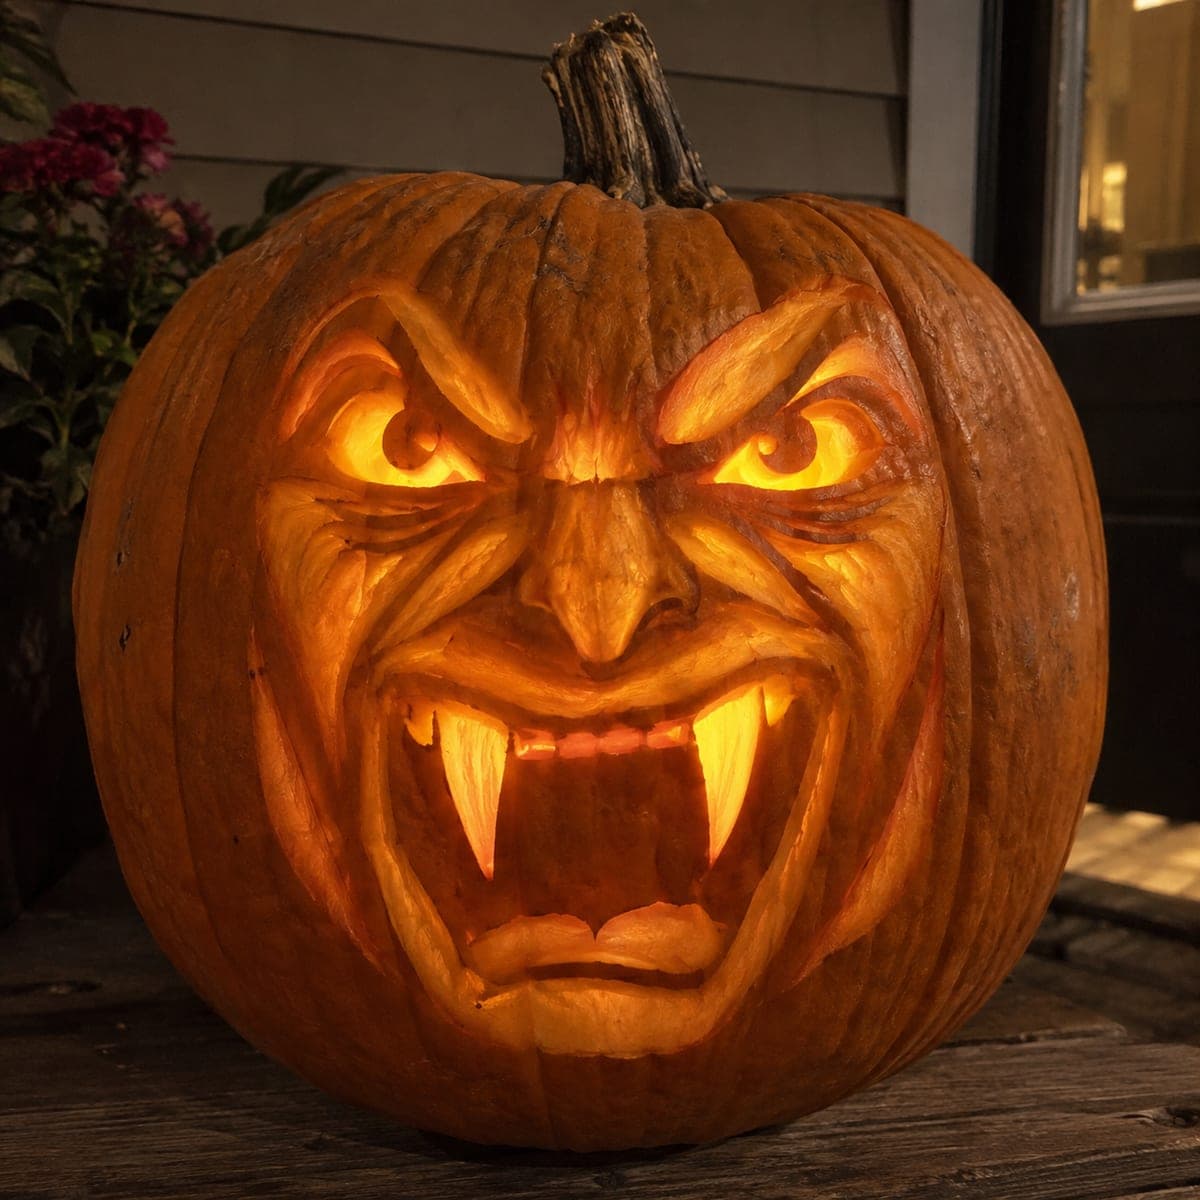
Horned Demon Face Sculpted Pumpkin CarvingAI
0

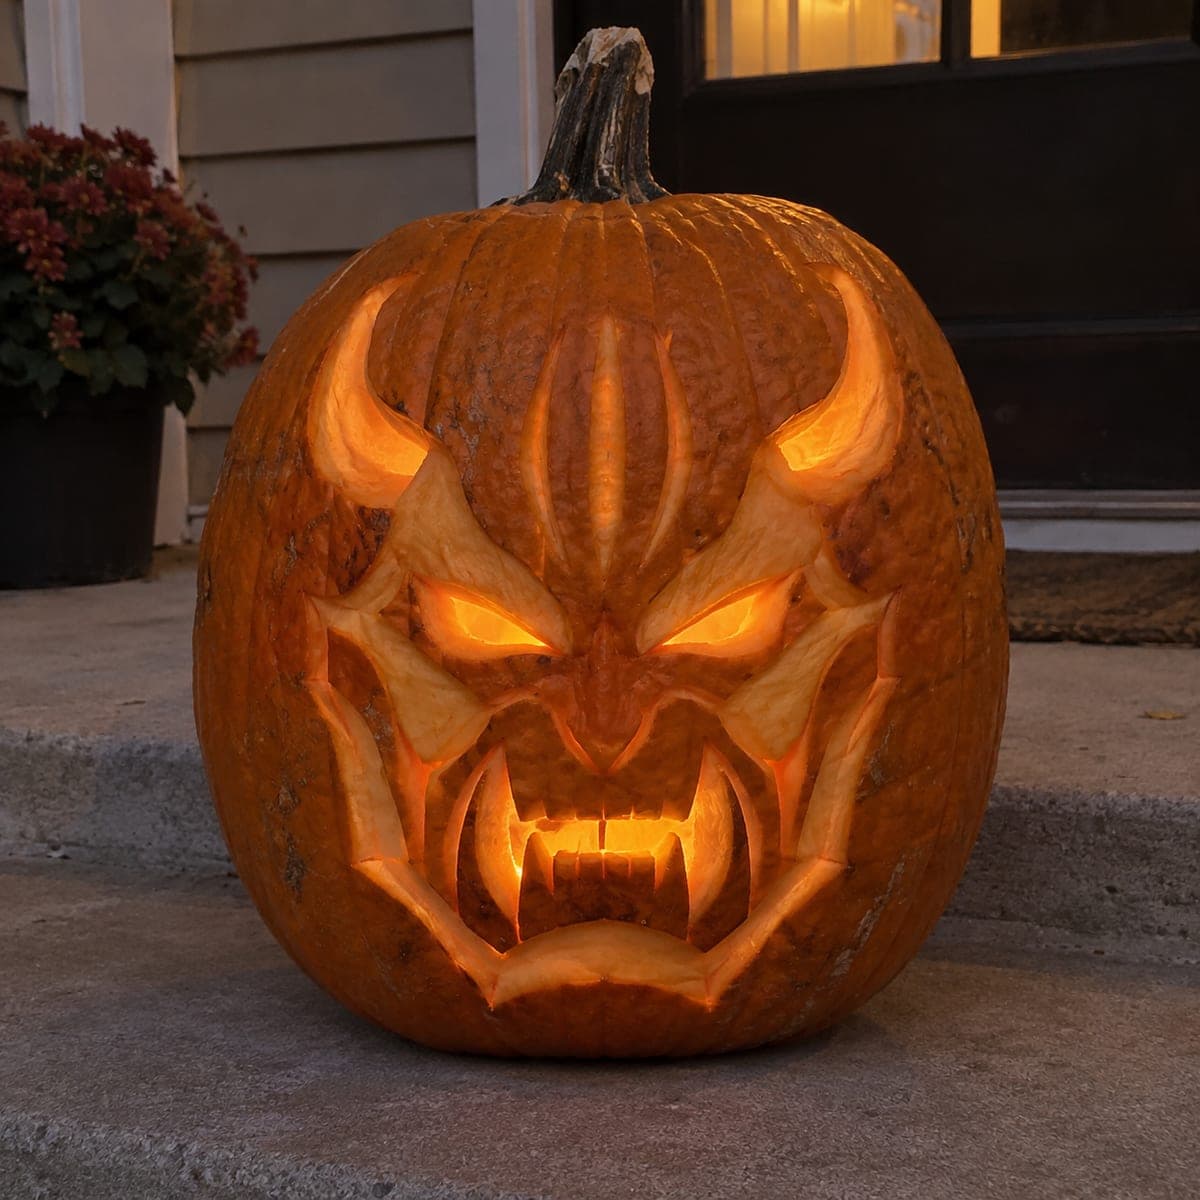
Horned Demon Face Sculpted Pumpkin Carving

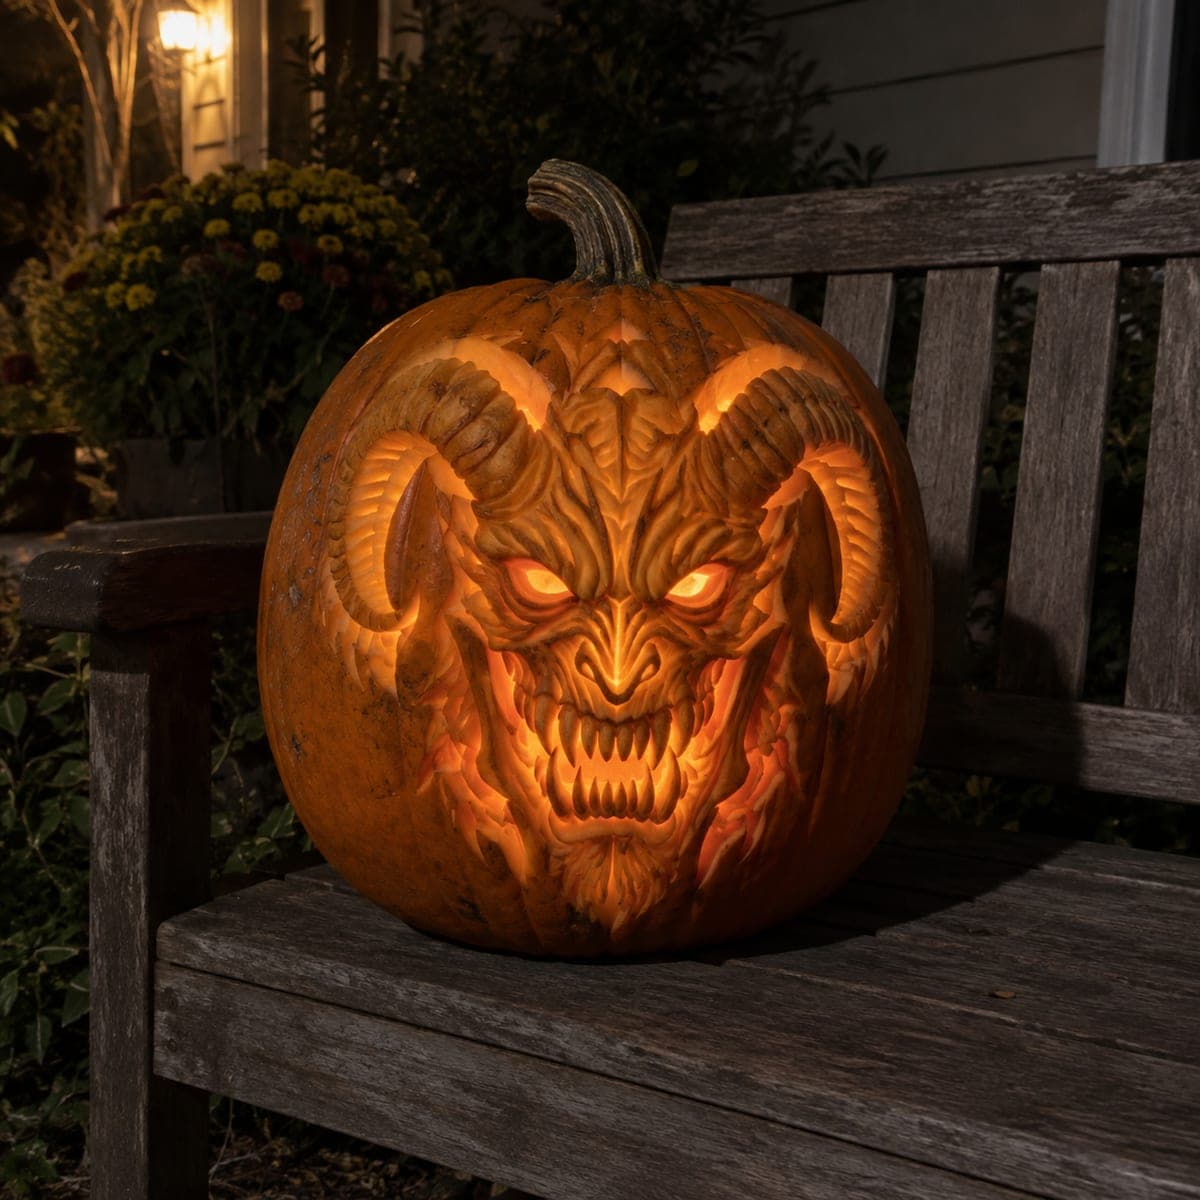
Curved horns, blade-like cheekbones, and a fanged snarl turn this pumpkin into a full demon mask, with narrowed eyes and mouth blazing from within. The armor-plate look comes from beveled relief: carve wide channels around each face plate so the raised shapes catch the porch light, then pierce the eyes and mouth for the glow. Angle the eye cuts downward for an angrier stare. Best saved for the adults-only side of the haunted display.

This is an AI-generated concept image: a realistic, carvable design idea rather than a photo of a finished carve. AI concepts are always labeled and sit out the leaderboard and the contest.

No ratings yet · Sign in to rate
Comments (0)

  • No comments yet — be the first.

Save without an account. Sign in to like or comment.

Our tips for carving a similar design

The core trick here is beveled relief carving, where you shave wide channels around each raised face plate so the ridges catch light and cast shadow. Plan the horns, brow, cheekbones, and jaw as separate armor-like plates, then save the eyes and mouth as your only true cutouts for the glow. Because this is a concept image, treat it as a target to build toward and keep every fang and horn tip anchored to solid pumpkin wall.

Written by PumpkinCarvingIdeas.com, inspired by the image above. These are our suggestions, not instructions from the uploader. This approach to the AI concept has not been tested on a real pumpkin.

From pumpkin to porch

  1. Prep and transfer the mask

    Pick a large, tall pumpkin with a smooth front face and thick walls, since sculpting eats into the flesh. Cut an access hole in the bottom rather than the top so the stem stays intact and the pumpkin sits flat. Scrape the front interior wall down to about an inch thick where you plan to sculpt. Tape your demon pattern on and poke through the main outlines: horns, brow, eyes, cheek plates, and the fanged mouth.

  2. Rough in the face plates

    Using a loop or ribbon tool, carve wide channels along every line that separates one plate from the next. Keep the horns, brow ridge, and cheekbones raised and remove skin from the valleys around them. Work shallow at first and deepen gradually so you do not blow through the wall. These channels are what read as armor plating once the pumpkin is lit.

  3. Bevel and shade the relief

    Go back over each plate and round or angle its edges so light rakes across the surface. Slope the channels deeper toward the eyes and mouth to funnel shadow inward. Peel the skin off the horns and cheek blades for a dim orange glow that separates them from the untouched dark background. Take your time here, since the sculpted shading is what sells the demon look.

  4. Shape the eyes for an angry stare

    Thin the pumpkin wall behind each eye first, then cut the narrow eye openings last among the small details. Angle the inner corners downward and the outer corners up to create the snarling brow. Keep a thin bridge of skin at the top lid so the shape holds and does not sag. Test the light now to check that both eyes match.

  5. Carve the fanged mouth

    Outline the open snarl, then leave solid pumpkin where each fang and tooth sits so they stay attached top and bottom. Cut through only the dark gaps between the fangs to let light blaze out. Bevel the lip edges outward so the mouth looks like it is pushing forward. Work slowly around the curved lower fangs, cutting away from your hand each pass.

  6. Light it and photograph

    Drop in a battery LED, warm white or amber, and set it toward the back so the eyes and mouth throw the brightest glow. Rotate the light until the sculpted plates catch even shadow. Shoot at dusk on a porch step for the moody look in the reference. Mist the cut edges with water and refrigerate between showings to keep the fangs crisp.

Gather your supplies

Check things off as you get ready.

Work on a stable surface, keep your free hand out of the cutting path, and have an adult handle sharp tools.

Three levels of light

  • Leave intact

    The outer background skin around the mask and the deep channels stay untouched for shadow.

  • Peel & shade

    The horns, brow ridge, and cheekbone blades get skin-peeled for a dim orange glow.

  • Cut through

    The narrowed eyes and the gaps between the fangs are cut through for the brightest light.

Learn the carving basics

Before you start cutting

How do I keep the fangs from breaking off?

Leave each fang as solid pumpkin attached at both the top and bottom of the mouth, and only cut through the dark spaces between them. Never carve a fang as a free-floating point. If a tip feels fragile, make it slightly thicker than the drawing shows.

My pumpkin wall is too thick to sculpt. What now?

Scrape the inside of the front face down to about an inch before you start any relief work. A thinner wall lets the peeled areas glow and gives you room to bevel the plates. Check the thickness often by holding the pumpkin up to a light.

Do I need to cut all the way through for the demon look?

No, most of this design is surface sculpting, not piercing. Only the eyes and the gaps in the mouth should go all the way through. The armor-plate effect comes from peeling and beveling, which glows dim orange rather than bright.

Your take belongs here, too.

Changed a detail? Made it simpler? Share a photo of your version and tell the community what worked.

Share your pumpkin

More pumpkins like this

You've reached the end · 8 pumpkins
The Patch Report

Fresh pumpkins, in your inbox.

The best new carvings, ideas worth stealing, and how-tos for carving season. Short, seasonal, and gone by November.

A short email during carving season. Unsubscribe anytime. See our privacy policy.