Halloween Pumpkin Carving Contest Β· Starts October 1st Β· $500 in prizes
← Back to ideas
@ai_concepts
Sep 5, 2026
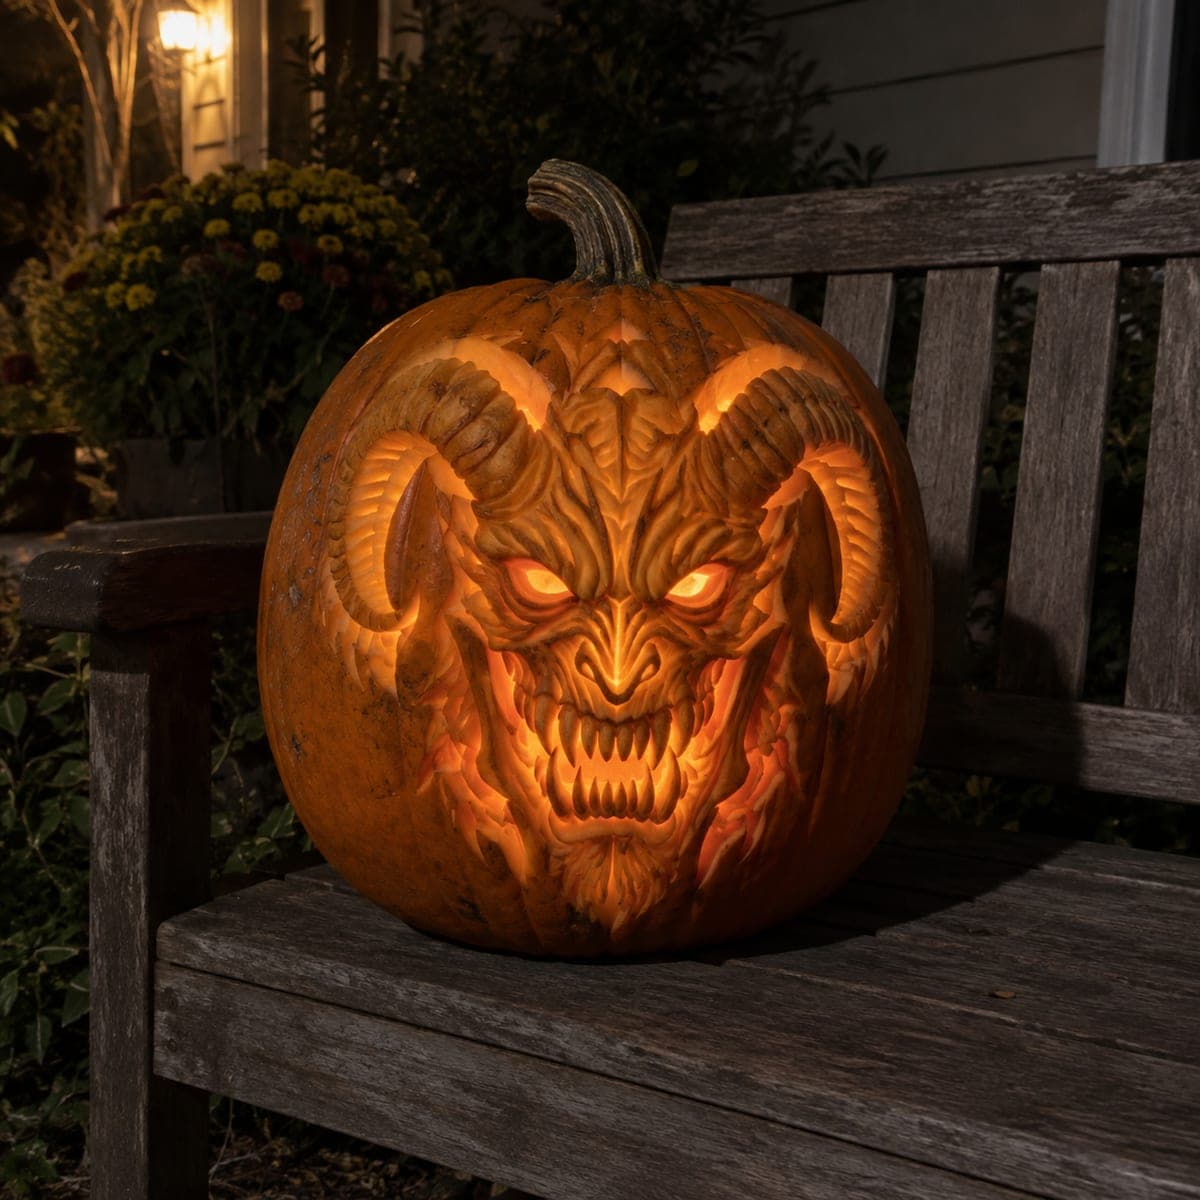
Horned Demon Face Pumpkin With Sculpted FangsAI
0

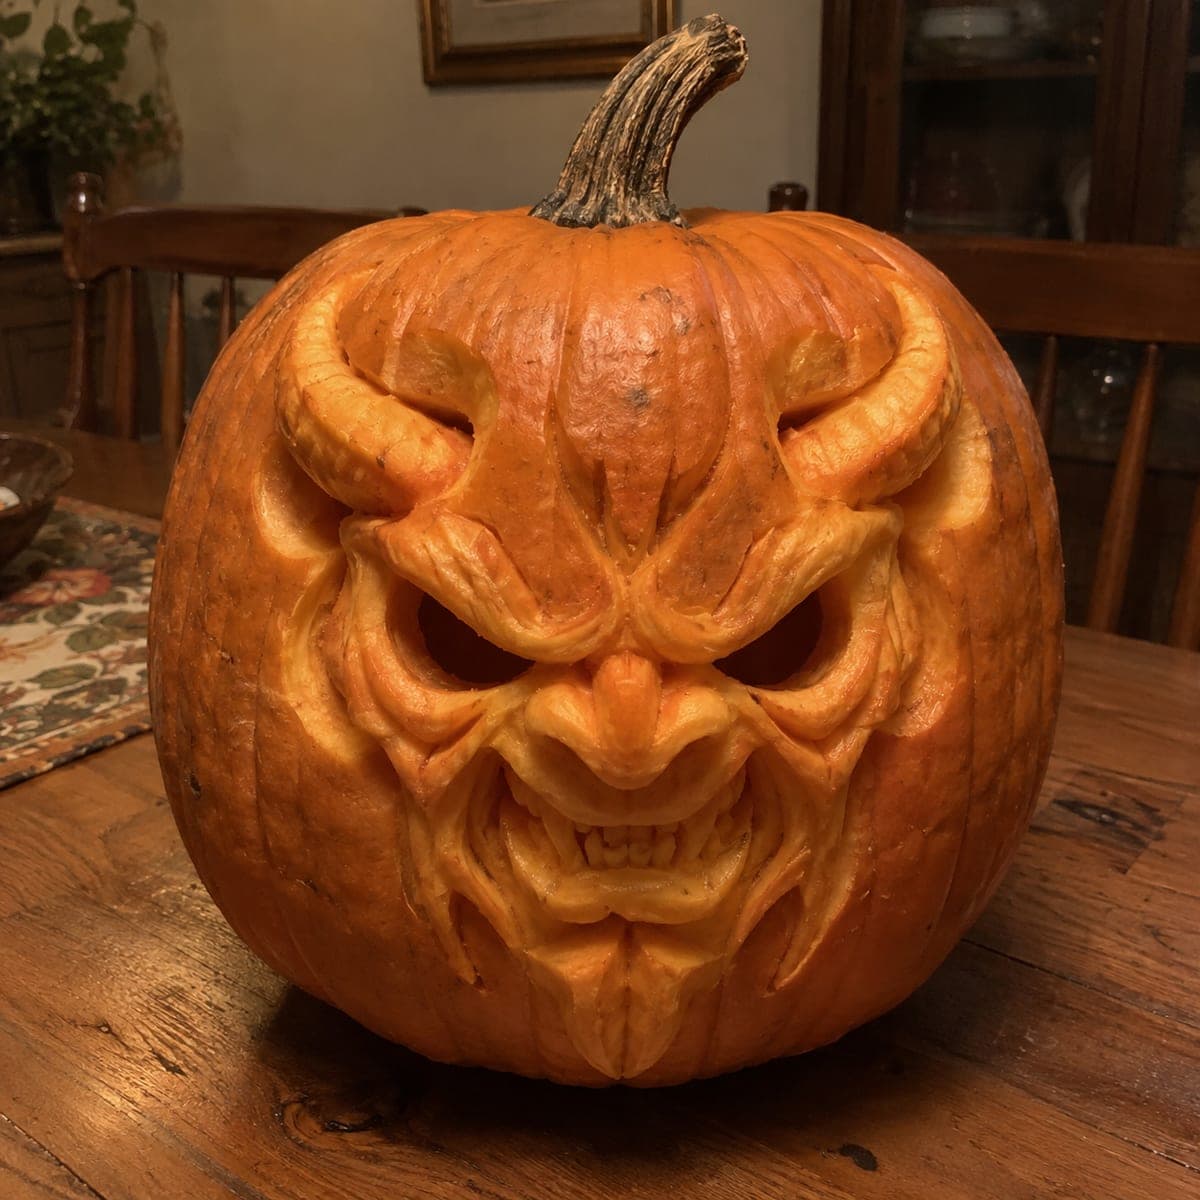
Horned Demon Face Pumpkin With Sculpted Fangs

Thick curling horns, hooded eye sockets, and a snarling mouth full of fangs are sculpted in deep three-dimensional relief on this demon pumpkin. Every ridge is shaped with loop tools and knives rather than cut through, so the face holds its menace even unlit. Work from the horns downward, roughing in the big planes before refining the teeth, and rub the cut surfaces with petroleum jelly to slow browning.

This is an AI-generated concept image: a realistic, carvable design idea rather than a photo of a finished carve. AI concepts are always labeled and sit out the leaderboard and the contest.

No ratings yet Β· Sign in to rate

Comments (0)

  • No comments yet β€” be the first.

Save without an account. Sign in to like or comment.

Our tips for carving a similar design

The whole trick here is 3D relief sculpting rather than cutting all the way through. Instead of open holes, you carve depth into the skin so the curling horns, hooded brows, and fang-filled snarl catch shadow and hold their menace even before the light goes in. Work top to bottom, roughing in the big shapes first, then refine the fine ridges and teeth last.

Written by PumpkinCarvingIdeas.com, inspired by the image above. These are our suggestions, not instructions from the uploader. This approach to the AI concept has not been tested on a real pumpkin.

From pumpkin to porch

  1. Pick a thick-walled pumpkin and gut it

    Choose a large, heavy pumpkin with a smooth front and a wall you can shave into without breaking through. Cut a lid from the bottom instead of the top so the stem stays intact as the demon's crown. Scoop the inside clean and thin the front wall to about an inch and a half so you have material to sculpt. Have an adult handle all the sharp blades.

  2. Transfer the layout and mark the horns first

    Sketch or transfer the design with the two curling horns arcing up from the brow, the deep hooded eyes, the ridged nose, and the wide fanged mouth. Mark the horns first since they set the whole composition. Use a washable marker so you can wipe and re-draw. Step back often to check that the face reads as symmetrical and mean.

  3. Shave off the skin and rough in big planes

    With a ribbon loop tool, peel the outer skin from every area that should glow, leaving skin only where you want deep shadow. Rough in the large forms first, the horns, the cheek masses, the brow ridge, before touching any detail. Keep your cuts shallow and build depth in passes so you do not blow through the wall. Rub petroleum jelly on exposed flesh as you go to slow browning.

  4. Carve depth into the eyes, brow, and horns

    Now sink the recesses that create the demon's scowl: the hollows under the hooded brow, the creases beside the nose, and the grooves that separate each horn ridge. Round the horns so they read as fully three-dimensional coils. Vary your depth so raised ridges stay pale and deep valleys go dark. Only the pupils of the eyes need to be true cutouts for glow.

  5. Refine the fangs and mouth last

    Save the snarling mouth for the end since it holds the most fragile detail. Carve each fang as a raised sculpted tooth with a shadowed gap around it rather than cutting the whole mouth open. Leave small bridges of flesh between adjacent teeth so nothing snaps off. Clean up the lip ridges and the chin folds with a fine detail knife.

  6. Light it and take the photo

    Drop a battery LED puck inside, warm white for a fiery glow. Because most of the face is sculpted relief, the light will rake across the ridges and deepen every shadow. Shoot in a dim room so the peeled areas glow and the untouched skin reads as shadow. Mist the pumpkin and refrigerate it overnight between displays to keep the detail crisp.

Gather your supplies

Check things off as you get ready.

Work on a stable surface, keep your free hand out of the cutting path, and have an adult handle sharp tools.

Three levels of light

  • Leave intact

    The outer ridges of the horns, the high cheekbones, and the top of the head stay as untouched skin for deep shadow.

  • Peel & shade

    The face planes, brow hollows, nose ridge, and the sculpted fangs get their skin shaved for a soft orange glow.

  • Cut through

    Only the small eye pupils are cut fully through for two sharp points of bright light.

Learn the carving basics

Before you start cutting

This is an AI concept, so can a real pumpkin actually hold all this detail?

Yes, with the right pumpkin and a relief approach. A thick, dense wall gives you room to shave depth without punching through. Keep the fangs as raised sculpted forms with bridges rather than open cuts and the design will hold together on a real pumpkin.

How do I keep the fangs from breaking off?

Do not cut the mouth open as one big hole. Carve each tooth as a raised shape with a shadowed groove around it, and leave thin flesh bridges connecting neighboring teeth. Save the mouth for last so the surrounding wall stays strong while you work.

Why sculpt instead of cutting all the way through?

Relief sculpting lets the face show its menace even when unlit, since the ridges cast their own shadows. Peeled skin still glows a soft orange when the LED is in, so you get depth without a hollow, jack-o-lantern look. Reserve true cutouts only for the eyes.

Your take belongs here, too.

Changed a detail? Made it simpler? Share a photo of your version and tell the community what worked.

Share your pumpkin

More pumpkins like this

You've reached the end Β· 8 pumpkins
The Patch Report

Fresh pumpkins, in your inbox.

The best new carvings, ideas worth stealing, and how-tos for carving season. Short, seasonal, and gone by November.

A short email during carving season. Unsubscribe anytime. See our privacy policy.